
Basic Fabric Setup
Basic Fabric Setup
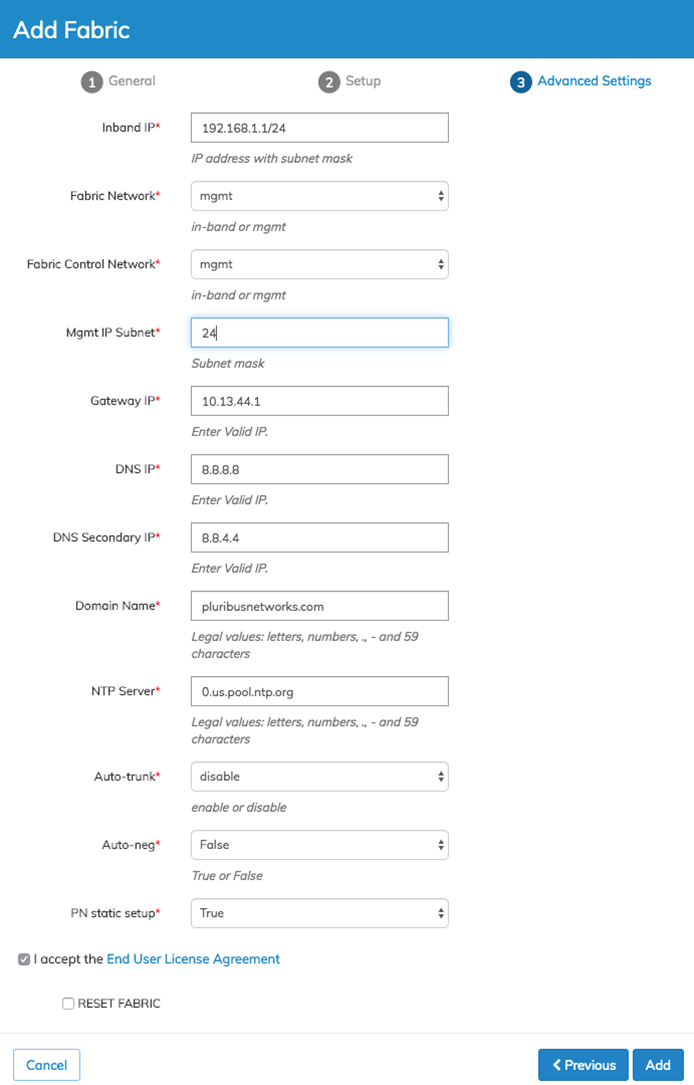
During the basic fabric setup, we will create a fabric named “DellFabric,” define which switches will be used in the fabric and assign fabric credentials such as the management IP subnet, gateway, and DNS.
In our examples the essential information to be entered is:
|
Mgmt. IP Subnet |
= |
24 |
|
Gateway IP |
= |
10.13.44.1 |
|
DNS IP |
= |
8.8.8.8 |
|
DNS Secondary IP |
= |
8.8.4.4 |
We’ll also need to check the "I accept the End User License Agreement" box.
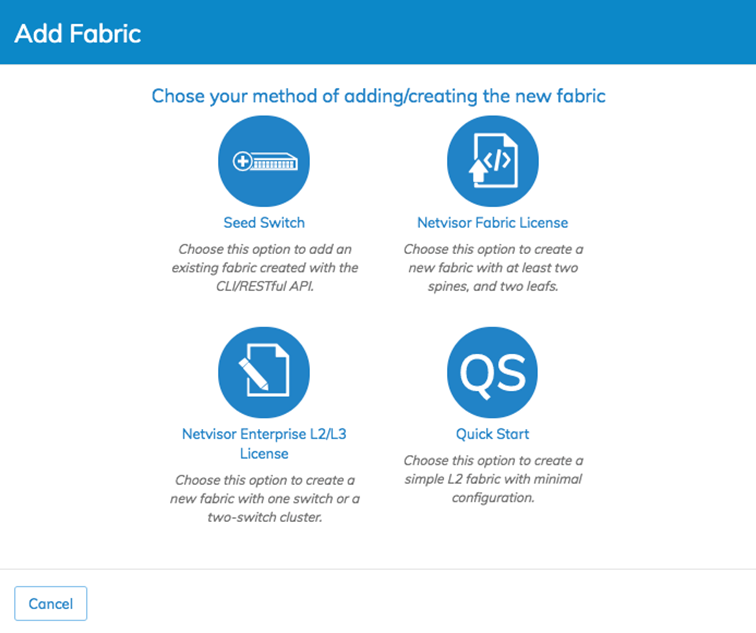
Before starting, it’s important to understand that UNUM can add or create a fabric in one of four methods:
|
Seed Switch |
– |
Add an existing fabric to UNUM, created via the CLI or another UNUM instance. |
|
Netvisor Fabric License |
– |
Create a new fabric with at least two spines and two leafs. |
|
Netvisor Enterprise L2/L3 License |
– |
Create a fabric with one switch or a two switch cluster. |
|
Quick Start |
– |
Build a simple Layer-2 fabric with routing between the spines as a fast start option for small or edge data center environments, using a minimal amount of information. This option combines the initial fabric setup/playbook operations. |
We’ll use the Netvisor Fabric License option to deploy our ten-switch fabric.
Another helpful, optional tool, UNUM, can save some configuration information in a Host File. Host files are simple text or .csv files that capture data for use, later on, to re-build a fabric with the same characteristics or edited to create a new fabric. We’ll be entering all information manually in our examples but will call out when it’s possible to save a host file for future use.
To perform the basic fabric setup:
|
1)Navigate from Dashboards → Topology and in the gray Global pane, right-click on Global and click + Add Fabric to add a Fabric to UNUM. In the add fabric pop-up, click the blue Netvisor Fabric License button. Add Fabric |
|
|
|
|
|
|
|
|
Add Fabric Selection Menu |
|

|
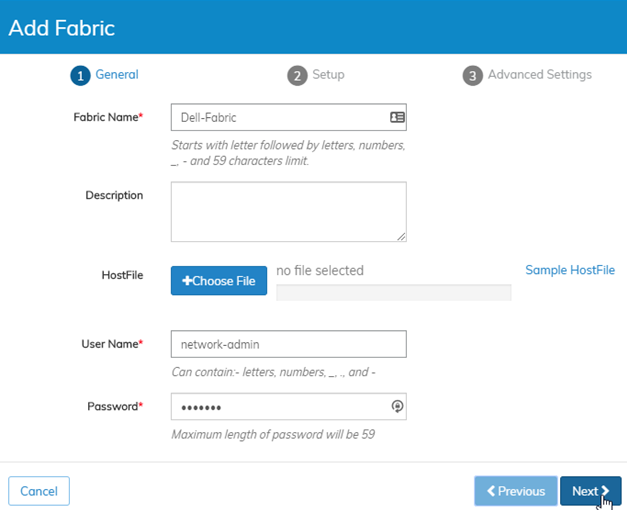
2)Populate the Fabric name, and enter the username/password for the switches. Caution: Currently, the initial fabric User Name needs to be “network-admin” and the initial Password needs to be “test123.” The password can and should be changed after the fabric is built. Click on the blue Next button. Add Fabric Parameters |
|
|
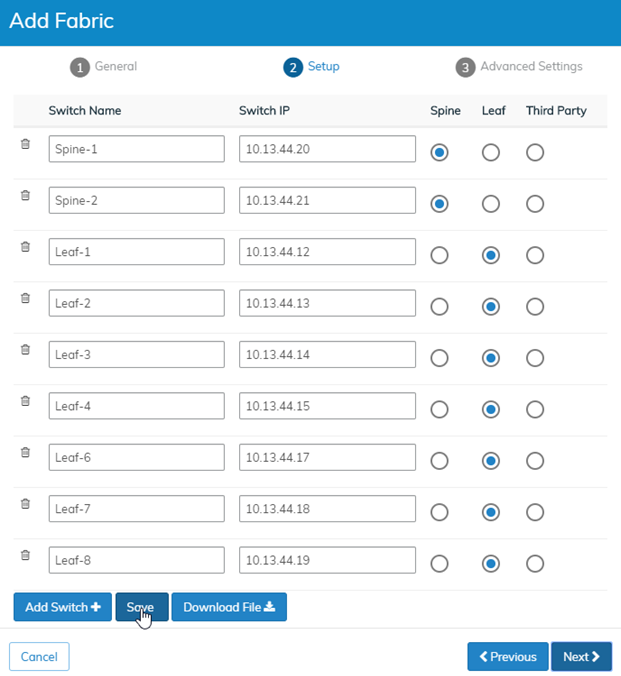
3)Populate switch information fields with the appropriate switch names and management IP addresses, and identify if the switch is a Spine, Leaf or a Third Party switch. Click the blue Save button to store switch information and then click Next to continue. Optional: Click on the blue Download File button to save a text file with the entered information. This file will be saved in your browser's download window and edited or used to rebuild a fabric with the same information at a later time via the +Choose File button in Step Two. Populate Switch Information |
|
|
4)Update the Management IP Subnet, Gateway IP address, and DNS settings based on the management interface/network. Validate the fabric-related settings that match the applicable deployment, including the DNS, domain, and subnet. Check the "I accept the EULA" box and click on Add to add the fabric to UNUM. Note: The RESET FABRIC box is used to permanently delete switch configuration information, excepting setup info such as the management IP address. It is only used where fabrics need to be rebuilt on switches with existing configurations, primarily for customer demos. In general, do not select this option. |
|
|
5)At this point, UNUM will accept the switch EULA, discover the topology via LLDP and deploy the unified cloud fabric. Light green circle animations appear on the switch icons in the topology view and popup messages as specific operations complete during this process. You will also see a blue progress indicator providing an approximate time for completion of the fabric setup. Provisioning Process Running |
|

|
6)When the process is finished, you will see a topology view similar to this image on the right. Provisioning Process Complete |
|
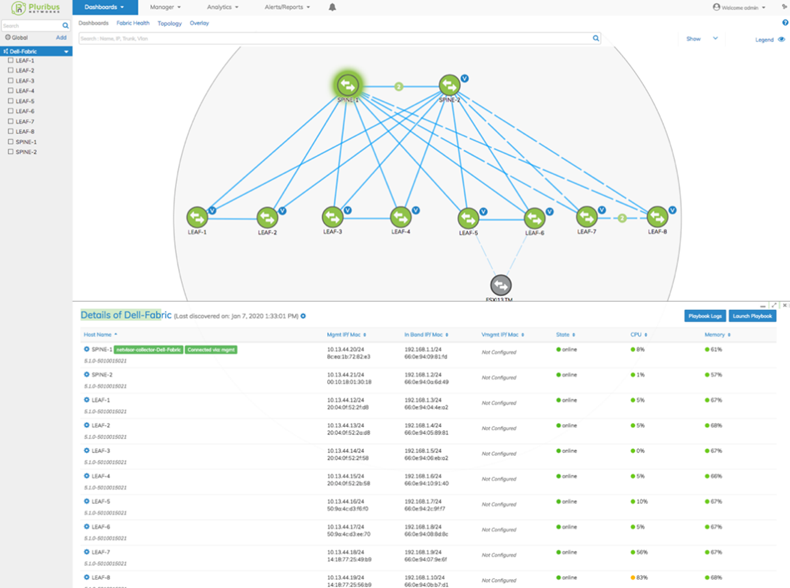
The Dell-Fabric appears in the left-hand navigation pane, along with the ten switches in the fabric. Switch details such as IP addresses, software version, status, and CPU/Memory indicators appear in the Details pane below.
During or after the setup process, administrators can click on the Playbook Logs button to see the specific tasks completed by UNUM.