Projects
Projects
Selecting Menu Bar → ![]() → Projects displays the Projects dashboard. The Project tab highlights.
→ Projects displays the Projects dashboard. The Project tab highlights.
There are features and functions used in Arista NetVisor UNUM and Insight Analytics that are common throughout the user interface (UI). Please refer to the Common Functions section for more information on the use of these functions and features.
The NetVisor UNUM Configuration Projects module provides a convenient method of creating Virtualwire Device Under Test Lab Projects within your NetVisor UNUM instance.
NetVisor UNUM functions associated with Project include:
Usage Note: Before collecting any analytics, add a Fabric and install and activate a valid license.

NetVisor UNUM Default Project Dashboard
If no projects exist a No data exists! message displays.
Note: NetVisor UNUM assigns Projects to NetVisor UNUM Users. The default user is the administrator account. If you wish to attach projects to specific users, create the user account and its role using Manage Users.
Create a Project
As noted, if required, create a user role to be used with the project.
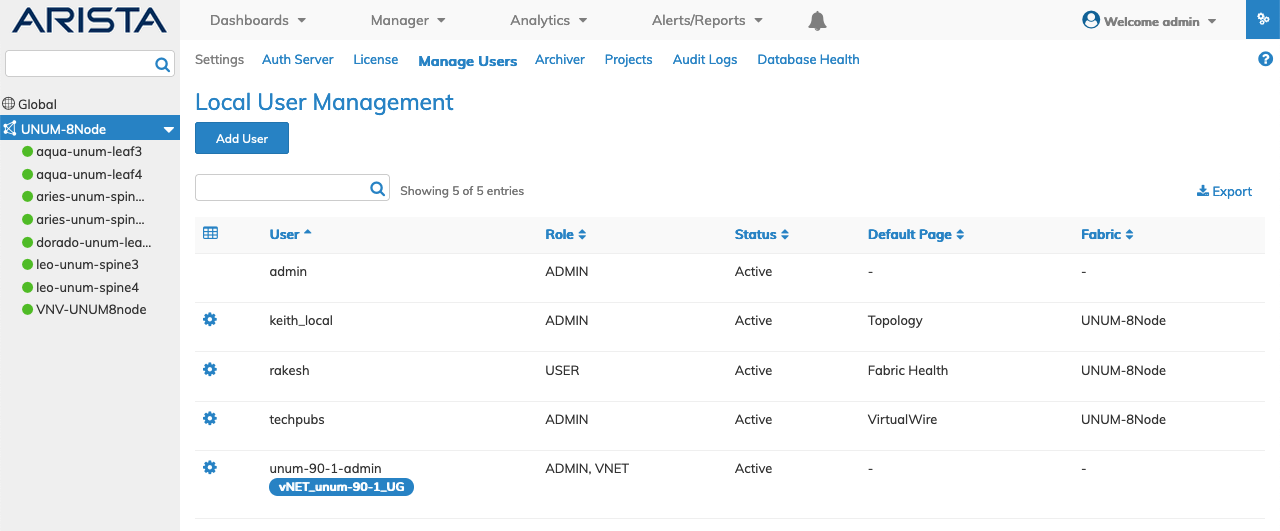
In the following example, a user account named "techpubs" exists in the NetVisor UNUM instance with an ADMIN role using the Fabric, NetVisor UNUM-8Node, and is assigned a Default Page to VirtualWire. When the user "techpubs" logs in, the user will land on the VirtualWire page.

NetVisor UNUM Local User Management Dashboard Example
To create the project, click Add Project.

NetVisor UNUM Project - Add Project
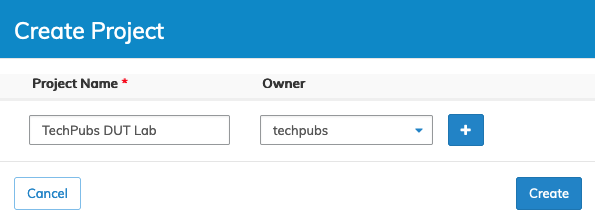
Enter the applicable project values in the configuration screen.
•Project Name - Enter a suitable name for the project.
•Owner - Assign a user account as the project owner.

NetVisor UNUM Project - Create Project
Add more projects using the ![]() icon. When complete, click Create.
icon. When complete, click Create.
The dashboard displays the newly created projects by Project Name.
Additional parameters include: Owner, Created By, and Creation Date.
The Project information is Fabric scope.

NetVisor UNUM Project Dashboard - Populated
Edit a Project
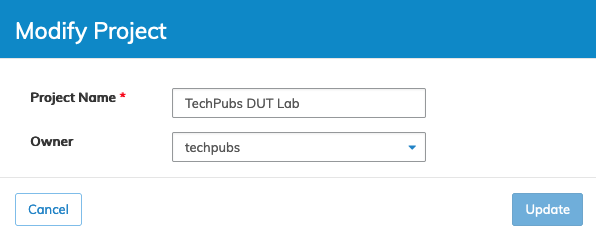
To make changes to an existing project, click the cog icon ![]() icon and select Edit.
icon and select Edit.

NetVisor UNUM Project - Modify a Project
Enter the applicable changes and click Update.
Delete a Project
To delete project, click the cog icon ![]() icon and select Delete.
icon and select Delete.
Use the delete project confirmation interface to execute the deletion by clicking either Delete Project & VirtualWires or Delete Project Only.
To cancel deleting a project, click Cancel.

NetVisor UNUM Project - Delete a Project
Caution: Use care when deleting a project and its associated VirtualWire. If you wish to retain the VirtualWire connections for future use select Delete Project Only.
Using a Project in VirtualWire
Refer to Add a Device Under Test under VirtualWire for more information.
