Downloading Netvisor ONE ONIE Image from Pluribus Networks Cloud
For a quick introduction on the services offered by Pluribus Networks Cloud (PNC), refer to the links:
•Getting started: https://www.pluribusnetworks.com/get-started/
•PN Cloud Overview video: https://www.pluribusnetworks.com/resources/pluribus-networks-cloud-overview/
Netvisor ONE supports multiple online and offline installation methods. However, this sections describes the offline installation method with the assumption that the switches do not have access to the internet and PNC.
Note: For offline installation process, a USB drive is required to save both the Netvisor ONE software and the license files.
Note: It is mandatory to save the license files to the USB stick along with Netvisor ONE software. The installation process cannot be completed if you do have the license files.
To download and install Netvisor ONE:
1.Access the latest Netvisor ONE ONIE software from PNC: click DOWNLOADS --> CURRENT in the left-hand menu panel (Figure 3 below).
2.Download an image: click the Download button against the ONIE version that you would like to download (Figure 3) and save the image to the FAT formatted USB stick root folder:
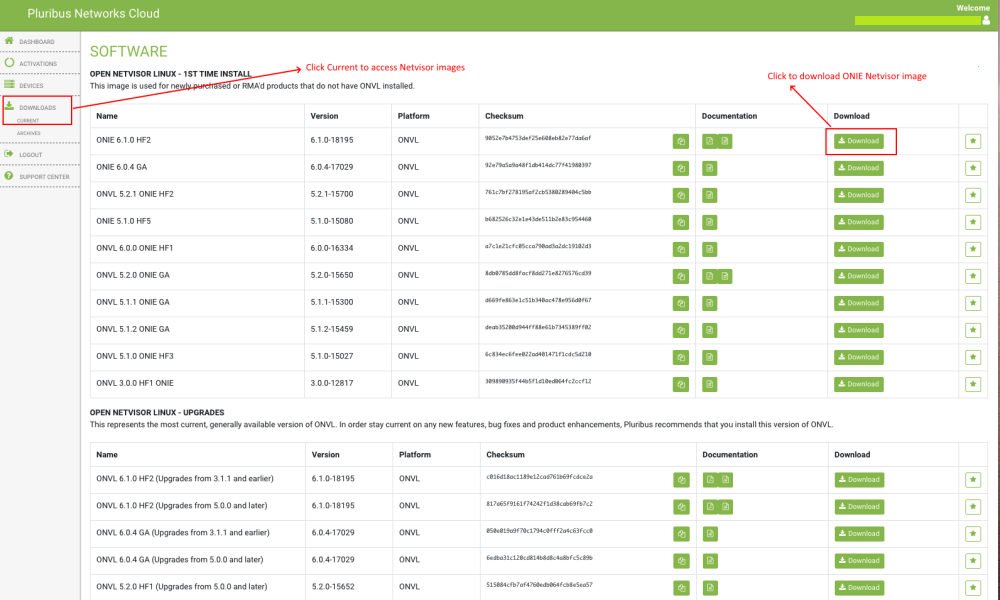
Figure 3 - Pluribus Networks Cloud Software Download Page
Note: Ensure that the USB stick is of FAT32 format.
Note: Release notes are also available for download from the Documentation column. It is recommended that you download and review the release notes before you begin the ONIE installation process.
3.Verify the MD5 checksum of the downloaded Netvisor image against the MD5 checksum obtained from the cloud:
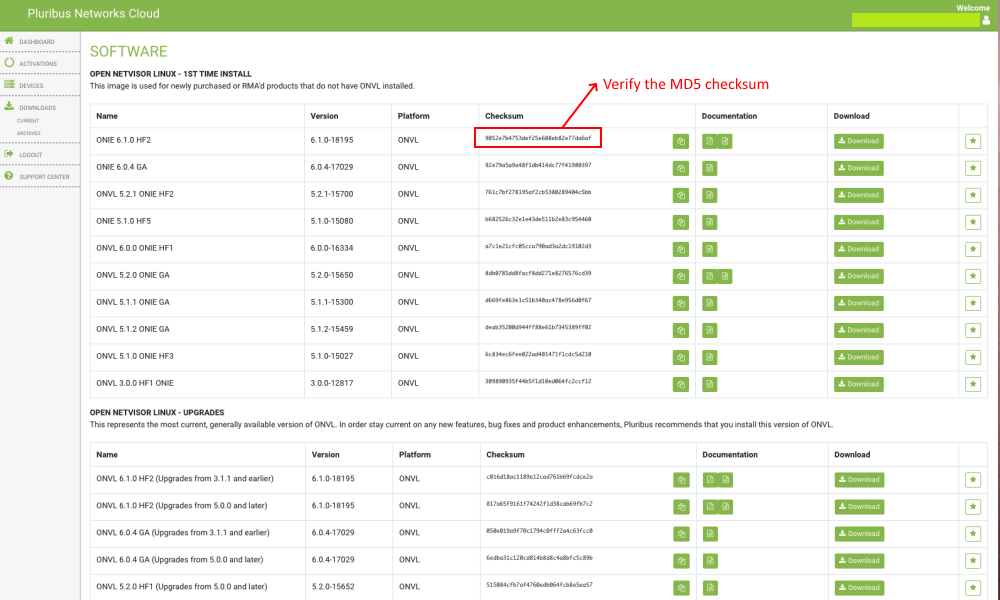
Figure 4 - Pluribus Network Cloud Software Download - MD5 Checksum
Activating a Switch from Pluribus Networks Cloud
To activate a switch,
1.Click the ACTIVATIONS option on the left-hand side menu panel as shown in the Figure 5 below:
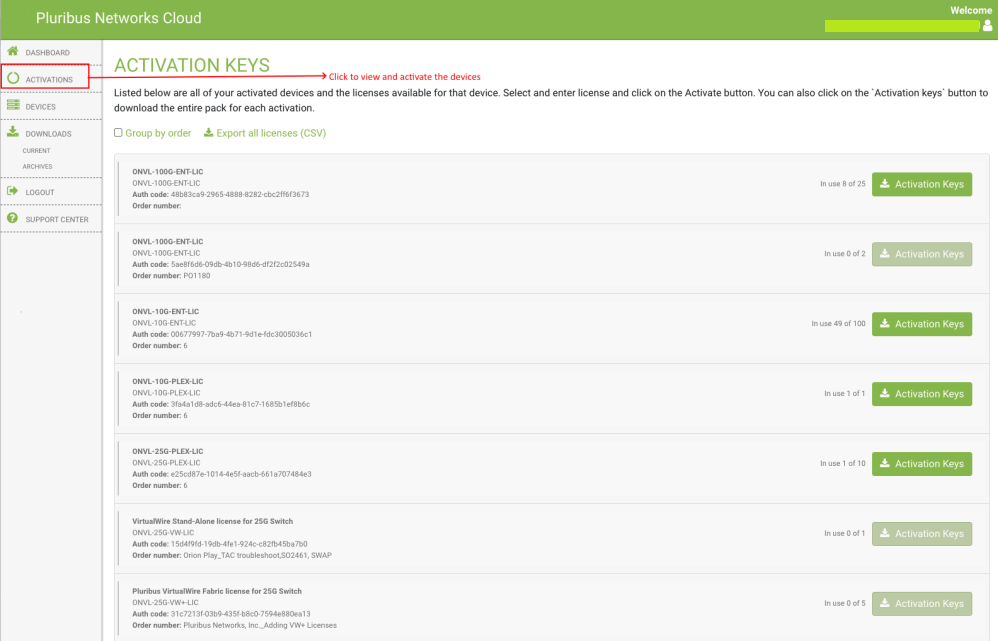
Figure 5 - Pluribus Network Cloud Software Activation Keys
2.Enter the device ID and click the Activate button (Figure 6):
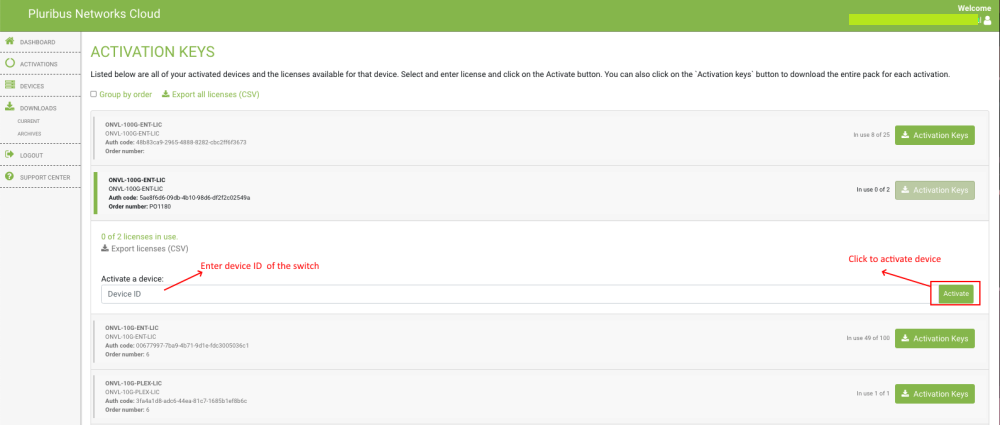
Figure 6 - Pluribus Network Cloud Software Activation Keys - Service Tag or Serial Number
Note: You can activate multiple switches with single onvl-activation-keys file if the same license type is used, for example, all switches activated using ONVL-25G-PLEX-LIC can use same onvl-activation-keys file downloaded by clicking on ONVL-25G-PLEX-LIC’s ACTIVATION KEYS link.
3.Once the switch is activated, download the Activation Keys file and copy to the same USB stick root folder where you saved the Netvisor ONE ONIE image. To download the activation key(s) for the switch(es) activated using the same license type, click the button as shown in Figure below.
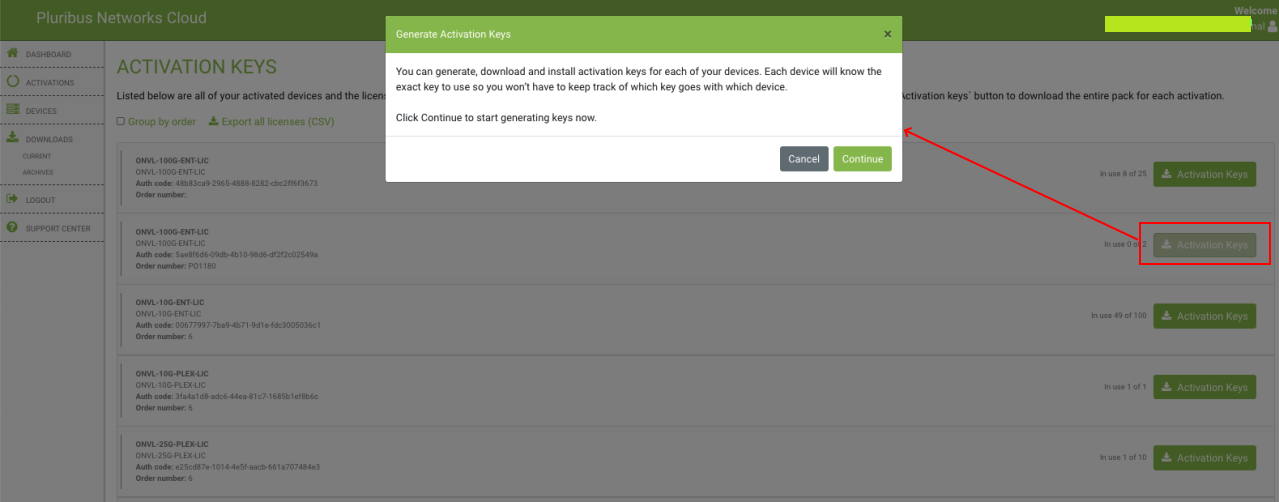
Figure 7 - Pluribus Network Cloud - Downloading Activation Keys
Offline Installation of Netvisor ONE ONIE Image and Switch Activation
Before you start the offline installation of Netvisor ONE ONIE image, ensure that:
•The switch is not connected to the Internet (if necessary, disconnect the management port).
•There is no previously installed Network OS on the switch.
•You are connected to the switch via serial console. For details on connecting to serial console, see the Using the Serial Console Port for Initial Configuration section in the Netvisor ONE Configuration Guide.
To install the offline image for Netvisor ONE ONIE:
1.Rename the Netvisor ONE ONIE image and Activation Keys file saved on the USB drive root folder:
oRename the file named onie-installer-<version-number> to onie-installer
oRename the Activation Keys file onvl-activation-keys.dms to onvl-activation-keys
2.Initiate the Netvisor ONE installation and switch activation process:
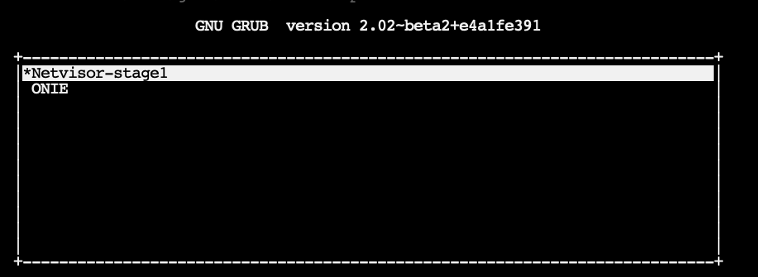
Plug in the USB drive (having the two renamed files) into the switch and reboot it. While the switch is booting up, select ONIE -> Install OS grub menu if switch does not automatically boot into ONIE Install menu. After booting into Install OS grub menu, the switch automatically detects the software image on the USB drive and starts the installation process.
Note: The switch reboots twice during the installation process and one more time after activation.
The progress of the installation can be monitored using the serial console:
[...]
Extracting stage1 image
./btrfs.initrd.img
./grub.cfg
./install.sh
./vmlinuz-4.2.0-27-generic
Provisioning fresh box
Netvisor Installer: platform: aquarius
Creating new Netvisor partition /dev/sda4 ...
Warning: The kernel is still using the old partition table.
The new table will be used at the next reboot.
The operation has completed successfully.
Error: /dev/sda4: unrecognised disk label
mke2fs 1.42.13 (17-May-2015)
Discarding device blocks: done
Creating filesystem with 7750353 4k blocks and 1937712 inodes
Filesystem UUID: 92cbbdd1-ffd8-4f91-ab89-e683b6258395
Superblock backups stored on blocks:
32768, 98304, 163840, 229376, 294912, 819200, 884736, 1605632, 2654208
Allocating group tables: done
Writing inode tables: done
Creating journal (32768 blocks): done
Writing superblocks and filesystem accounting information: done
sed: /netvisor_mnt/etc/default/grub: No such file or directory
Installing for i386-pc platform.
Installation finished. No error reported.
Netvisor stage-1 installation Successful
Rebooting into stage-1 to complete stage-2 installation
ONIE: NOS install successful: http://sandy.pluribusnetworks.com/artifactory/releases/nvOS/6.0.0 GA/nvOS-6.0.0-6000016331-onvl.pkg
ONIE: Rebooting...
After the reboot, the switch comes up with Netvisor-stage1 as shown below:
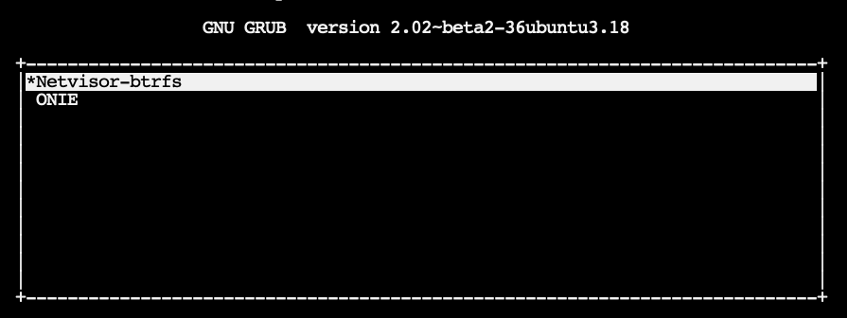
At the completion of stage1, the switch prints the following messages and restarts again:
[...]
Setting up getty
Generating GRUB config
/init: line 393: can't create /netvisor-mnt/etc/mtab: nonexistent directory
Setting up netvisor initial config
Installing GRUB
mkdir: can't create directory '/netvisor-mnt/sys': File exists
mkdir: can't create directory '/netvisor-mnt/dev': File exists
mkdir: can't create directory '/netvisor-mnt/proc': File exists
mount: mounting none on /netvisor-mnt/dev/pts failed: No such file or directory
Installing for i386-pc platform.
Installation finished. No error reported.
Current default time zone: 'America/Los_Angeles'
Local time is now: Sun Apr 19 15:33:23 PDT 2020.
Universal Time is now: Sun Apr 19 22:33:23 UTC 2020.
Updating initramfs ...
update-initramfs: Generating /boot/initrd.img-4.15.0-36-generic
Resetting the grubenv file
Netvisor installation completed
Rebalancing Btrfs block tree
[ 116.597985] BTRFS info (device sda4): relocating block group 6455033856 flags 5
[ 116.617053] BTRFS info (device sda4): relocating block group 5381292032 flags 5
[ 116.637495] BTRFS info (device sda4): relocating block group 4307550208 flags 5
[ 116.655937] BTRFS info (device sda4): relocating block group 3233808384 flags 5
[ 116.670648] BTRFS info (device sda4): relocating block group 2160066560 flags 5
Done, had to relocate 5 out of 9 chunks
Done, had to relocate 0 out of 4 chunks
umount: can't umount /netvisor-mnt/dev/pts: No such file or directory
mount: mounting UUID=92cbbdd1-ffd8-4f91-ab89-e68[ 117.656681] sd 4:0:0:0: [sda] Synchronizing SCSI cache
3b6258395 on /netvisor_mnt failed: No such file [ 117.669433] reboot: Restarting system
or directory
se[ 117.673993] reboot: machine restart
Next, the switch boots up, ready to be activated. Netvisor gets the license key from the USB drive and activates it at the end of this step:
After Netvisor is installed successfully, the onvl-activation-keys file in the USB is auto-detected and the switch is activated.
At the end of the activation process the switch reboots one last time:
The below messages are printed on the console after a successful activation:
[..]
AUTO-PROVISION: onvl-discover: onvl-activation-keys found: /dev/sdb1
AUTO-PROVISION: Extracting initial bundle.
AUTO-PROVISION: Decrypting signed bundle.
AUTO-PROVISION: Extracting signed bundle.
AUTO-PROVISION: Verifying package signature.
AUTO-PROVISION: Extracting packages.
AUTO-PROVISION: pkgs ready
AUTO-PROVISION: onvl-installer: checking for device installer -
8WWMX42/onvl-activation-keys...
AUTO-PROVISION: onvl-installer: executing device installer - 8WWMX42/onvlactivation-
keys...
AUTO-PROVISION: [INSTALLED]
Running Acceptance Tests...
test passed comment
Total Memory: OK 7.78G
Switch device: OK orion found
[GREEN] switch successfully initialized.
serial number: 1550ST9100083
hostid: 900011c
device id: 8WWMX42
Reboot required.
After Netvisor ONE is installed and the switch is activated, wait for a while until the login prompt appears and then log into the serial console using the following credentials:
Username: network-admin
Password: admin
Now, you are prompted to read and accept the EULA agreement and setup the switch parameters such as switch name, management IP, password, DNS IP etc.
Once these configurations are done, connect the mgmt port of the switch to your mgmt network if you have not connect it previously or disconnected it. Then you can SSH into the switches using the username network-admin and the new password you set.