
VFLOW - Manage vFlow
Security/Monitoring vFlow
There are features and functions used in UNUM Manager and UNUM Analytics that are common throughout the user interface (UI). Please refer to the Common Functions section for more information on the use of these functions and features.
Manage vFlow
Selecting Manager → Security/Monitoring → Manage vFlow displays the Manage vFlow dashboard with a list of any existing vFlow settings.
The vFlow functionality in Netvisor ONE is a unique Pluribus feature, which defines fabric-wide policies (using match conditions) for line-rate control as well as facilitate the manipulation and redirection of traffic flows using physical or logical filtering methods (using action parameters). Netvisor ONE implements vFlow objects in hardware that have no impact on the forwarding performance of the switch and vFlows can be applied to traffic flows regardless of the forwarding method or provisioning construct employed. As such, vFlow objects can be implemented for bridging, routing and extended bridging operations and also for transparent forwarding services such as VirtualWire and Virtual Link Extension (vLE).
Select the applicable Fabric from the left-hand navigation bar and the dashboard updates showing all vFlow entries from all switches within the Fabric.
Note: If no entries exist a "No Data Exists" message is displayed. You must first configure an entry on a switch. Prerequisite settings and configuration may be required.
This feature table displays data based on the fabric's default Collector Switch. If no data displays in the dashboard, either select a switch from the Left-hand Navigation (LHN) pane or perform a Search by selecting an FRG (Fabric Resource Group) and a specific Attribute from the drop-down lists, as required.
The dashboard displays data based on the default Collector Switch ( in this example, aries-unum-spine1).
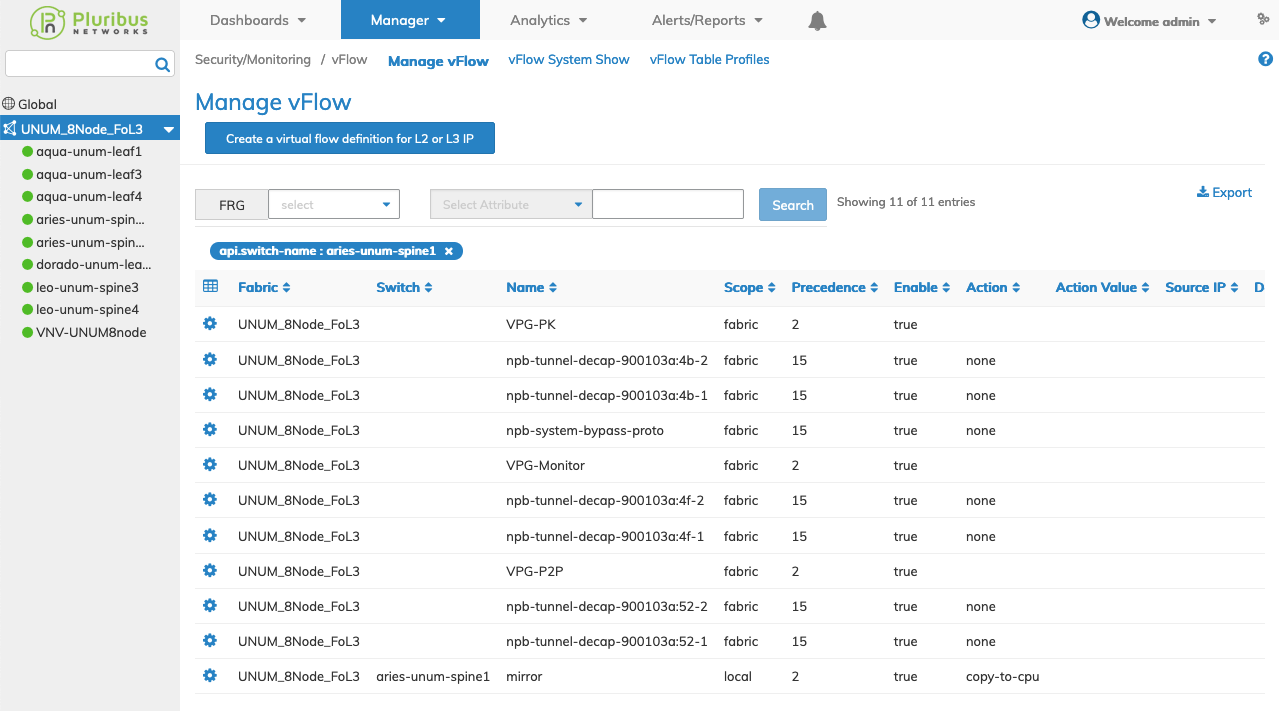
Manager Security/Monitoring vFlow Fabric Dashboard
If no data exists in the Manage Ports dashboard, select a switch or perform a Search to view Manage vFlow details by selecting an FRG (Fabric Resource Group) or a specific Attribute from the drop-down lists.
Attributes include:
|
Fabric |
Switch |
Name |
Scope |
Precedence |
Enable |
|
Action |
Action Value |
Source IP |
Destination IP |
In Port |
Proto |
|
Metadata |
Source vPG |
Destination vPG |
BiDir vPG 1 |
BiDir vPG 2 |
Transparency |
|
Source Mac |
Destination Mac |
Table Name |
TOS |
VRF |
Ether Type |
|
TCP Flags |
VXLAN |
Source Port |
Destination Port |
DSCP |
Source IP Mask |
|
Destination IP Mask |
Source Mac Mask |
Destination Mac Mask |
Inner VLAN |
|
|
Manager Security/Monitoring Manage vFlow - Searchable Attributes
Note: An FRG must exist before being selectable in the FRG selection box. Refer to Manage Groups and Fabric Virtualization for more information on creating and using FRGs.
Enter the search criteria for the selected attribute or FRG and click the Search button.
Select the applicable switch from the fabric and the dashboard updates automatically with vFlow settings.
The dashboard displays a list of existing vFlows by name. Additional parameters include: Scope, VLAN, Precedence, Enable, Action, Source IP, Destination IP, BW Max, and Burst Size.
vFlows are added by selecting Create a virtual flow for L2 or L3 IP.
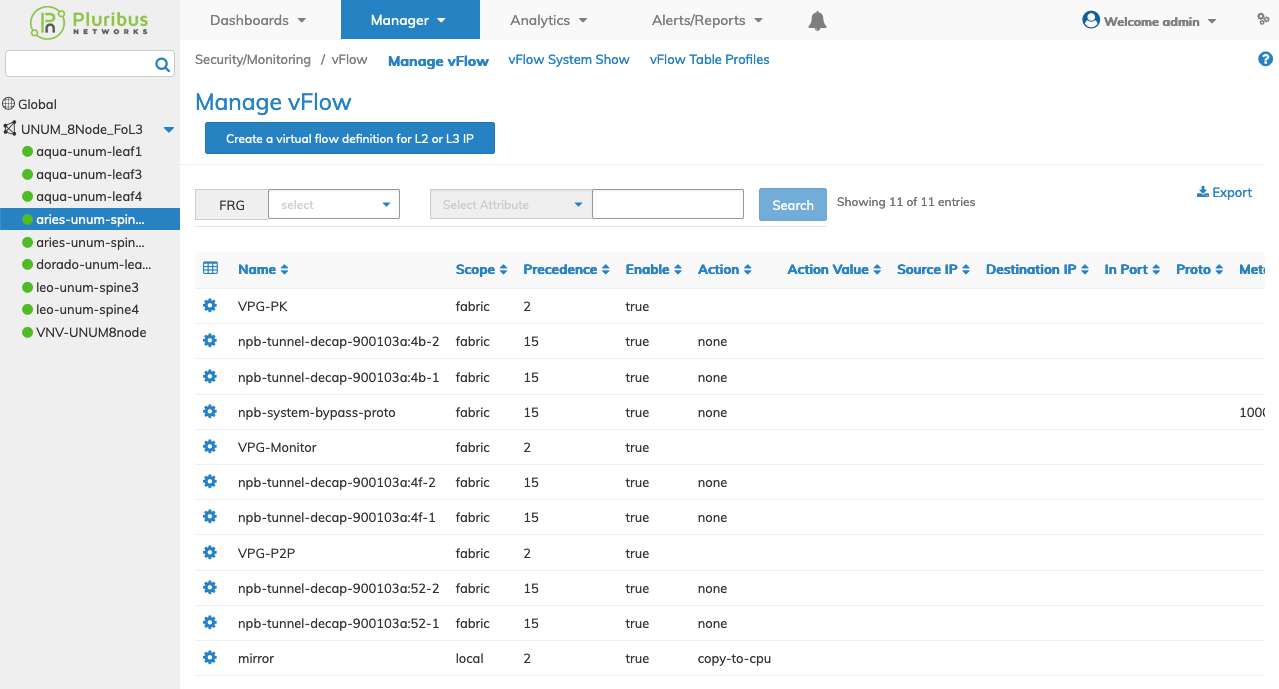
Manager Security/Monitoring vFlow Switch Dashboard
Create a vFlow
vFlows are added by selecting Create a virtual flow for L2 or L3 IP.
To add a vFlow click Create a virtual flow for L2 or L3 IP and enter the configuration parameters which include:
•Switch / FRG – The switch name or Fabric Resource Group.
•Name – Name for the vFlow.
•Scope – Scope is local or fabric.
•Precedence – Traffic priority value between 2 and 15.
•Table Name – The table name.
•Enable – Enable or disable flows in hardware (checkbox).
•Action – Forwarding action to apply to the vFlow.
•Src Ip – Source IP address for the vFlow.
•Dst Ip – Destination IP address for the vFlow.
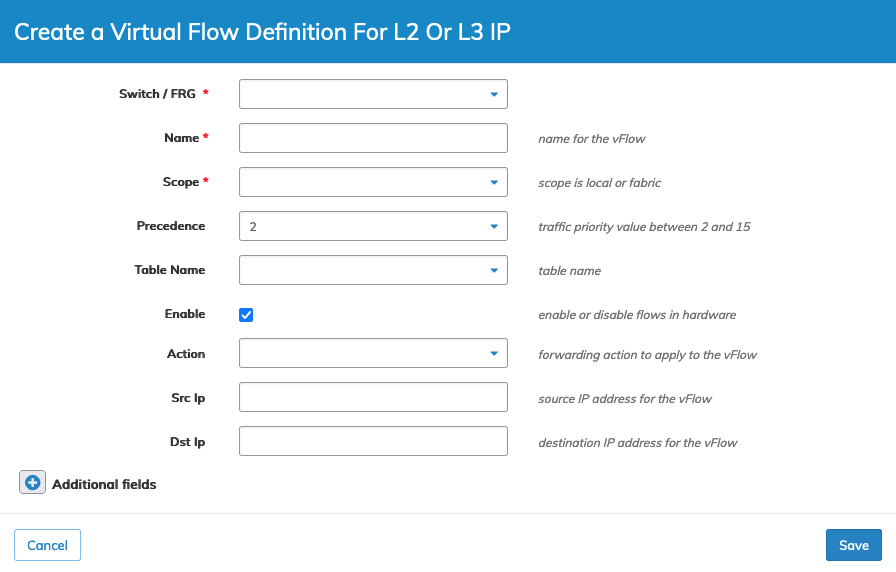
Manager Security/Monitoring Create vFlow
Click Save to continue or Cancel to return to the previous screen without saving any changes.
Select additional field parameters by clicking on the ![]() icon. Additional fields include:
icon. Additional fields include:
•VLAN – VLAN for the vFlow.
•Dscp – 6 bit Differentiated Services Code Point (DSCP) for the vFlow with range 0 to 63.
•Tos – ToS number for the vFlow.
•Dropped – Match dropped or forwarded packet (checkbox).
•VRF – VRF subnet belongs to.
•Ttl – Time to live.
•Proto – Layer 3 protocol for the vFlow.
•Metadata – Metadata number for the vFlow.
•VXLAN – VXLAN id for the vFlow.
•Transparency – Transparent for protocol packets.
•Dur – Minimum duration required for the flow to be captured (in seconds).
•vNET Id – vNET assigned to the vFlow.
•Bd – Bridge Domain for the vFlow.
•Out Port – Outgoing port for the vFlow.
•Src Ip Mask – Source IP address wildcard mask for the vFlow.
•Dst Ip Mask – Destination IP address wildcard mask for the vFlow.
•Src Port – Layer 3 protocol source port for the vFlow.
•Dst Port – Layer 3 protocol destination port for the vFlow.
•Description – vFlow description.
•vRouter Name – Name of the vRouter service.
•Dscp Map – DSCP map to apply on the flow. Please reapply if map priorities are updated.
•In Port – Incoming port for the vFlow.
•Src Mac – Source MAC address for the vFlow.
•Dst Mac – Destination MAC address for the vFlow.
•Inner VLAN – Inner VLAN for the vFlow.
•Ether Type – EtherType for the vFlow.
•Src Mac Mask – Source MAC address to use as a wildcard mask.
•Dst Mac Mask – Destination MAC address to use as a wildcard mask.
•Src Port End – Layer 3 protocol src port end range for the vFlow.
•Src Port Mask – Source port mask.
•Dst Port End – Layer 3 protocol dest port end range for the vFlow.
•Dst Port Mask – Destination port mask.
•Dscp Start – 6 bit Differentiated Services Code Point (DSCP) start number.
•Dscp End – 6 bit Differentiated Services Code Point (DSCP) end number.
•Tos Start – Start Type of Service (ToS) number.
•Tos End – The ending Type of Service (ToS) number.
•VLAN Pri – Priority for the VLAN 0 to 7.
•Inner VLAN Pri – Priority for the VLAN 0 to 7.
•Internal Pri – Internal priority 0 to 7.
•Tcp Flags – TCP Control Flags.
•Flow Class – vFlow class name.
•Ingress Tunnel – Tunnel for the ingress traffic.
•Egress Tunnel – Tunnel for egress traffic.
•Bw Min – Minimum bandwidth in Gbps.
•Bw Max – Maximum bandwidth in Gbps.
•Burst Size – Committed burst size in bytes.
•Action Value – Optional value argument between 1 and 64.
•Action Set Mac Value – MAC address value.
•Action Set Svp Value – SVP value.
•Action to Next Hop Ip Value – Next hop IP address for packet redirection.
•Action to Ecmp Group Value – ECMP group for packet redirection.
•Action to Ports Value – Action to ports value.
•Override Sys Flows – Override system flows (checkbox).
•Mirror Id – Mirror configuration name.
•Process Mirror – vFlow processes mirrored traffic or not (checkbox).
•Log Stats – Log packet statistics for the flow (checkbox).
•Stats Interval – Interval to update packet statistics for the log (in seconds).
•Transient – Capture transient flows (checkbox).
•VXLAN Ether Type – EtherType for the VXLAN.
•From Tunnel Decap – Tunnel terminated VXLAN packets.
•VXLAN Proto – Protocol type for the VXLAN.
•Stp State – STP state.
•Packet Res – Packet resolution in ASIC.
•Fwding Type – ASIC forwarding type.
•Set Src – Set src ip of ipv4 packet.s
•Set Dst – Set dst ip of ipv4 packets.
•Set Src Port – Set src port of ipv4 packets.
•Set Dst Port – Set dst port of ipv4 packets.
•Src vPG – Source Virtual Port Group name.
•Dst vPG – Destination Virtual Port Group name.
•Bidir vPG 1 – Bidirectional Virtual Port Group name.
•Bidir vPG 2 – Bidirectional Virtual Port Group name.
•Udf Name1 – UDF name.
•Udf Data1 – UDF data.
•Udf Data1 Mask – Mask for udf data.
•Udf Name2 – UDF name.
•Udf Data2 – UDF data.
•Udf Data2 Mask – Mask for udf data.
•Udf Name3 –UDF name.
•Udf Data3 – UDF data.
•Udf Data3 Mask – mask for udf data.
•Flow Cb – CPU to process vFlow callback function.
•Cpu Class – CPU class name.
•If – Administrative service interface.
•Phy Dst Port – Packet destination port for the vFlow.
•L3 Class Id – Dst L3 Class ID.
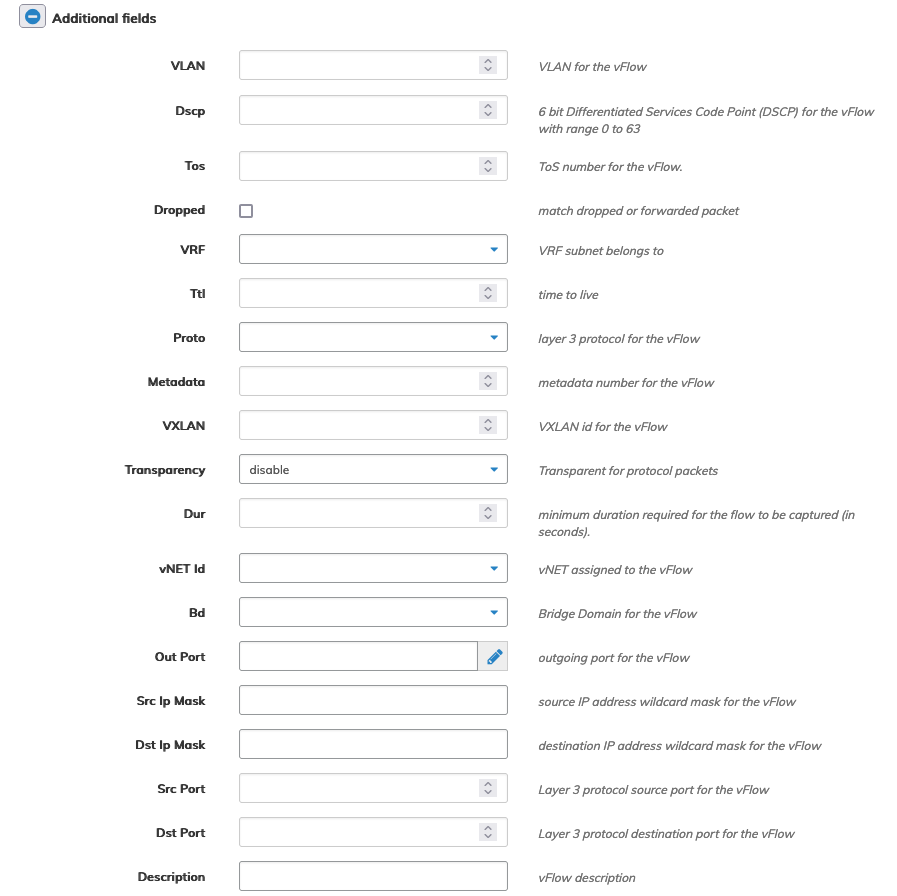
Manager Security/Monitoring vFlow Additional Parameters
Click Save to continue or Cancel to return to the previous screen without saving any changes.
Note: The Edit icon referred to in this section is represented by the pencil icon ![]() .
.
Modify Security/Monitoring vFlow
To modify a vFlow use Edit by selecting the Cog ![]() icon to make changes to the vFlow parameters.
icon to make changes to the vFlow parameters.
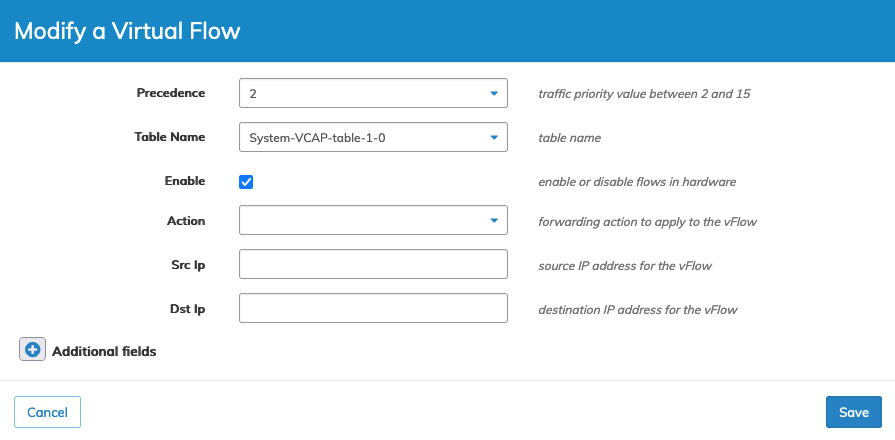
Manager Security/Monitoring Modify vFlow
Select additional field parameters by clicking on the ![]() icon. Additional fields include:
icon. Additional fields include:
Click Save to continue or Cancel to return to the previous screen without saving any changes.
Delete a vFlow
To delete a vFlow use Delete by selecting the Cog ![]() icon. A confirmation message requires an acknowledgment to continue deletion. Click OK to continue or Cancel to return to the previous screen without making any changes.
icon. A confirmation message requires an acknowledgment to continue deletion. Click OK to continue or Cancel to return to the previous screen without making any changes.

Delete vFlow Confirmation
