Quick Start Example
Quick Start Example
Quick Start is a new fabric automation option available as of the NetVisor UNUM 5.2 release.
Quick Start creates a simple Layer-2 fabric with routing between the spines, with minimal configuration, as a fast start option for small or edge data center environments with four to ten switches. This option combines the initial fabric setup and fabric configuration steps to simplify the build process. Quick Start can create a fabric with or without 3rd party spines.
Important: Quick Start imports some network information from the ZTP Server such as DNS values and ntp servers (refer to the Configuring the NetVisor UNUM ZTP Server section for more information). If you have added a pre-configured fabric, or did not use zero-touch switch provisioning, you will need to fill out the management network information in the ZTP server and save the settings. It is not necessary for the ZTP server to be running, just that the network information is saved.
Below is an example of creating a L2 VRRP Quick Start fabric with Arista Spines:
|
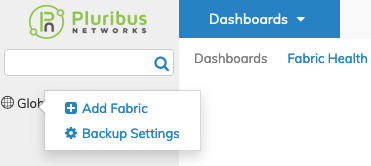
1)From the Topology Dashboard in the gray Global pane, right-click on Global and click + Add Fabric to add a Fabric to NetVisor UNUM. Add Fabric |
|
|
|
|
|
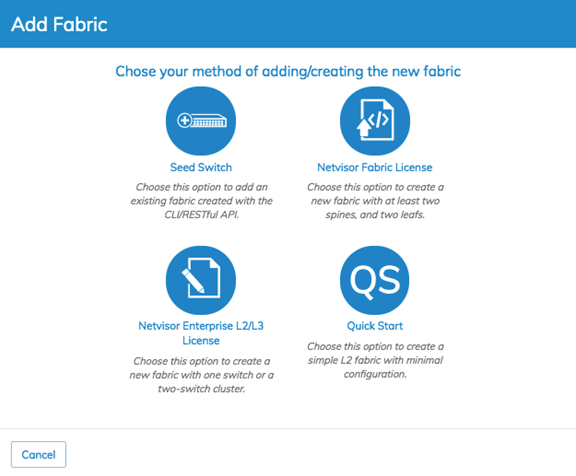
2)From the Add Fabric popup, click on the Quick Start button. Add Fabric Quick Start |
|
|
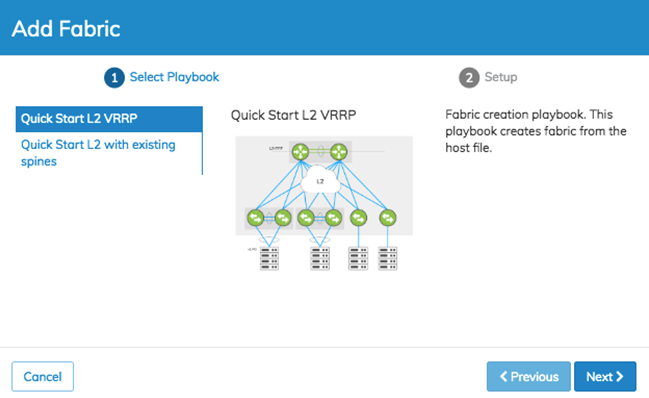
3)From the Add Fabric window, chose the Quick Start L2 VRRP playbook option. Quick Start L2 VRRP Playbook |
|
|
4)Next, populate the Setup window with the essential information necessary to build the fabric, including one VLAN for initial Day-0 connectivity (see below). Here we’re creating the DELLFabric again, on the 10.13.44.x/24 OOB management network, with VLAN 10 and a VRRP IP 10.10.10.1/24. Note: The VRRP virtual IP address can either be an x.x.x.1 with a master router of x.x.x.2 and an alternate of x.x.x.3 or x.x.x.254 with a master router of x.x.x.253 and an alternate of x.x.x.252. Administrators should choose the high or low option based on their fabric requirements. Quick Start L2 VRRP Playbook Setup Menu |
|
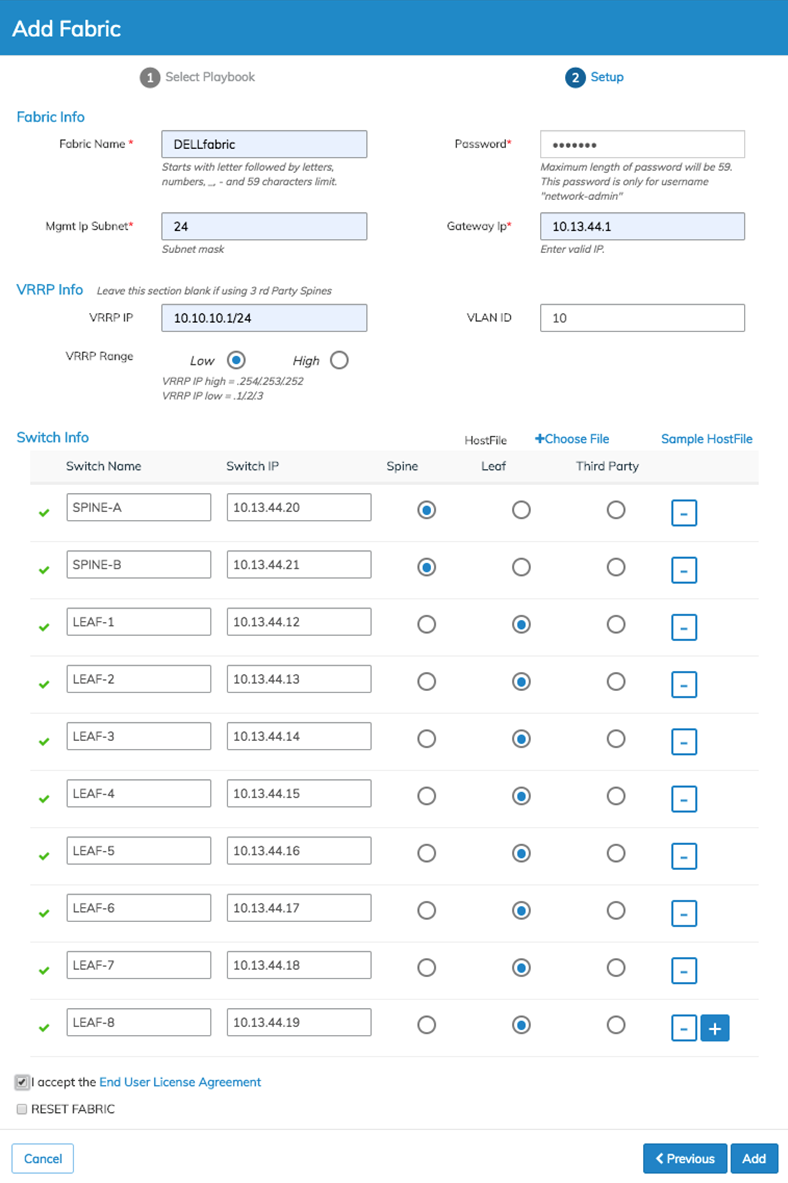
TIP: The green check mark ✓ on each line of switch information indicates that the switch is reachable and is in the applicable, unconfigured state. If a red X appears instead, administrators should check to see if they have an unreachable switch or already has a configuration applied. In the latter case, the switch will need to have the switch-config-reset command run on it to remove the configuration. This command deletes the current config information, so use it with caution.
|
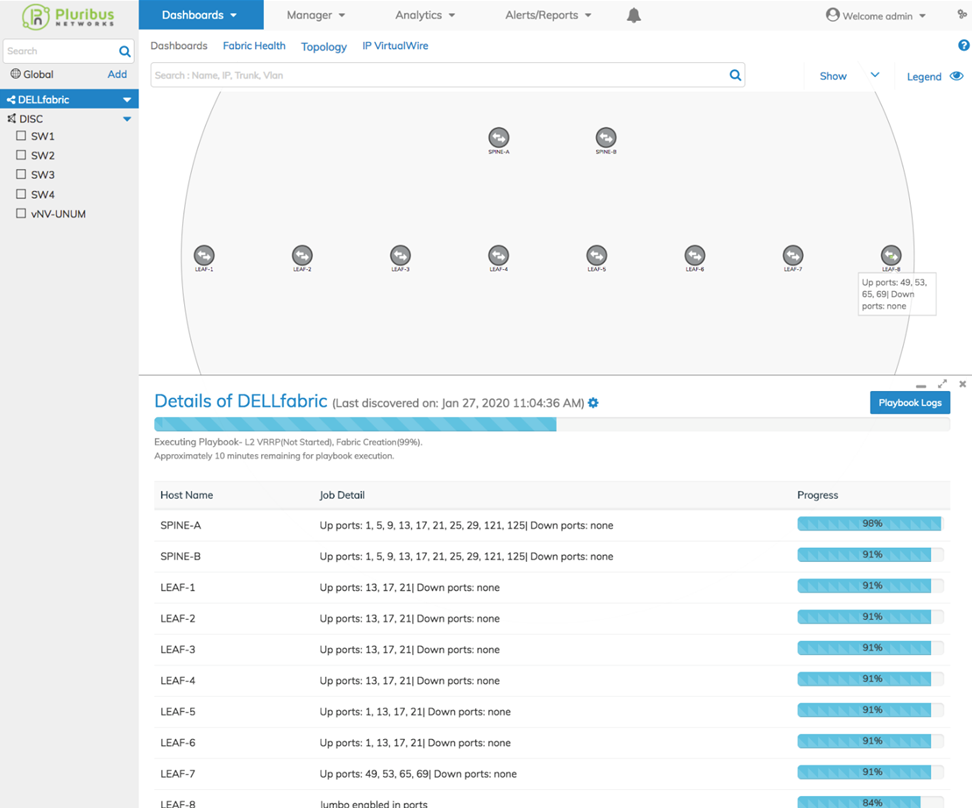
5)Once you have entered and verified the fabric information, click on the blue Add button. This action brings up the progress screen. The fabric Details pane now includes an overall progress indicator at the top for the entire fabric build process. Individual switch progress displays to the right in each switch row. NetVisor UNUM measures progress by task and provides a time estimate. These indicators can vary based on the switch models chosen for the fabric but are helpful as an approximate indicator of how long the fabric will need to complete. Quick Start L2 VRRP Playbook Provisioning |
|
|
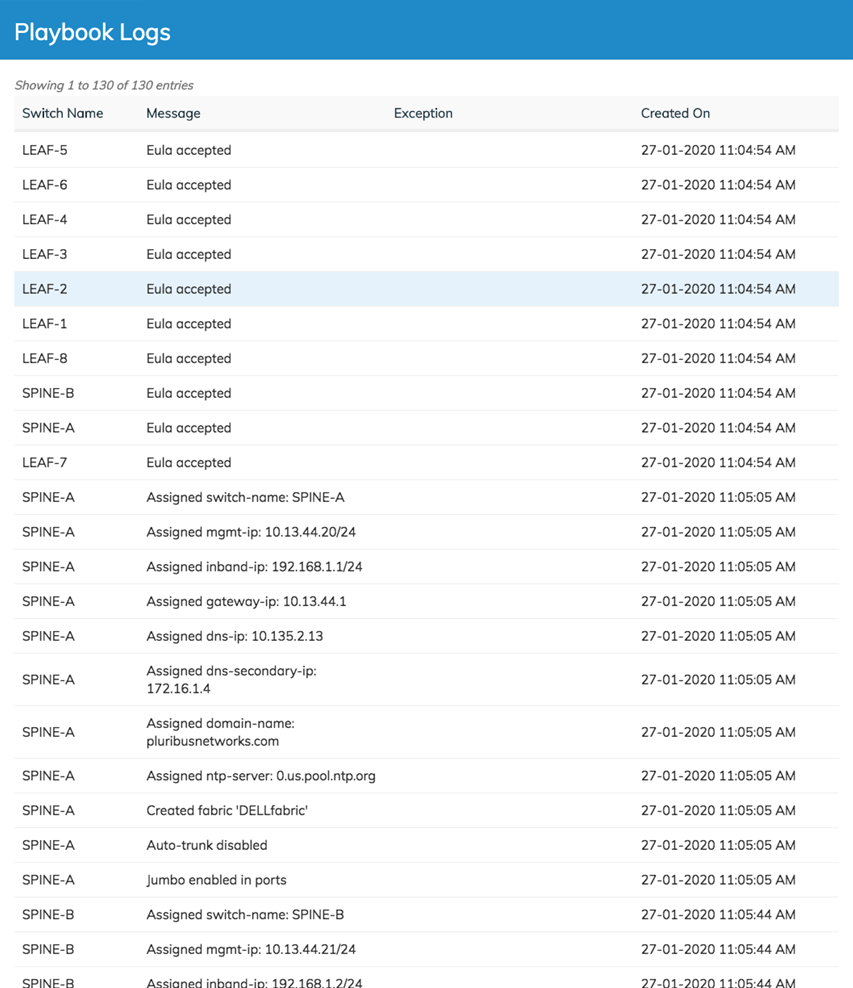
6)Clicking on the blue Playbook Logs button to the right of the Details pane brings up a list of the tasks executed by NetVisor UNUM. Quick Start L2 VRRP Playbook Logs |
|
|
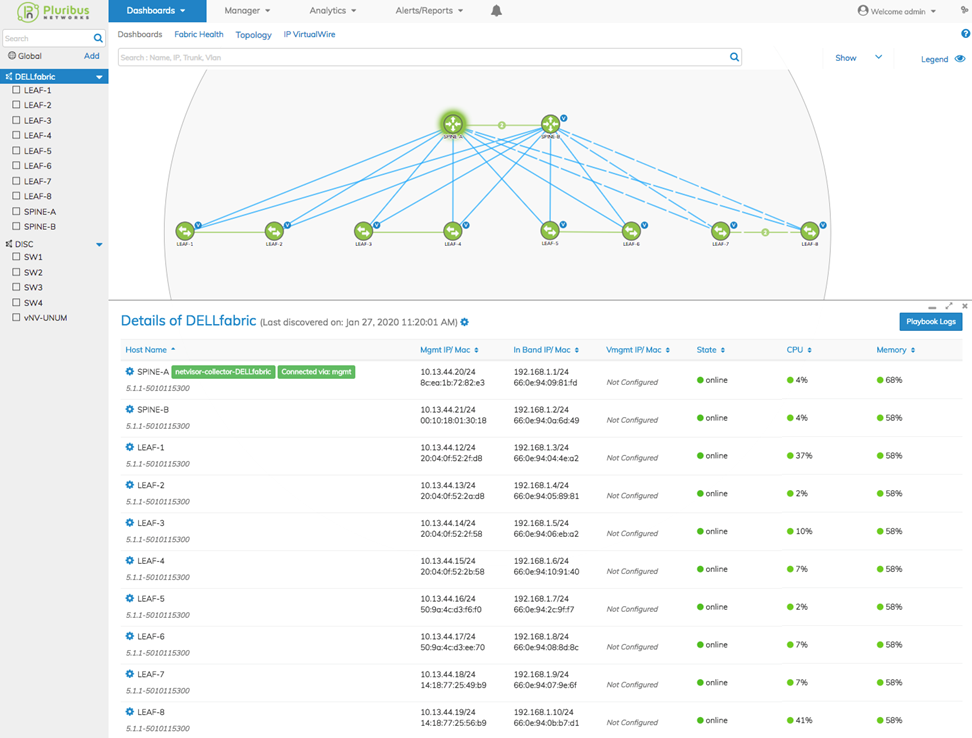
7)Below our Layer-2 VRRP fabric has been created and is ready for use. TIP: If the fabric appears to have gone over the estimated time, try refreshing your browser window. Quick Start L2 VRRP Fabric Provisioning Complete |
|
|
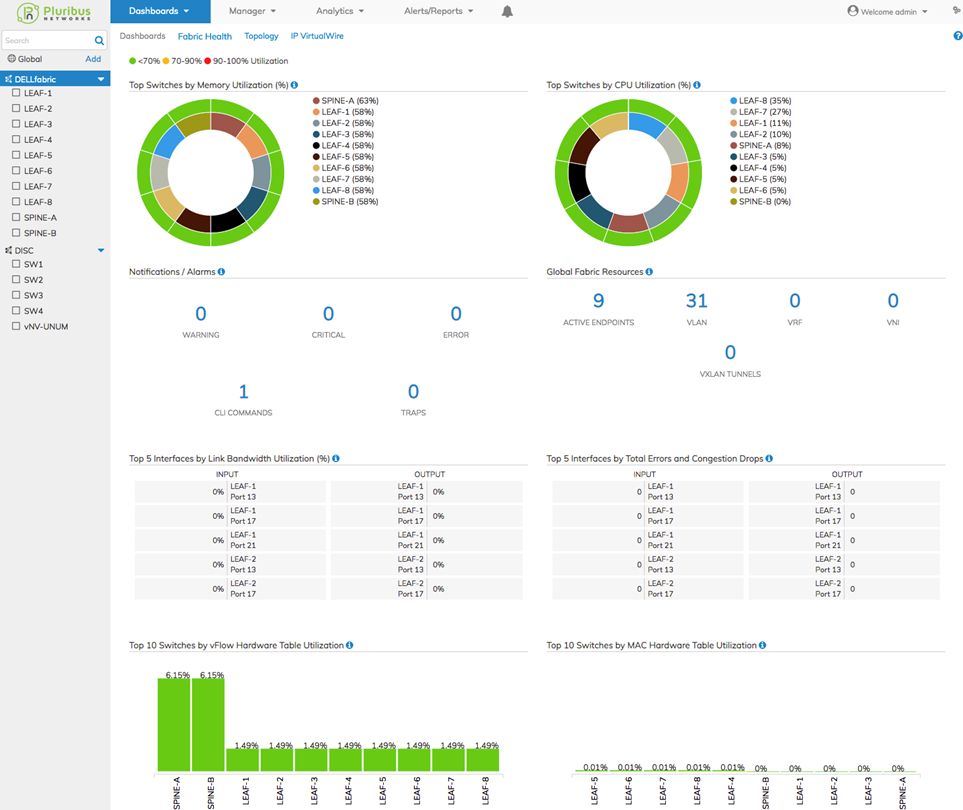
8)Check the Fabric Health Dashboard on a new fabric to see if there are any issues. Click on Dashboards in the top menu and select Fabric Health. Everything is green and good to go! Now add host ports to VLAN 10, and the hosts can communicate with each other. Quick Start Provisioning Fabric Health |
|