
Add Topology
Topology Dashboard
There are features and functions used in Arista NetVisor UNUM and Insight Analytics that are common throughout the user interface (UI). Please refer to the Common Functions section for more information on the use of these functions and features.
In lab automation deployments where Arista Networks switches use the VirtualWire feature, users require easy repeatability when deploying the same topology. For example, there is a need to configure different VirtualWire connections and save them for reuse. Use the VirtualWire topologies feature to automate the creation of VirtualWires, their associated transparent VLANs, and the associated VXLAN IDs on the tunnels in a convenient and user-friendly fashion.
The "Enable" feature checks for the presence of the requisite static VXLAN tunnels between the VirtualWire nodes and displays a warning message if the tunnels are not active. When the tunnels required for VirtualWire creation are present, the automation process adds the required VXLAN ID to each tunnel and creates the VirtualWire connection.
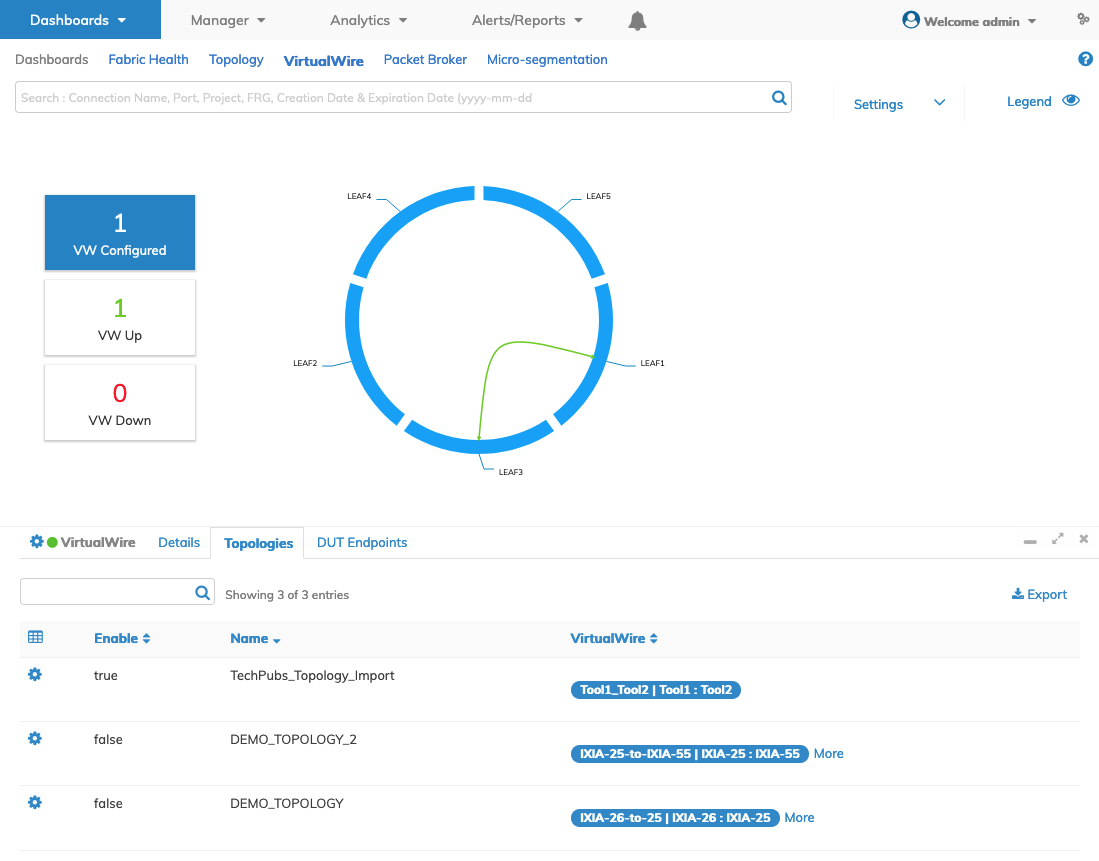
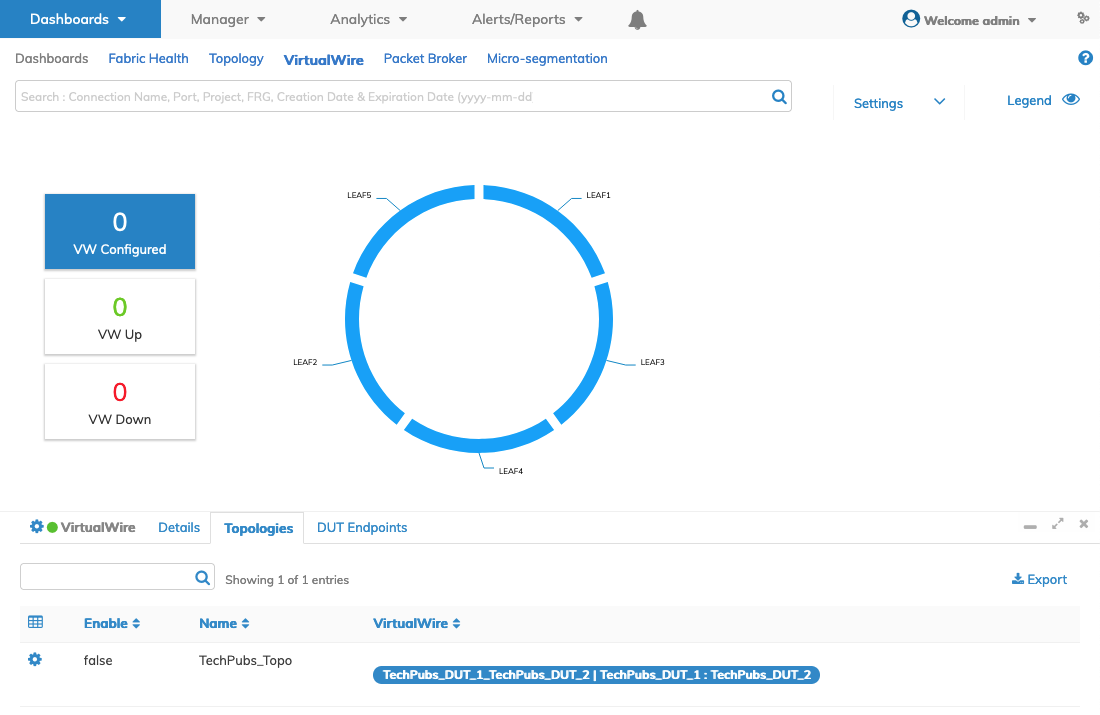
Selecting Dashboard → VirtualWire → Topologies displays the Topologies pane.
Existing topologies display in the topologies pane.
VirtualWire - Topologies Pane
The pane displays a list of existing Topology entries by Name, VirtualWire, and Enable status.
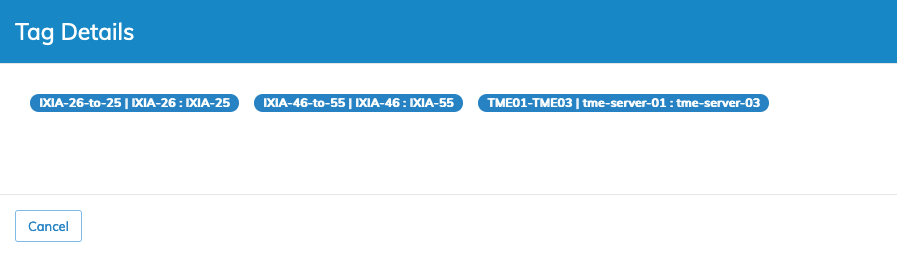
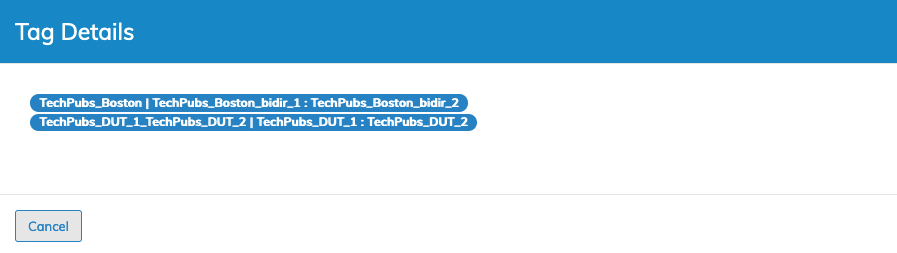
The More function displays all tags associated with the selected VirtualWire.
VirtualWire - Topologies Pane - More Tags Feature
Click Cancel to return to the VirtualWire dashboard.
|
Topology Pane |
|
|
Enable / Disable Topology
The "Enable" feature checks for the presence of the requisite static VXLAN tunnels between the VirtualWire nodes and displays a warning message if the tunnels are not active. When the tunnels required for VirtualWire creation are present, the automation process adds the required VXLAN ID to each tunnel and creates the VirtualWire connection.
Enabling the topology creates the vFlow between the DUT endpoints.
Disabling the topology tears down the connections.
The topology configurations are preserved for further use.
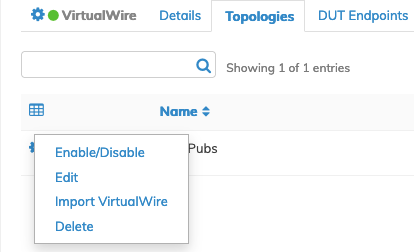
To enable a topology use the Cog ![]() icon and select Enable/Disable.
icon and select Enable/Disable.
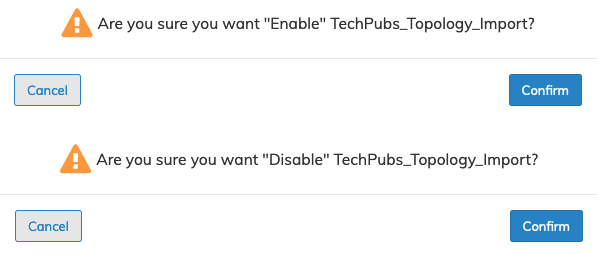
VirtualWire - Topologies Pane - Enable/Disable Confirmation
Click Confirm to continue or click Cancel to return to the previous screen without making any changes.
The dashboard updates. In the following example, the TechPubs_Topology_Import VirtualWire Enable status changes to false, and the links are no longer displayed.

VirtualWire - Topologies Pane - Enable/Disable Updated Dashboard
Add Topology
When adding a topology, the topology is created with a fabric scope.
To add a topology, use the Cog ![]() icon and select Add Topology in the VirtualWire Menu Options panel.
icon and select Add Topology in the VirtualWire Menu Options panel.
A FRG (Fabric Resource Group) may be selected and assigned to the Topology. Refer to the Manage Groups section to create, use and manage Fabric Resource Groups (FRG).
Enter the required parameters that include:
•FRG – Select a Fabric Resource Group from the drop-down list.
•Name – The name for the topology.
•Topology Options – Select Import VirtualWire or Add VirtualWire from the drop-down list.
Add Virtualwire
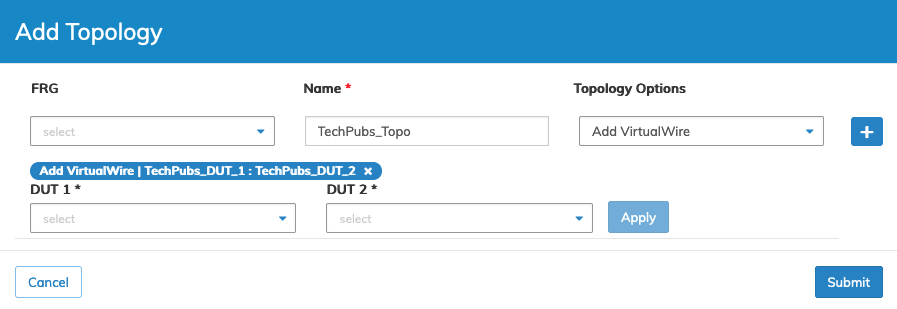
VirtualWire - Add Topology
Click Submit to continue or click Cancel to return to the previous screen without making any changes.
The dashboard updates with the new topology.
VirtualWire - Add Topology - Dashboard Update
By default, the topology status is set to false.
Use the Cog ![]() icon and select Enable/Disable to enable the topology.
icon and select Enable/Disable to enable the topology.

VirtualWire - Add Topology - Enabled
Import VirtualWire
The Import VirtualWire function imports existing VirtualWire configurations into the topology.
Select a Topology name from the topologies pane and click the Cog ![]() icon to import a topology. Select Import VirtualWire in the VirtualWire Menu Options panel.
icon to import a topology. Select Import VirtualWire in the VirtualWire Menu Options panel.
In this example, the TechPubs_Boston configuration will import into the TechPubs_Topo topology.
Before importing a configuration, Disable the current Topology.
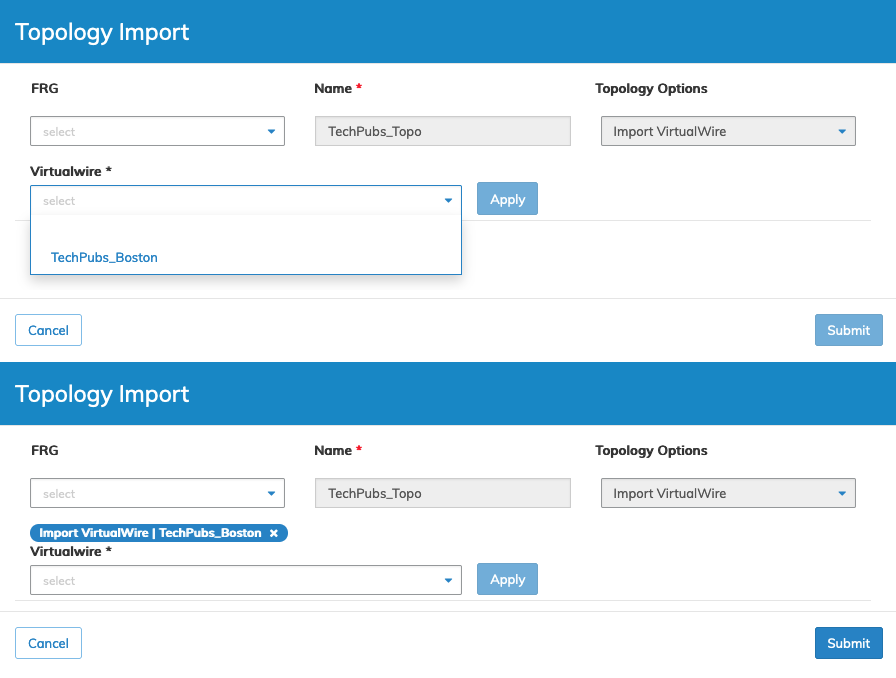
VirtualWire - Add Topology - Import VirtualWire
Select the VirtualWire to be imported and click Apply.
Click Submit to continue or click Cancel to return to the previous screen without making any changes.
The imported VirtualWire is added to the selected topology.
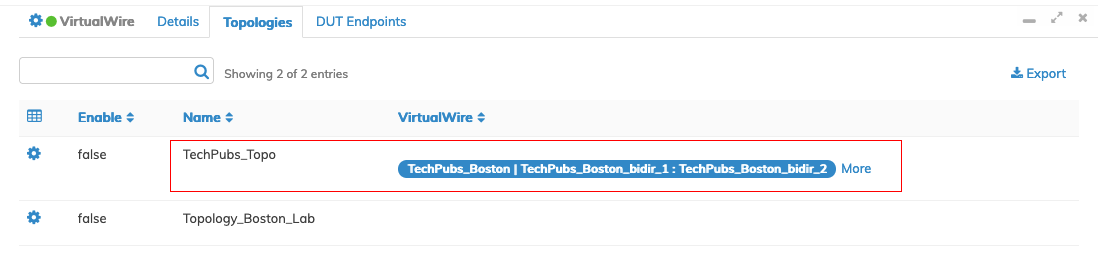
VirtualWire - Add Topology - Imported VirtualWire
Use the More function to display additional information contained in Tag Details.
VirtualWire - Add Topology - Imported VirtualWire - Tag Details
Enable the topology to create the connection between the imported DUT endpoints.
Edit Topology
Choose the Topology name from the topologies pane and click the Cog ![]() icon to select Edit.
icon to select Edit.
Enter the required changes.
Use the ![]() to remove existing configurations.
to remove existing configurations.
This following example illustrates adding and removing DUTs and removing existing tags leaving only the recently imported VirtualWire topology configuration.
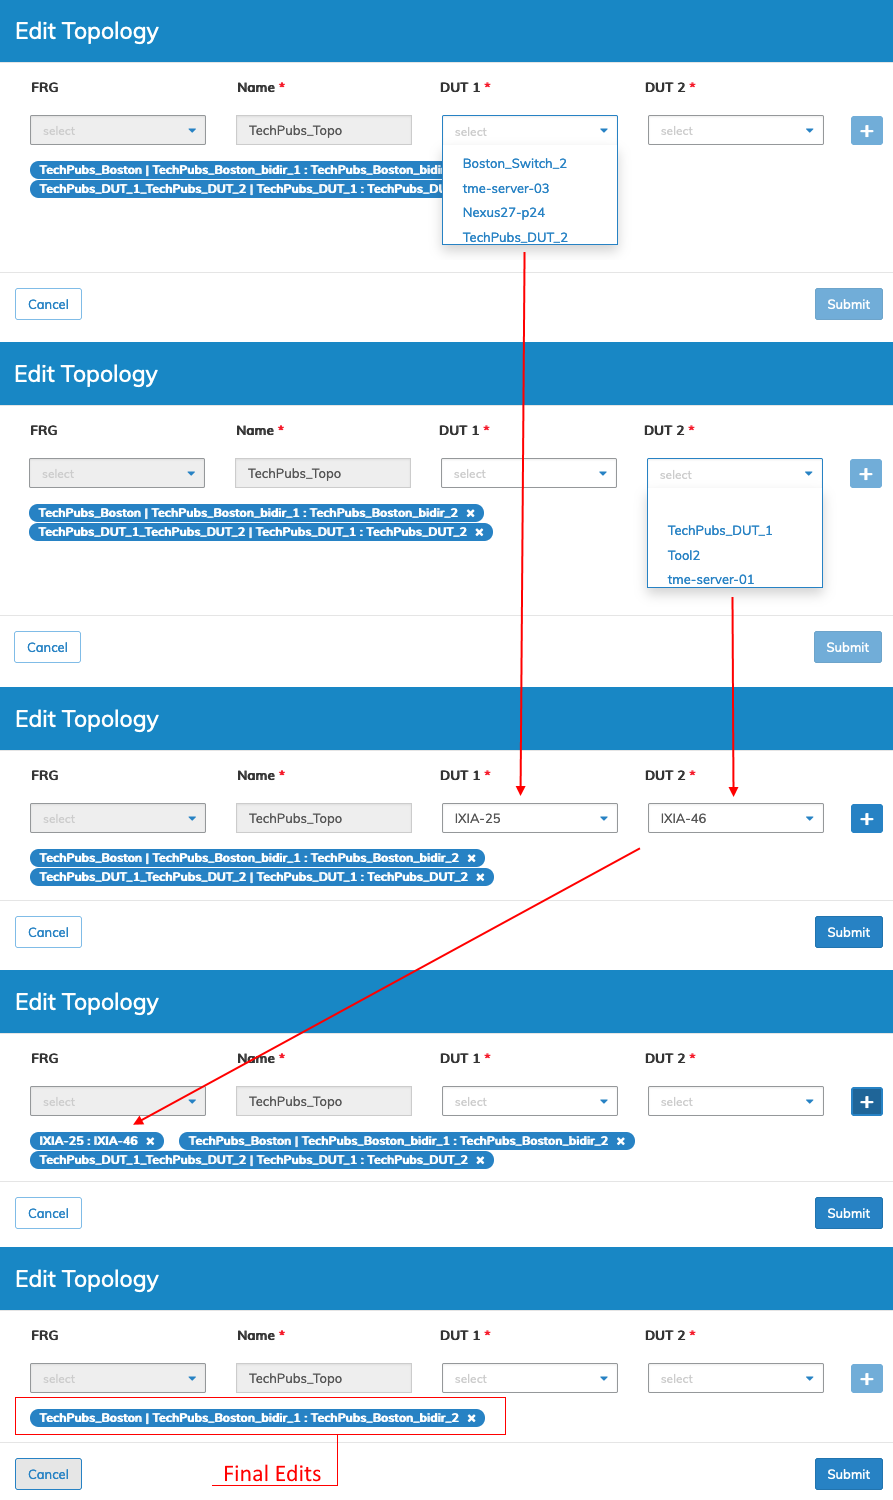
VirtualWire - Edit Topology
Click Submit to continue or click Cancel to return to the previous screen without making any changes.
After enabling the TechPubs_Topo topology, the imported TechPubs_Boston topology configuration appears in the VirtualWire dashboard.
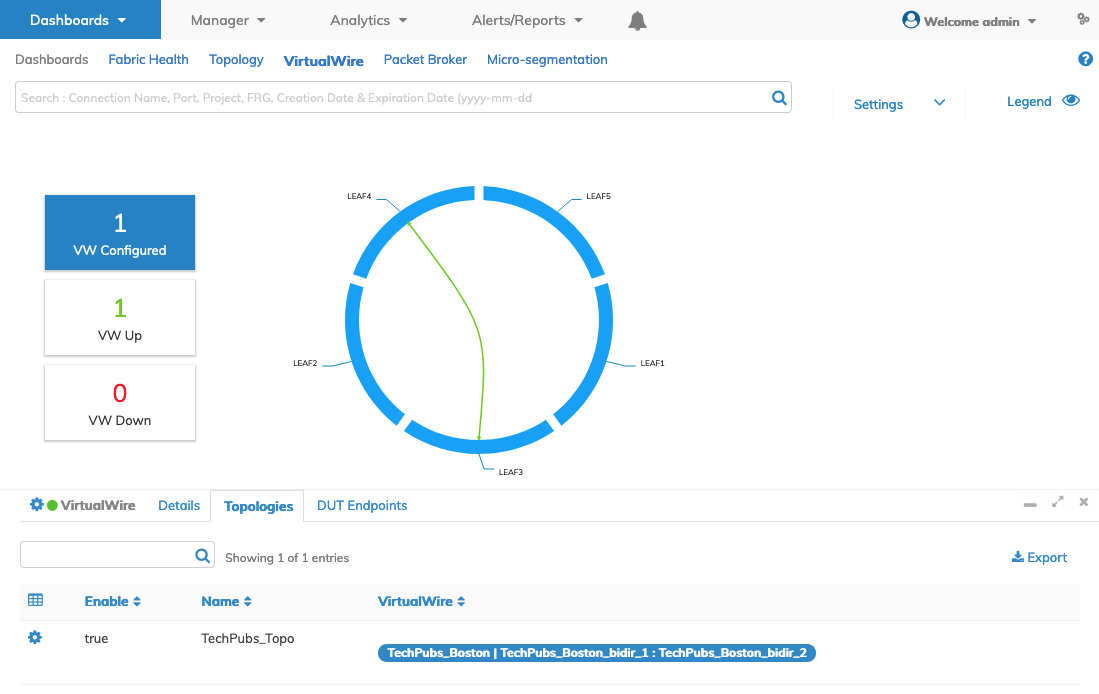
VirtualWire - Imported Topology