
Ports - Port Mapping
Insight Analytics Ports Dashboard
There are features and functions used in Arista NetVisor UNUM and Insight Analytics that are common throughout the user interface (UI). Please refer to the Common Functions section for more information on the use of these functions and features.
Selecting Analytics → Insight Analytics Ports → Port Mapping displays the Port Mapping dashboard. The Port Mapping tab highlights.
Usage Note: Before any analytics are collected, add a Fabric and install and activate a valid license.
While in the Insight Analytics Ports dashboard you navigate through Port Mapping functions including, VMware Port Mapping and Custom Port Mapping.
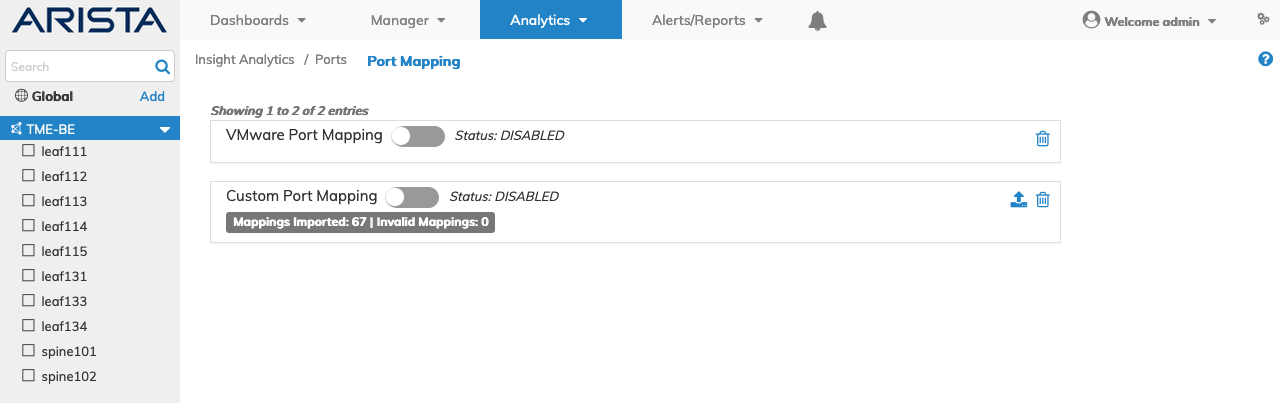
Insight Analytics Port Mapping Dashboard
This feature provides a mapping between port numbers and protocol pairs to corresponding VMware services.
Currently there exists a default port mapping file in Insight Analytics Flow which maps port/protocol pairs to certain applications.
As an example, when the port number is 80 and protocol is TCP, the application will be HTTP. This feature is extended to enable VMware specific port mapping.
When enabled, this will have precedence over the default mapping.
For example, if there are any common port/protocol pairs between VMware mapping file and the standard port mapping file the VMware Port Mapping is used.

Insight Analytics Port Mapping
Insight Analytics Flow VMware Port Mapping
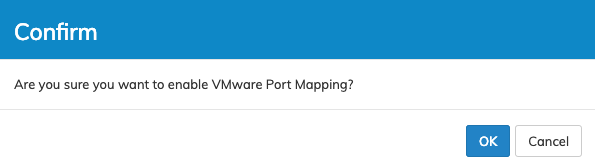
To enable VMware port mapping, click the selector switch. The port mapping application displays a confirmation message.
Insight Analytics Enable VMware Port Mapping
Click OK to start VMware Port Mapping or Cancel to return to the previous screen without making any changes.
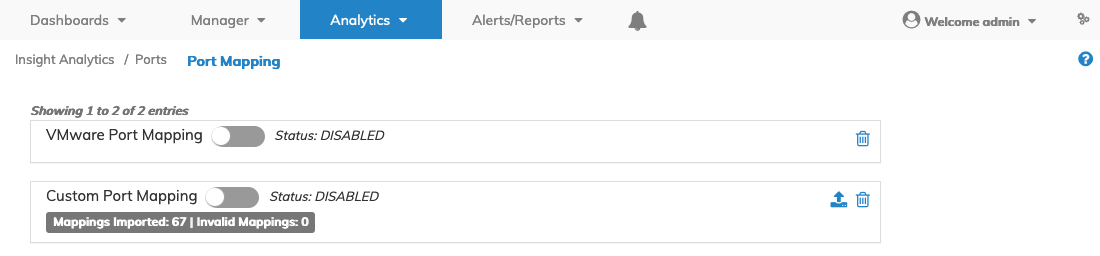
A confirmation message appears, and the Port Mapping dashboard displays the running application.

Insight Analytics VMware Port Mapping Running
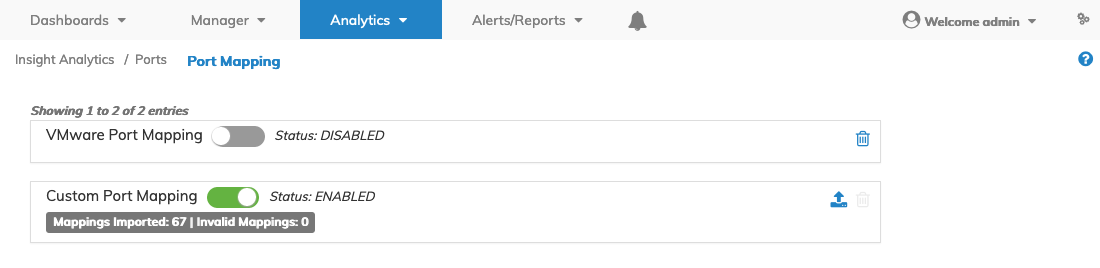
The VMware Port Mapping and Custom Port Mapping selector switches are displayed in the dashboard.
To enable Custom Port Mapping, click the selector switch.
Insight Analytics Custom Port Mapping
Usage Note: If the Custom Port Mapping selector switch is grayed-out you must first upload a custom CSV file containing the port mapping details to enable Custom Port Mapping.
Use the Upload ![]() icon and select the applicable file.
icon and select the applicable file.
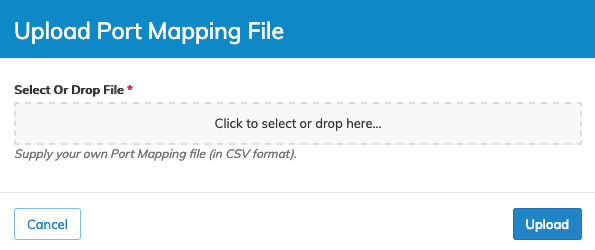
Insight Analytics Flow Port Mapping Upload File
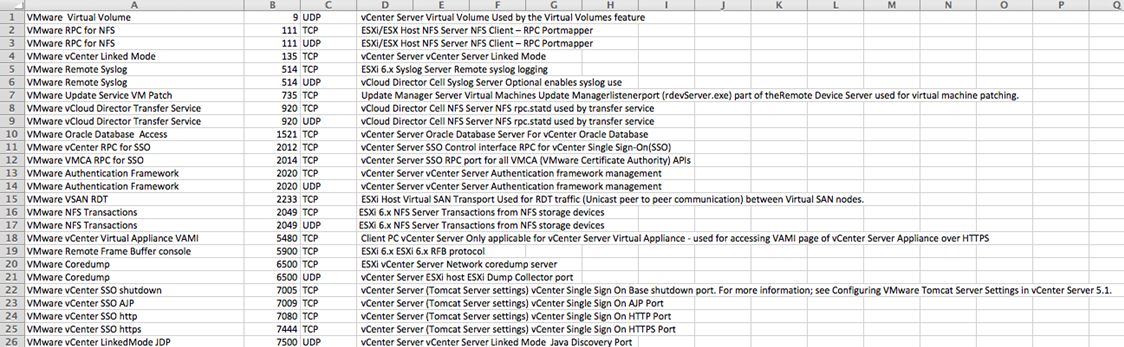
Insight Analytics Custom Port Mapping Example CSV File
The NetVisor UNUM Platform will confirm a successful upload of the CSV file. Click the selector switch to enable the Custom Port Mapping. The port mapping application displays a confirmation message.
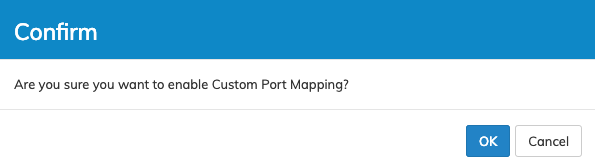
Insight Analytics Custom Port Mapping Enable Confirmation
Click OK to start Custom Port Mapping or Cancel to return to the previous screen without making any changes.
A confirmation message appears, and the Port Mapping dashboard displays the running application along with a status update message indicating the number of mappings imported and the number of any invalid mappings.
Insight Analytics Custom Port Mapping Running
Use the Trash Bin ![]() icon to delete an entry, if required. The Custom Port Mapping must first be disabled.
icon to delete an entry, if required. The Custom Port Mapping must first be disabled.
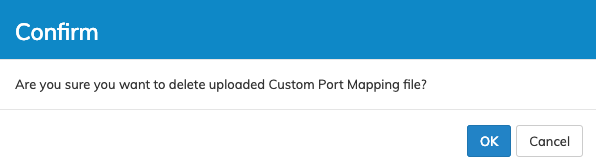
Insight Analytics Custom Port Mapping Delete File Confirmation
Click OK to continue or Cancel to return to the previous screen with making any changes.