
Virtual Machine Software Installation
Virtual Machine Software Installation
Access the VMware vCenter console (VMware vSphere Client depicted) and then follow the steps illustrated in the example figures below:
Deploy OVF Template
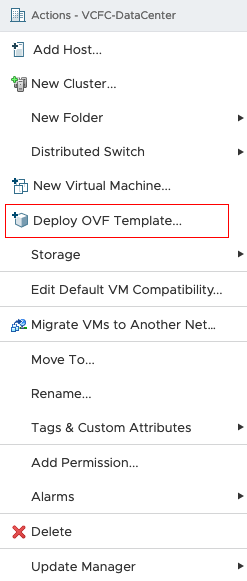
Deploy OVF Template
Select Source
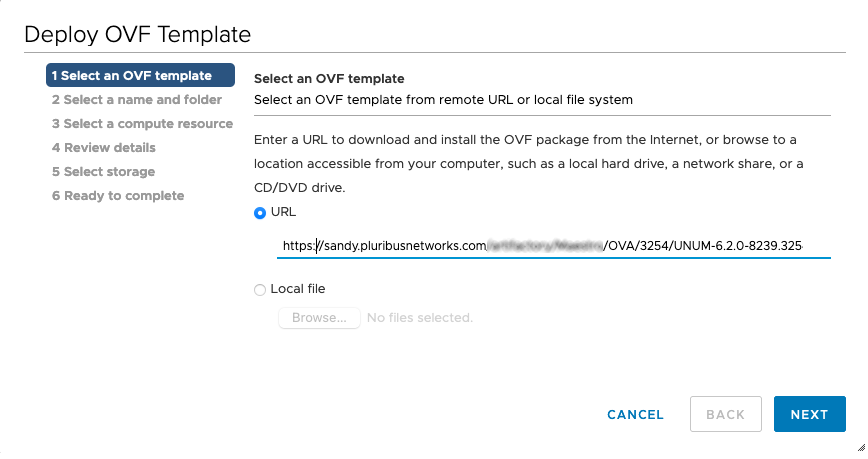
Select Source
Select Name
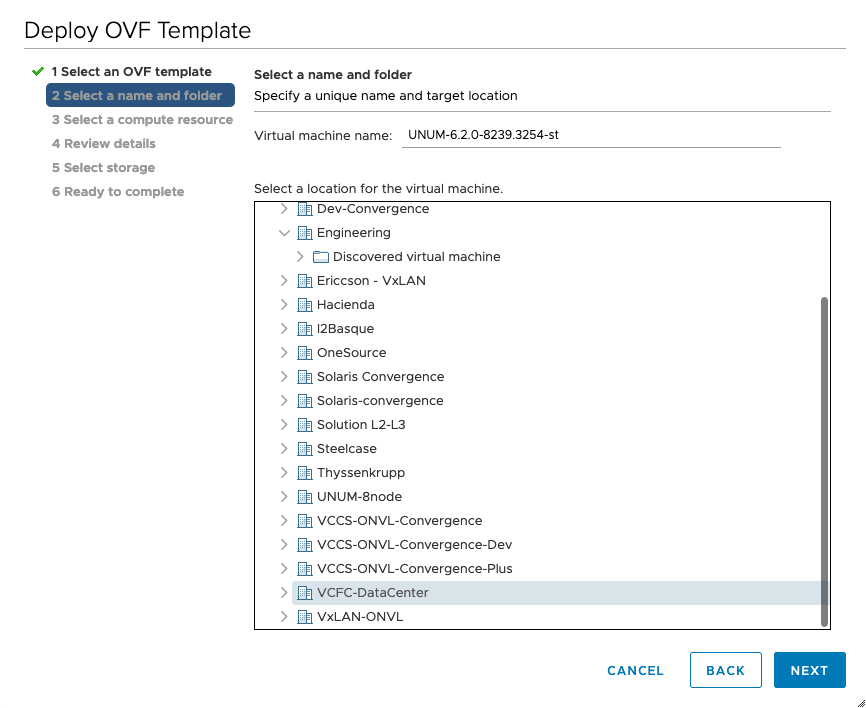
OVF Template - Select Name
Select Compute Resource
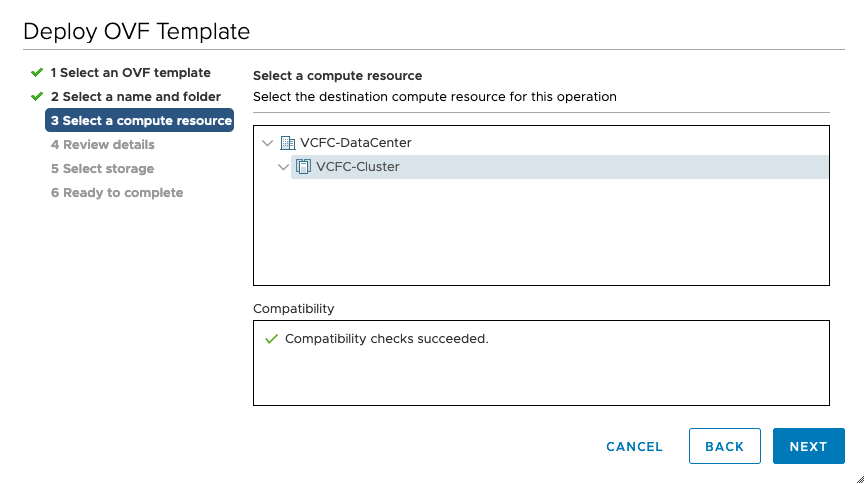
OVF Template - Select Compute Resource
Review Details
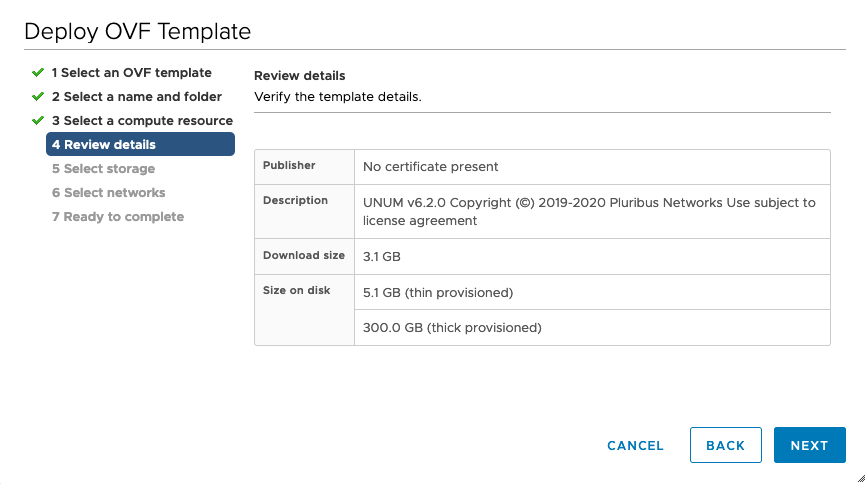
OVF Template - Review Details
Select Storage
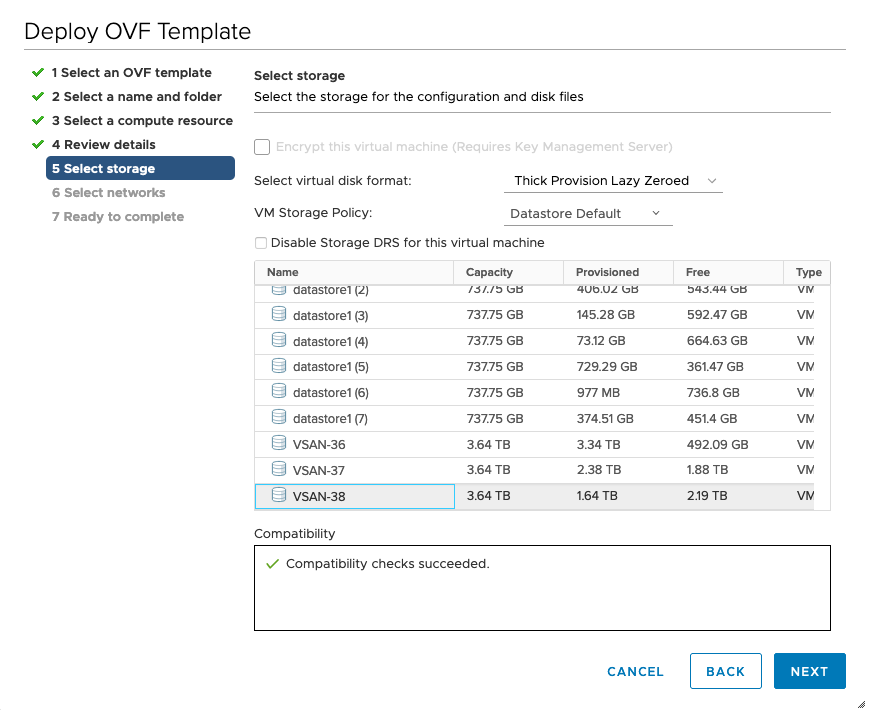
OVF Template - Select Storage
Setup Networks
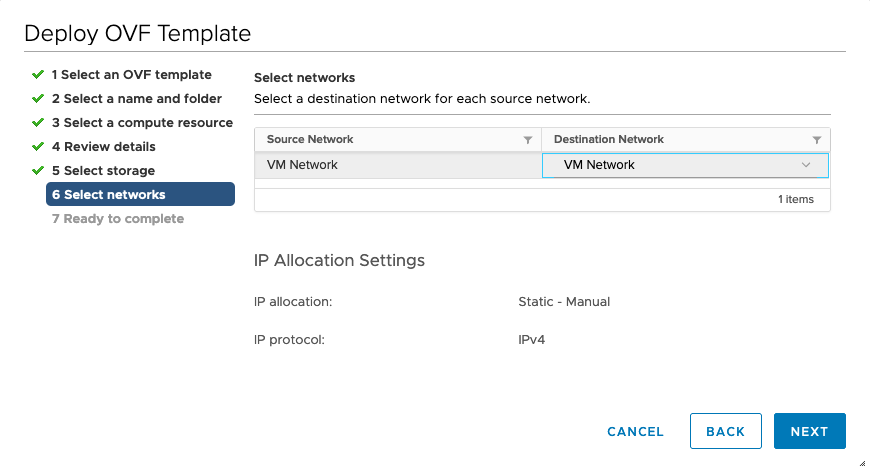
OVF Template - Setup Networks
Select the applicable type of network configuration from IP Allocation, such as DHCP or Static-Manual.
When configuring a Static IP, enter the specific network values as shown in the following example.
For DHCP configuration, leave the fields empty.
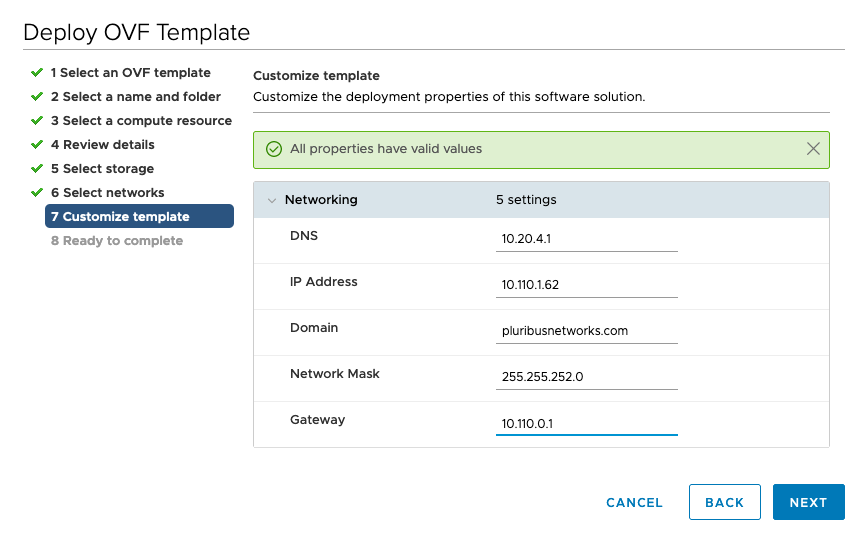
Static IP Network Configuration
After configuring the network configuration, click Next.
Note: Please carefully review the following usage information regarding the Ethernet adapters used by Arista NetVisor UNUM.
|
Eth0: |
used for management, GUI (user interaction) and data collection via Netvisor REST. This interface uses DHCP by default. |
|
Eth1: |
Eth1: is used for internal system communication. A standalone Arista NetVisor UNUM VM instance REQUIRES the use of an IP address for eth1 before normal operations begin. Arista recommends adding the Eth1 IP address to a dummy vSwitch and a separate dummy subnet on the ESXi host.
WARNING! If you change the IP address of Eth1 in a cluster configuration, you disrupt normal operations. Please contact Technical Support if you need or want to change the Eth1 address in a cluster configuration.
|
|
Eth2: |
<Optional> used to connect a Seed Switch or Fabric via an inband connection. Note: To connect more than one Fabric via inband and external switch is required. |
UNUM Ethernet Adapters Usage Table
Ready to Complete
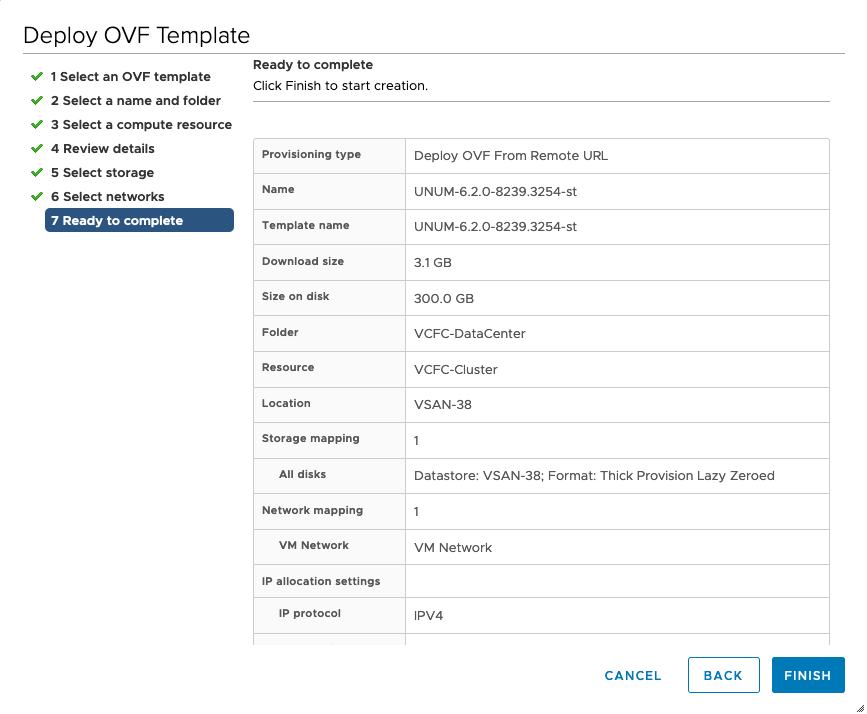
OVF Template - Ready to Complete
Note: Thick Provisioning is recommended.
Please ensure the checkbox item "Power on after deployment" option is set before clicking Finish.
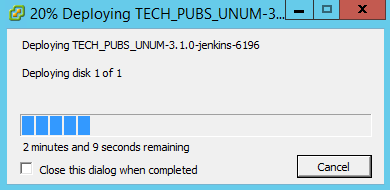
Deployment
|
|
|
|
OVF Template - Deploying |
OVF Template - Deployed |
Console Messages
Select the Console tab to view configuration messages.
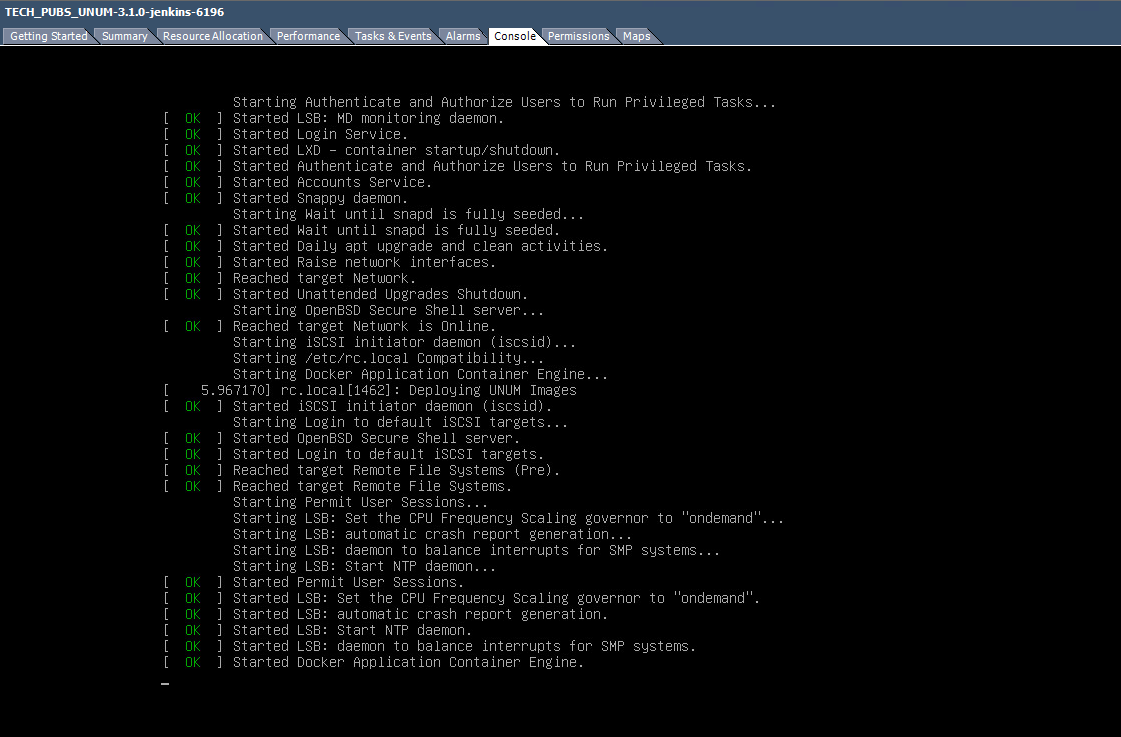
OVF Template - NetVisor UNUM Configuration Console Messages
As the Virtual Machine OVA is configured you will see a series of console messages indicating status of the deployment and configuration.
NetVisor UNUM installation images are loaded. The installation and configuration load times take approximately 5 - 10 minutes depending on your environment.
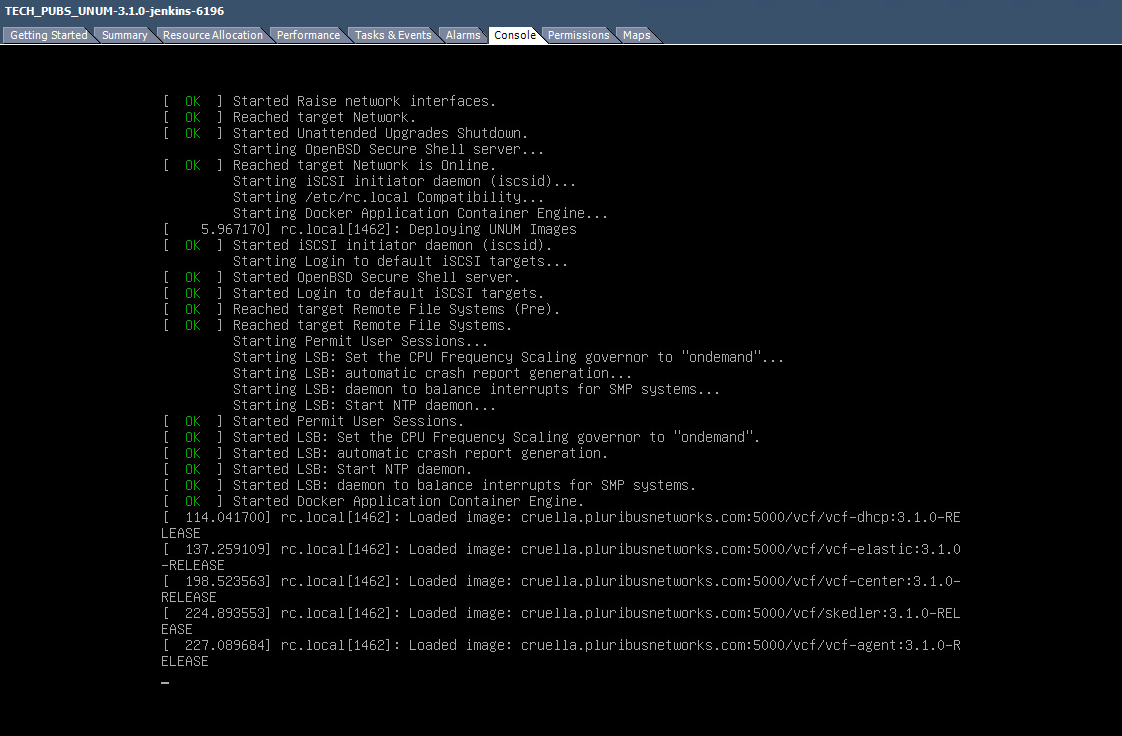
OVF Template - NetVisor UNUM Configuration Console Messages - NetVisor UNUM Images
Once the installation and configuration is complete you login in to your new NetVisor UNUM instance via the console.

NetVisor UNUM Console Login
NetVisor UNUM Inband Connection and Configuration
Configuring the Management vSwitch as part of the ESXi installation process.
Note: Please take note of the physical connection(s) between ESXi and the connecting NetVisor UNUM switch.
General ESXi Configuration Steps
1.Create a vSwitch.
2.Create Port Group for inband network.
3.Add Uplink to the vSwitch.
Create the vSwitch
Select Networking and click in the Virtual Switches tab and click on Add standard virtual switch.
Enter the applicable name for the vswitch
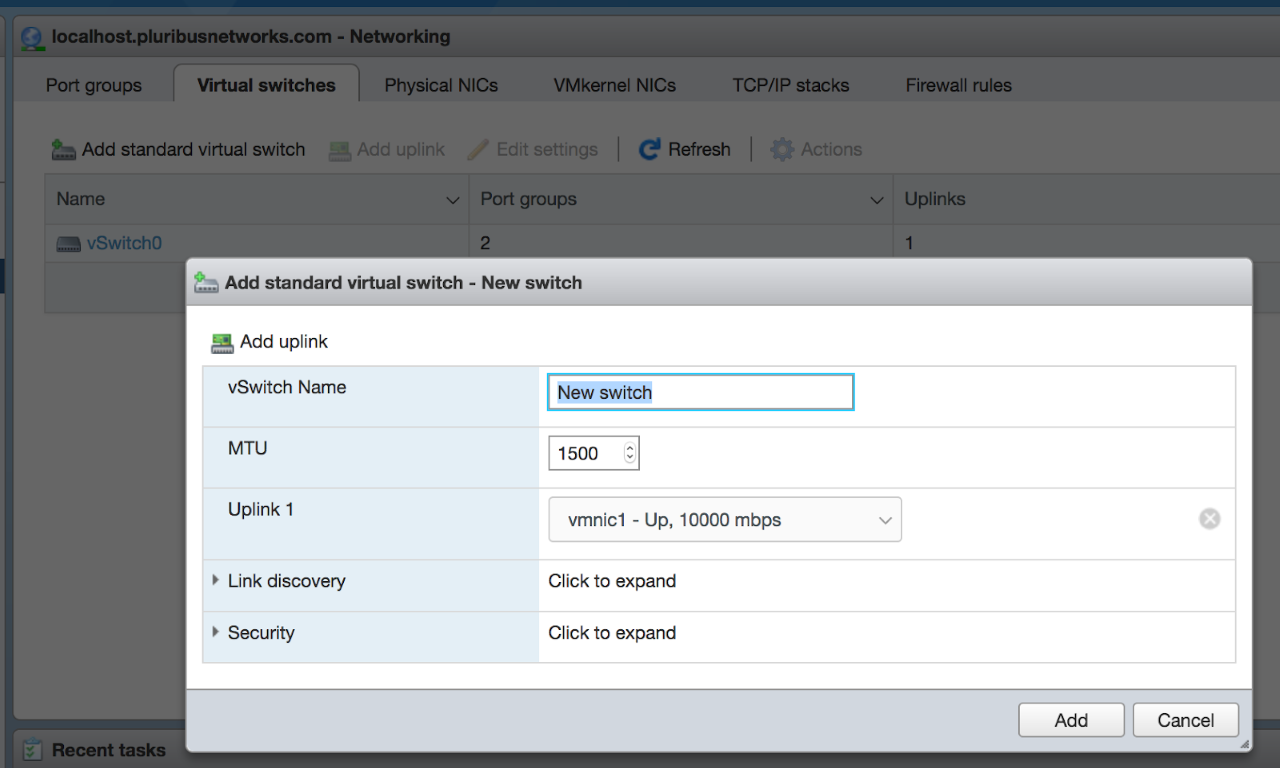
NetVisor UNUM ESXi vSwitch Name
Click on Security tab.
Set Promiscuous mode to Accept
Set MAC address changes to Accept
Click on Add button
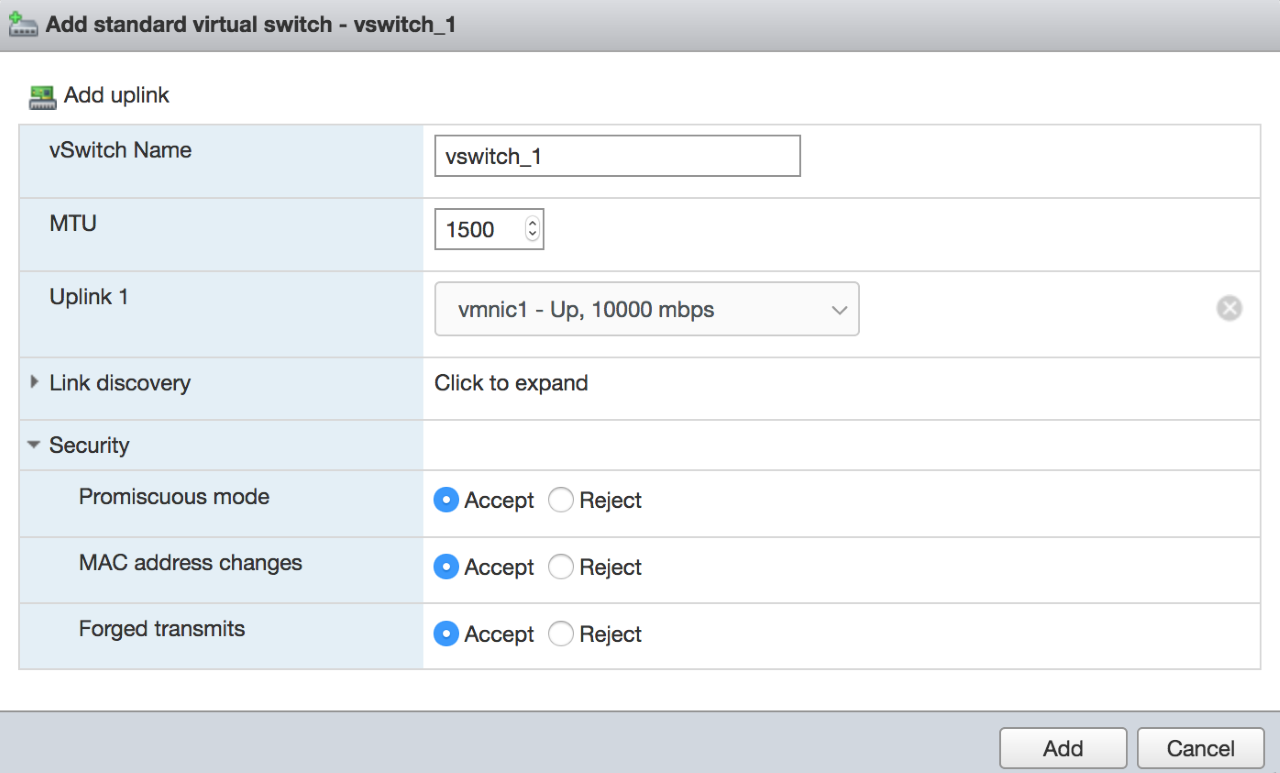
NetVisor UNUM ESXi Security Settings
The new vSwitch displays in the Virtual Switches interface accompanied by a success message.
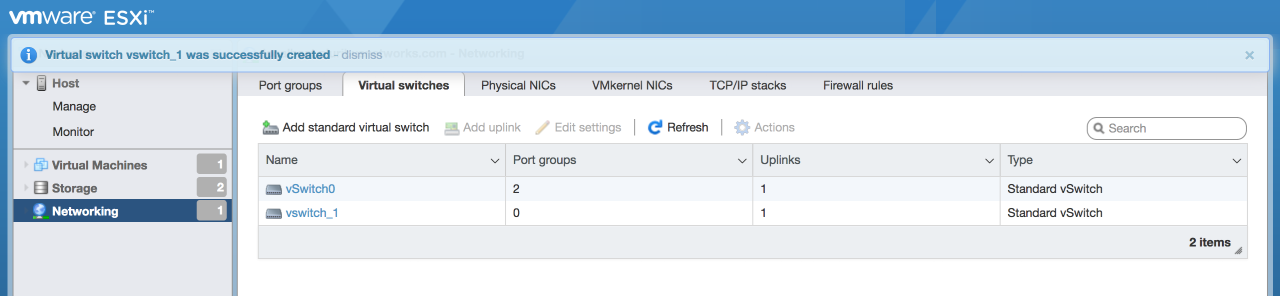
NetVisor UNUM ESXi vSwitch Added
Create a Port Group for Inband Network
Click on Port groups tab
Click on Add port group button
Enter a port group name.
Select an optional VLAN id
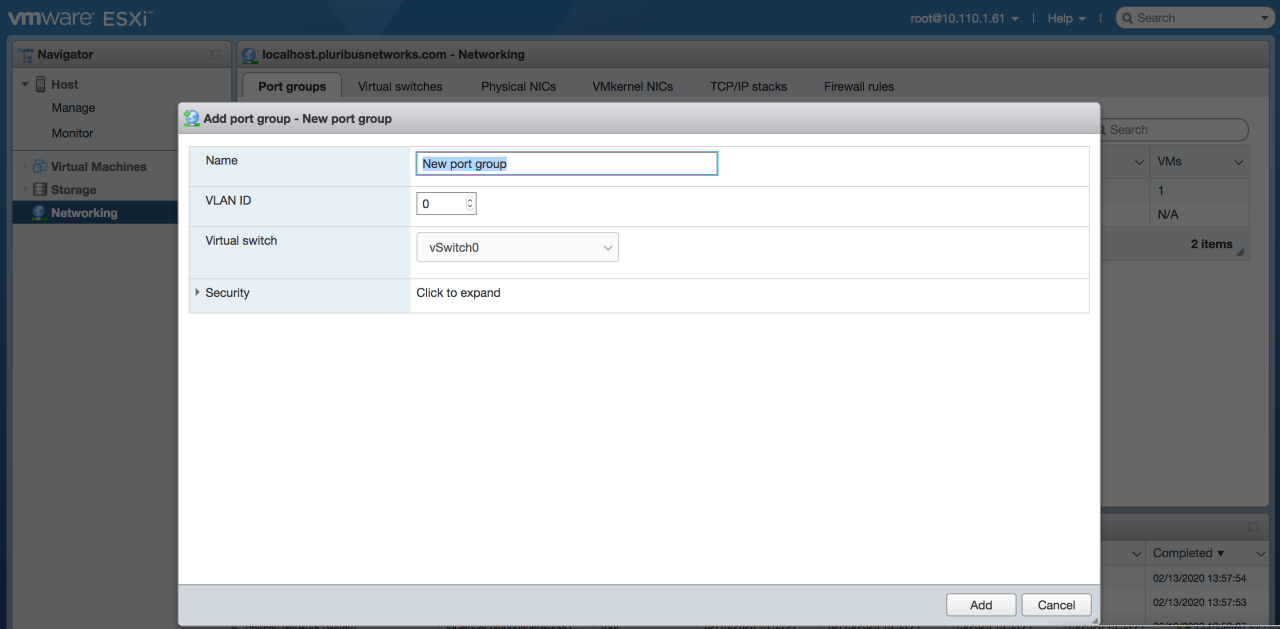
NetVisor UNUM ESXi Create Port Group
Select the vSwitch you created as Virtual switch for the port group.
Expand the Security settings.
Make sure that ALL port group settings are set to “Inherited from vSwitch”.
Click on Add button.
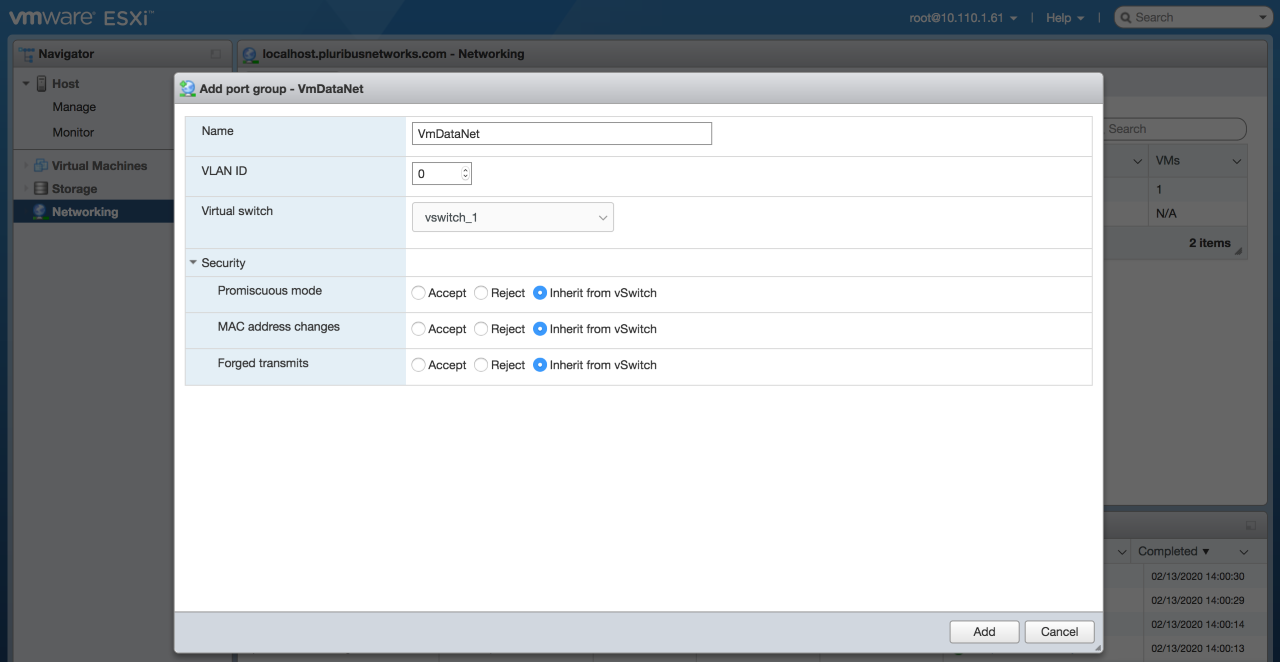
NetVisor UNUM ESXi Create Port Group Security Settings
The new Port Group displays in the Port groups interface accompanied by a success message.
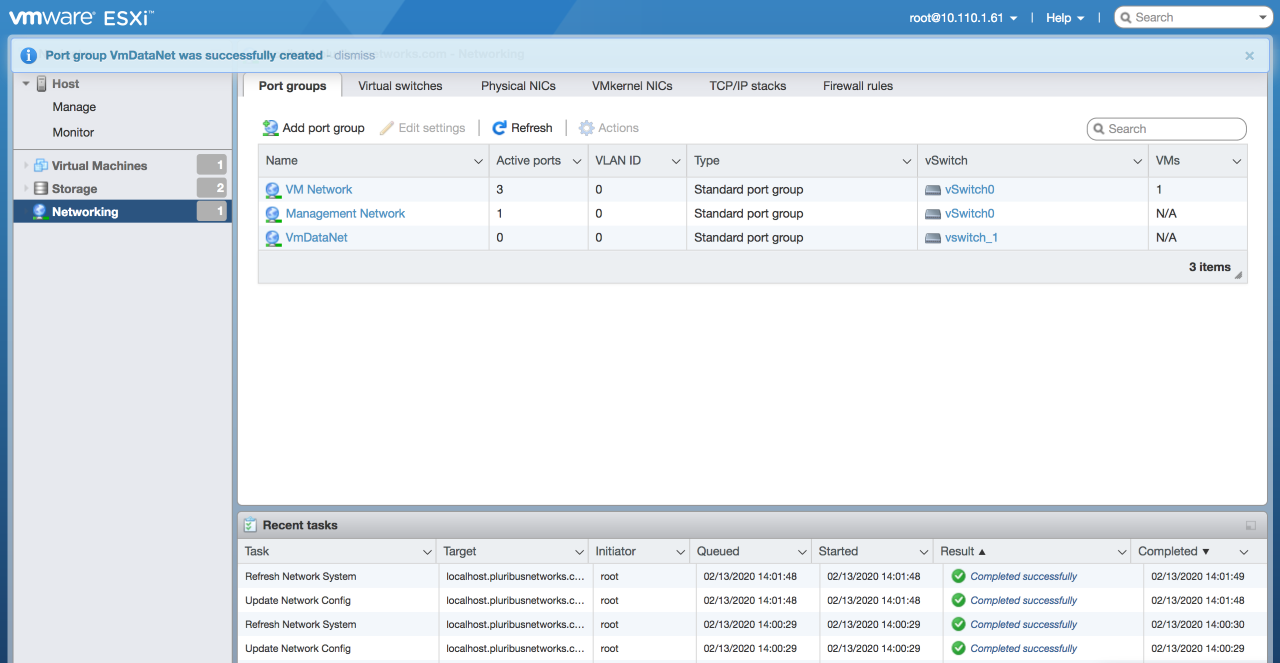
NetVisor UNUM ESXi Create Port Group Added
Adding an Uplink to the vSwitch
Navigate to the vSwitch tab and click on the newly created vSwitch (vswitch_1 in this example).
Click on the Add uplink button.
Set the uplink to the physical connection between the ESXi host and switch. As required, create multiple uplinks.
Click on Save button.
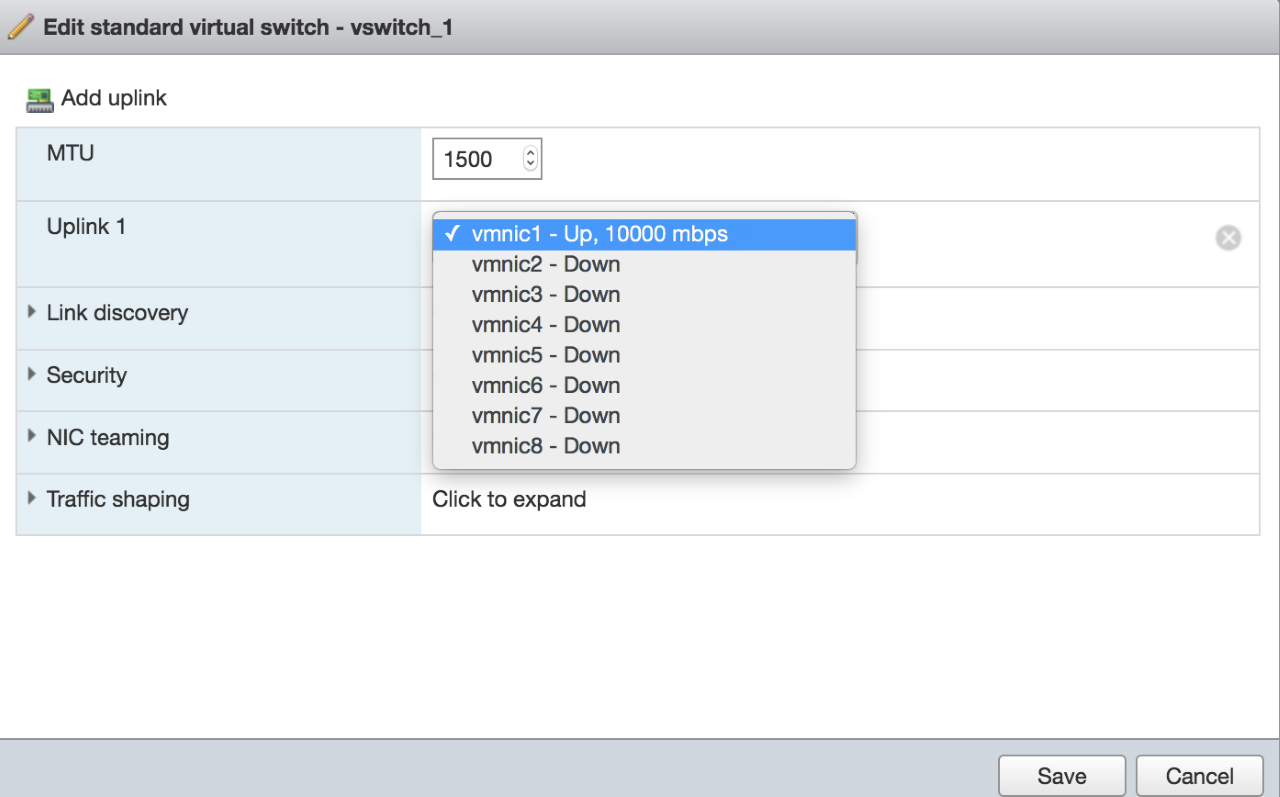
NetVisor UNUM ESXi Add Uplink
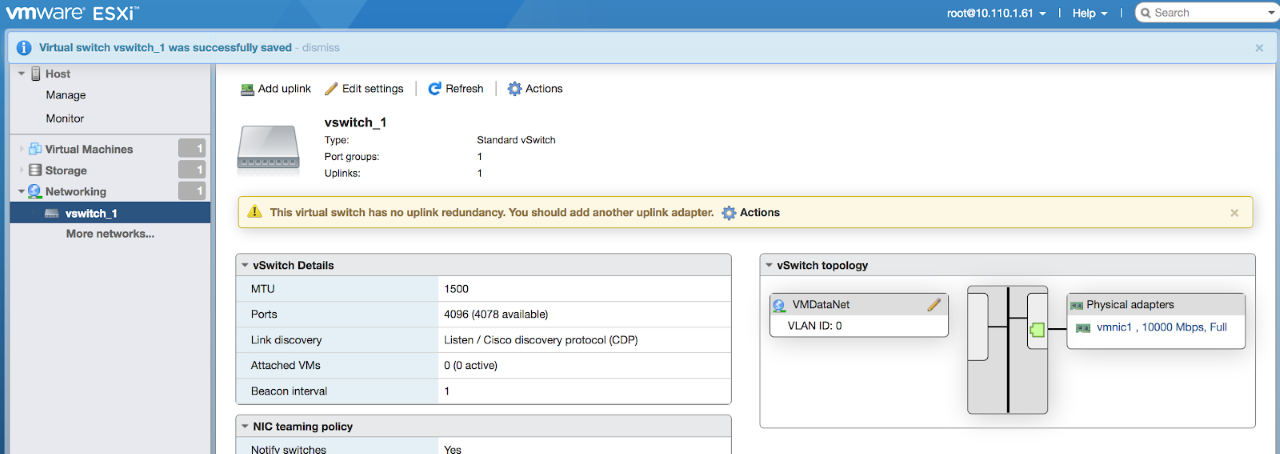
NetVisor UNUM ESXi Uplink Added
Switch Configuration
Verify that switch has a web-enabled on data interface using the admin-service-show command. Otherwise, enable:
CLI (network-admin@ureg-dlspine1) > admin-service-modify if data web
CLI (network-admin@ureg-dlspine1) > admin-service-show if data
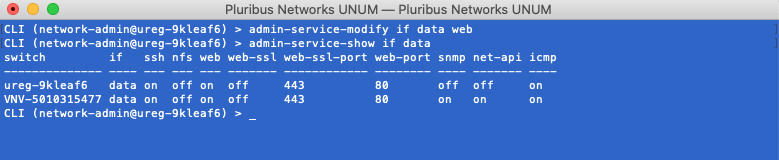
Switch Configuration
Note the Inband IP address of the switch using the switch-setup-show command.
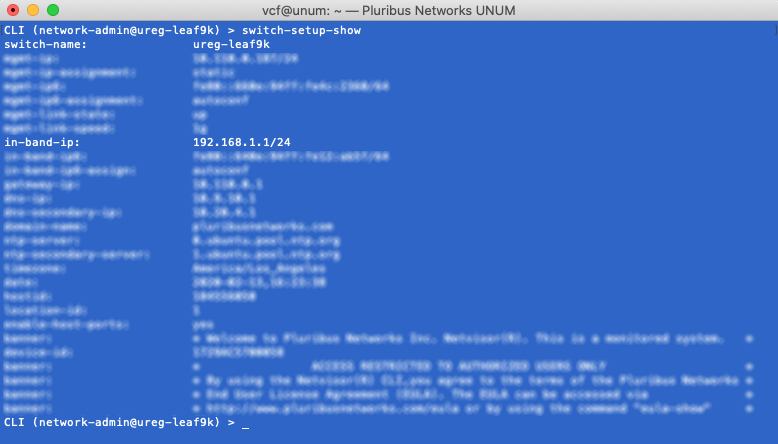
Switch Configuration Inband IP
NetVisor UNUM Configuration
General NetVisor UNUM Configuration Steps
1.Deploy NetVisor UNUM OVA. If already deployed, go to Assign Network Adapter 3; otherwise, review the deployment process here.
2.Assign Network Adapter 3.
3.Login to NetVisor UNUM.
4.Set up the IP address of Eth2.
5.Test the connection.
6.Add the Seed Switch.
Assign Network Adapter 3
Click on Edit Settings of the NetVisor UNUM VM
Set the Network Adapter 3 of the VM to the port group VmDataNet previously created in ESXi configuration.
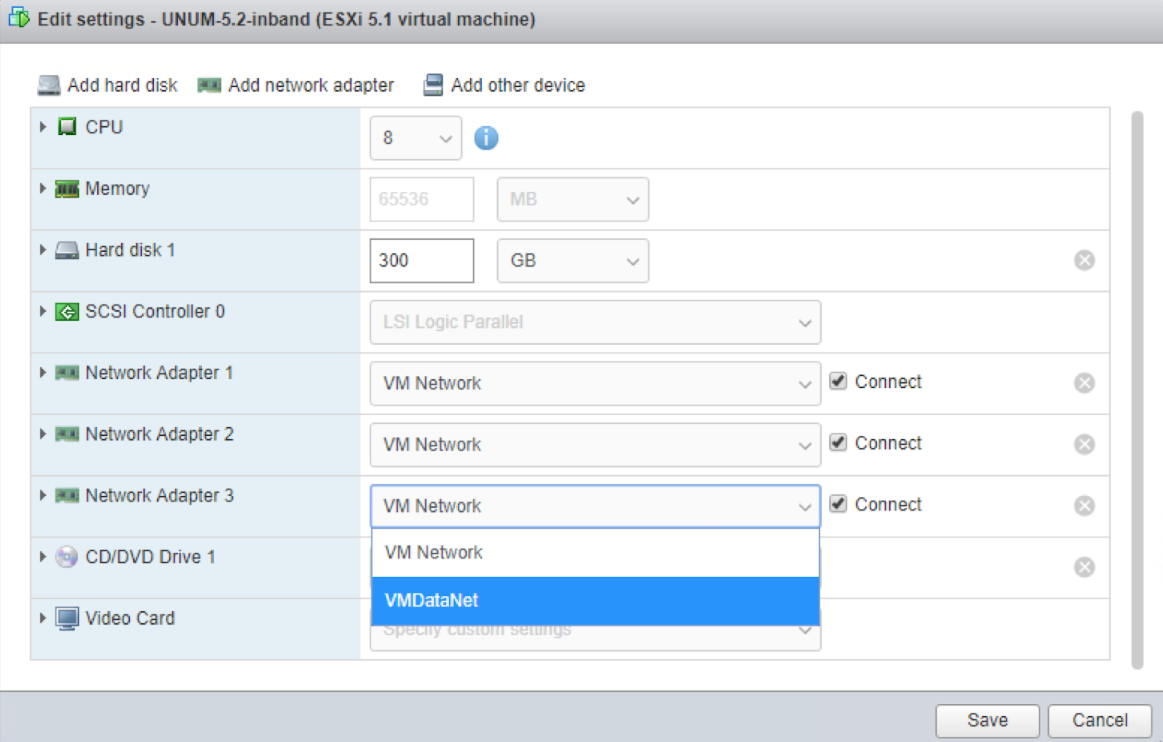
Network Adapter 3 Setup
Click Save.
Login to NetVisor UNUM
Refer to these detailed instructions on logging into the NetVisor UNUM VM and making network configuration changes.
Setting the IP Address of Eth2.
Set the IP address of eth2 using the configuration steps to an IP address in the same network range previously obtained from the inband setup.
In this example, the switch IP address is 192.168.1.1/24.

Network Adapter Eth2 Setup
Test the Connection
Check to make sure you can ping the inband IP address of the switch.
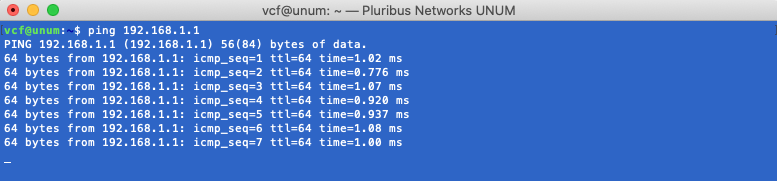
Switch Ping Test