
Network Connections
High Capacity Appliance Network Interface
After installation of the Arista NetVisor UNUM High Capacity Appliance, network activity must be setup as follows (please refer to the figure below for proper connections):
1.For proper operation the Arista NetVisor UNUM High Capacity Appliance requires a separate 1G or 10G switch for connectivity between eth1 on all Server nodes.
2.Connect your Management Network to Eth0 (1G or 10G) on Server node A. By default, Server node A (Host) is configured for DHCP. To set a static IP, see Appendix A.
3.It is required to connect Eth1 into an isolated 1G or 10G switch. Server nodes will communicate via Eth1, with the following IP Addresses:
a.172.16.250.150 - 172.16.250.162
4.Plug in redundant power connections with the provided cables ONLY and power up.
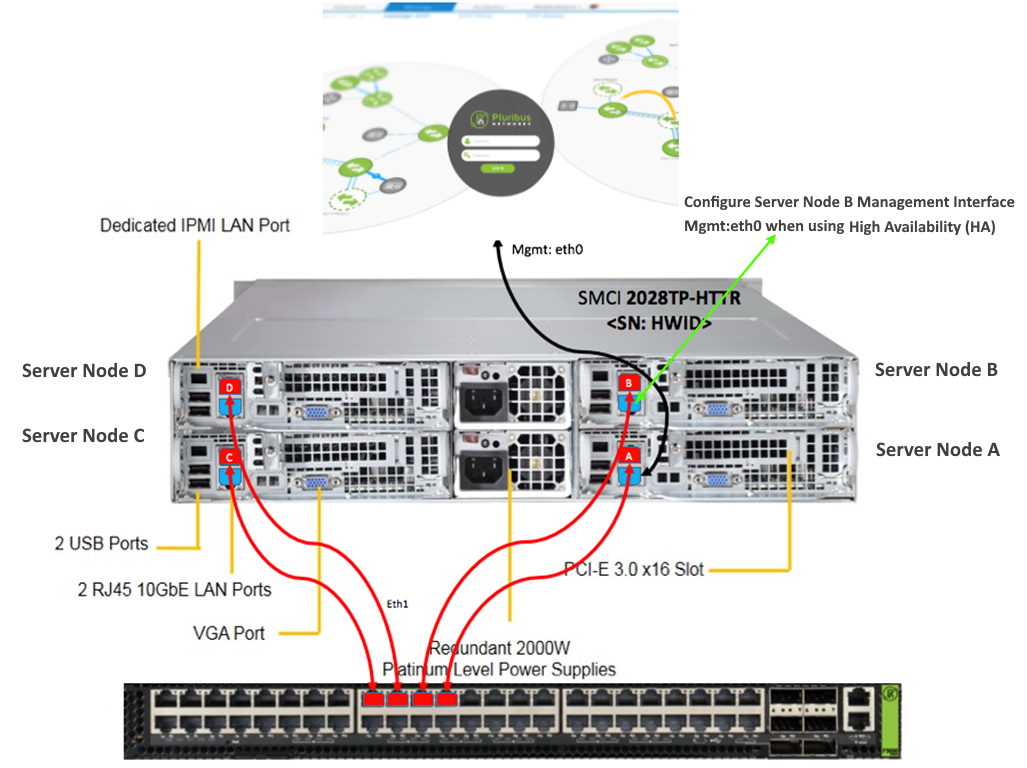
Network Connections
NOTE: Eth1 connections are not configured on a VLAN, please contact Arista Technical support if one of the following must occur:
|
•More than one Arista NetVisor UNUM High Capacity Appliance plugged into the same switch (by default, all appliances come with the same pre-configured Eth1 IP addresses), and each Appliance isolated in a separate and dedicated VLAN. |
|
•You want to change the default Eth1 IP Addresses of: 172.16.250.150 - 172.16.250.162. |
5.Connect VGA console and IPMI as desired. IPMI default configuration is DHCP.
6.USB connections are not advised.
7.The Arista NetVisor UNUM High Capacity Appliance, comes with the Arista NetVisor UNUM software pre-installed.
8.Upon boot up, by default Arista NetVisor UNUM will use DHCP to obtain a Management / eth0 IP address. If a Static IP is desired, see Appendix B.
9.It is highly recommended that the default root password of your Server nodes be changed from test123.
NOTE: It is required that all Server nodes have the same root password.
To change the root password of your Server nodes, you can do the following:
Log onto each Server node as root using the ESXi web client (or vSphere client if you have access):
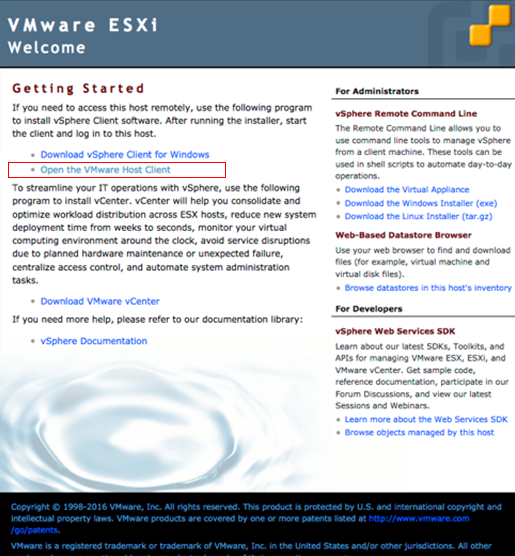
VMware Welcome Screen
Select “Change Password”

VMware Change Password Dashboard
Enter New Password:
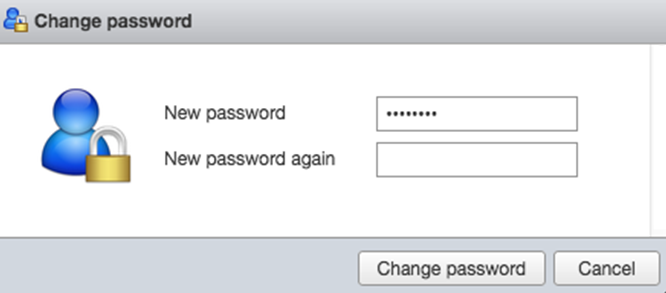
VMware Change Password
IMPORTANT: Repeat for each Server node, root passwords must be the same on each.
10.The Primary Server Node A, runs the Arista NetVisor UNUM Web Interface.
You can find the IP of your Arista NetVisor UNUM Primary VM via the ESXi web client (or vSphere client if you have access), log in with the your newly set root password:
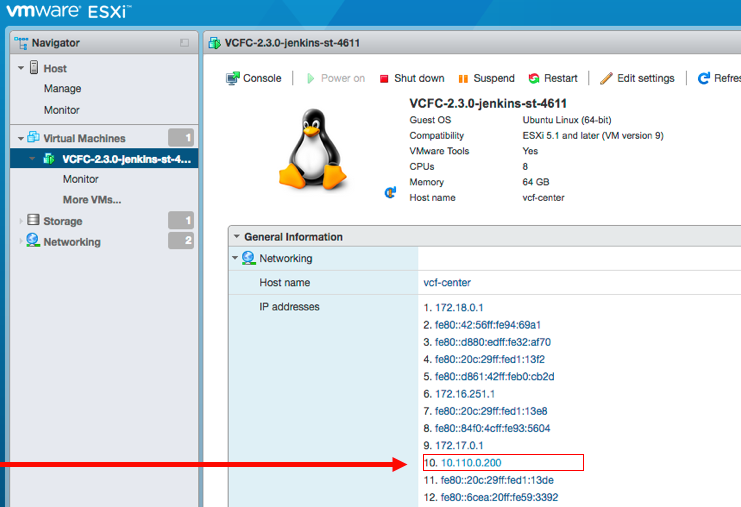
Arista NetVisor UNUM Primary VM
In the above example, you will see the IP from your DHCP server, in this case it is “10.x.x.x”, but the actual IP will depend on your DHCP configurations.
11.Once you obtain the IP of your Arista NetVisor UNUM, use a Chrome browser to connect for the best experience.
12.Please refer to the Arista NetVisor UNUM Installation & User’s Guide for SW configuration and current Release Notes for configuration and operating instructions:
a.These documents can be found at: https://www.pluribusnetworks.com/get-started/unum
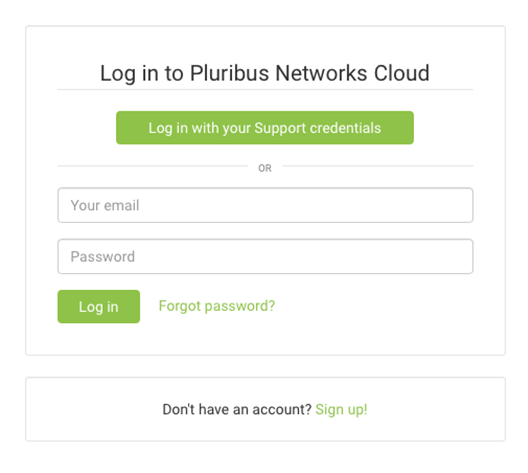
Pluribus Networks Cloud Login Screen
NOTE: All content of the Installation & User’s Guide is applicable to both the Arista NetVisor UNUM Standalone VM as well as the Arista NetVisor UNUM High Capacity Appliance unless otherwise noted. There is no need to download the OVA software as it comes pre-installed on the High-Capacity Appliance.
The software upgrade procedure is the same for both the Standalone VM/Appliance and the High Capacity Appliance.
If supported between two compatible versions, upgrade software can also be obtained from: https://www.pluribusnetworks.com/get-started/unum
