
Virtual Port Groups - Manage vPG
Fabric Layer 1 – Virtual Ports Groups - Manage vPG
There are features and functions used in UNUM Manager and UNUM Analytics that are common throughout the user interface (UI). Please refer to the Common Functions section for more information on the use of these functions and features.
Manage vPG
Please refer to the Packet Broker and VirtualWire sections for more information about vPGs.
Selecting Manager → Layer 1 → Virtual Port Groups → Manage vPG displays the Manage vPG dashboard with a list of any existing vPG entries.
Select the applicable Fabric from the left-hand navigation bar and the dashboard updates showing all vPG entries from all switches within the Fabric.
Note: If no entries exist a "No Data Exists" message is displayed. You must first configure an entry on a switch. Prerequisite settings and configuration may be required.
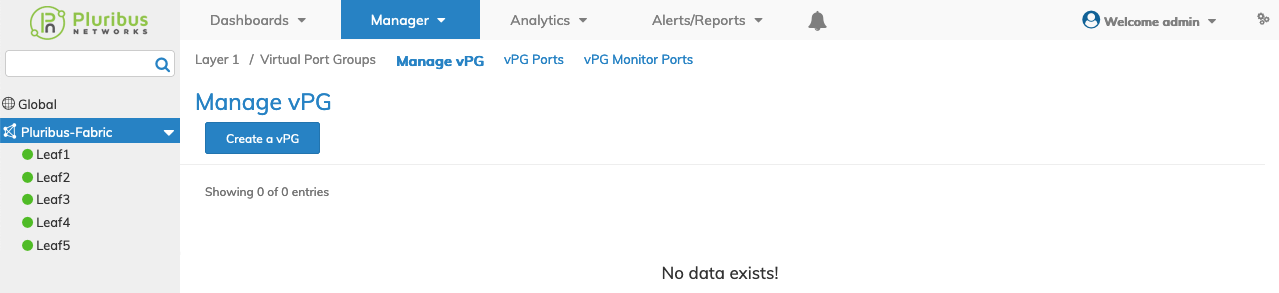
Manager Virtual Port Groups - Manage vPG - Fabric Dashboard - No vPGs
Create a vPG
Using Create a vPG, select a Switch from the drop-down list, enter the configuration parameters, which include:
•Switch – Select a Switch.
•Name – The name assigned to the Virtual Port Group.
•Type – The type of vPG, source, destination or from the drop-down list.
Assign additional fields as required by clicking on the ![]() icon.
icon.
Additional fields include:
•vNET Id – The vNET used for the vPG.
•Ports – The ports assigned to the vPG using the interactive port selector.
•Port Description – A description of the assigned ports.
•Monitor Ports – The monitor ports assigned to the vPG using the interactive port selector.
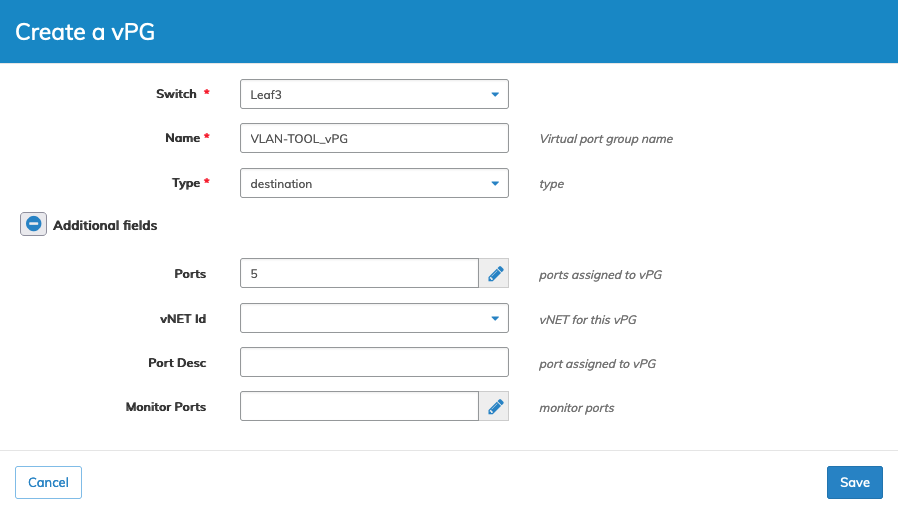
Manager Virtual Port Groups - Manage vPG - Create a vPG on a Switch
Click Save to continue or Cancel to return to the previous screen without making any changes. The dashboard updates with the new vPG.
Note: Manage vPG is a fabric-scope function, meaning the vPG is created on all switches. Port assignment can be limited to individual switches during the creation process.
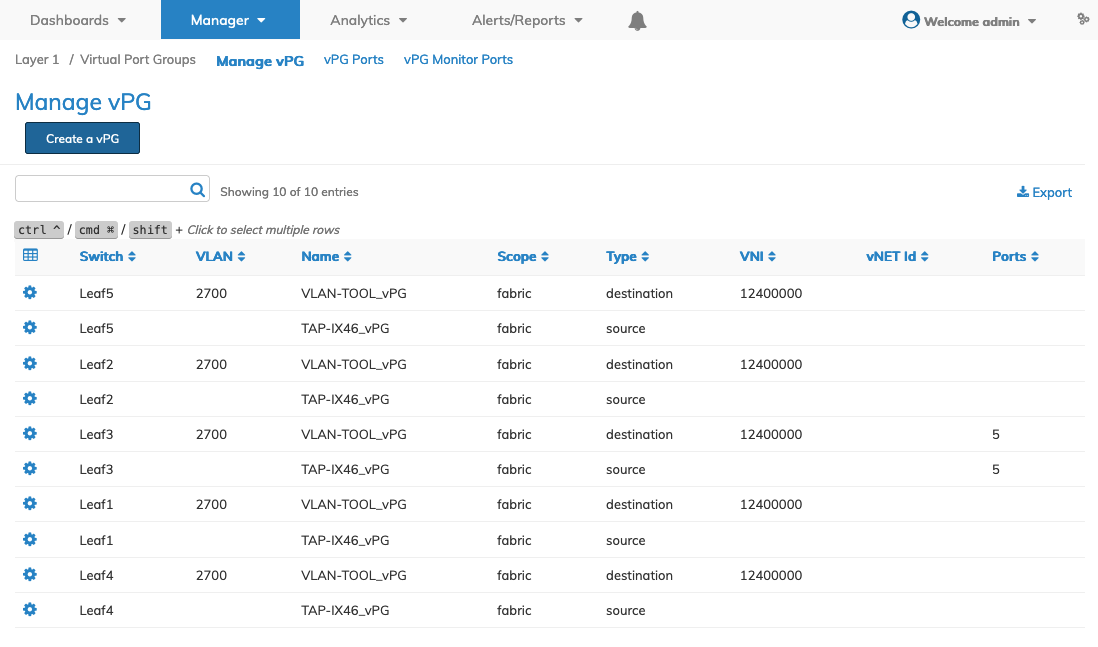
The dashboard displays a list of existing vPG entries by Fabric.
Additional parameters include: Switch, Name, Scope, Type, VNI, VLAN, vNET Id, and Ports.
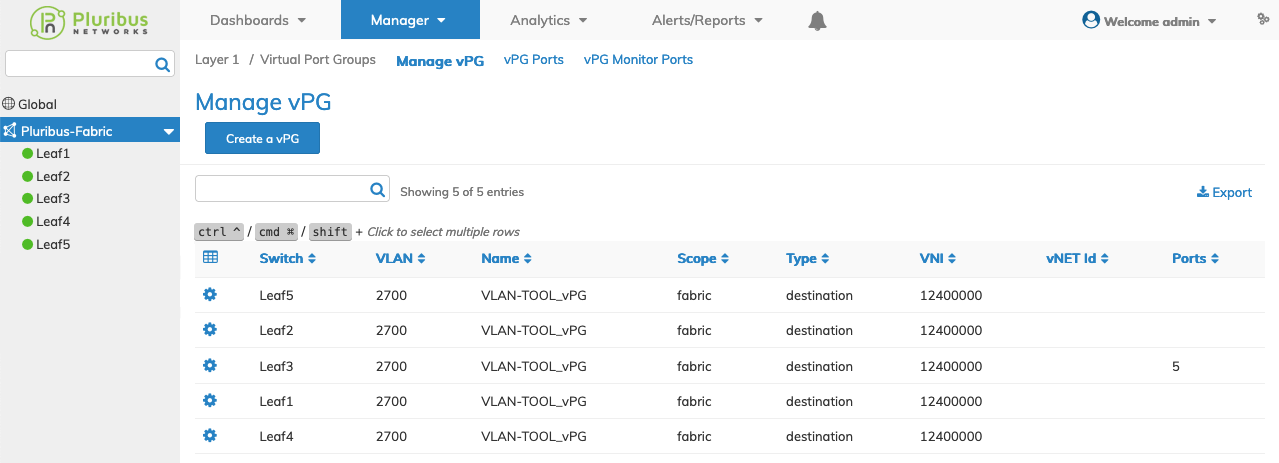
Manager Virtual Port Groups - Manage vPG - Fabric Dashboard
Select the applicable switch from the fabric and the dashboard updates automatically with the switch vPG entries.
The dashboard displays a list of existing vPG entries by Name.
Additional parameters include: Name, Scope, Type, VNI, VLAN, vNET Id, and Ports.
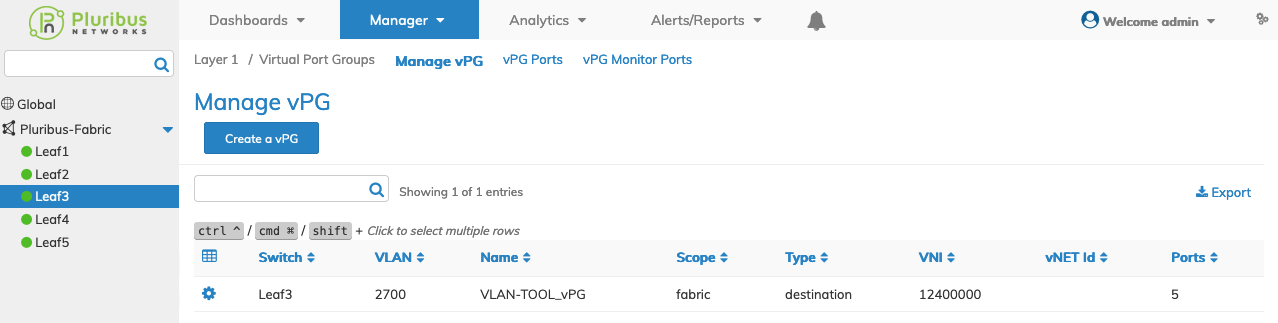
Manager Virtual Port Groups - Manage vPG - Switch Dashboard
Select Dashboard → Packet Broker → Trigger Discovery to discover the vPGs.
The vPG appears in the topology and Port Groups details pane.
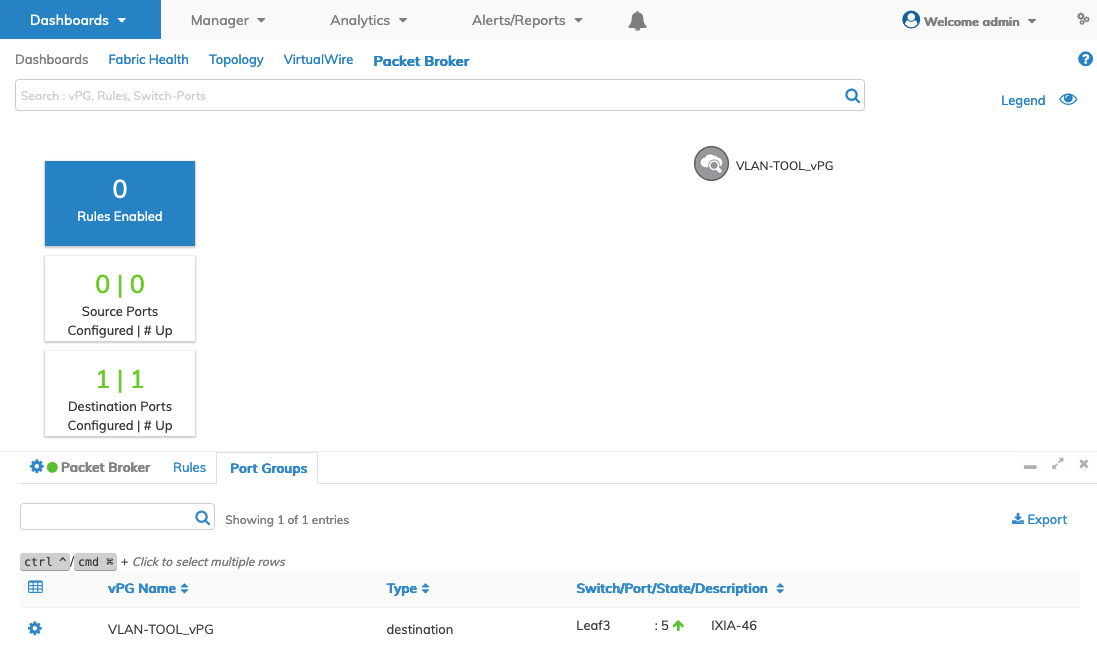
Manager Virtual Port Groups - Manage vPG - Packet Broker Dashboard
Continue to add vPGs, as required.
Manager Virtual Port Groups - Manage vPG -Manage vPG Dashboard - Additional vPGs
Select Dashboard → Packet Broker → Trigger Discovery each time to discover the vPGs.
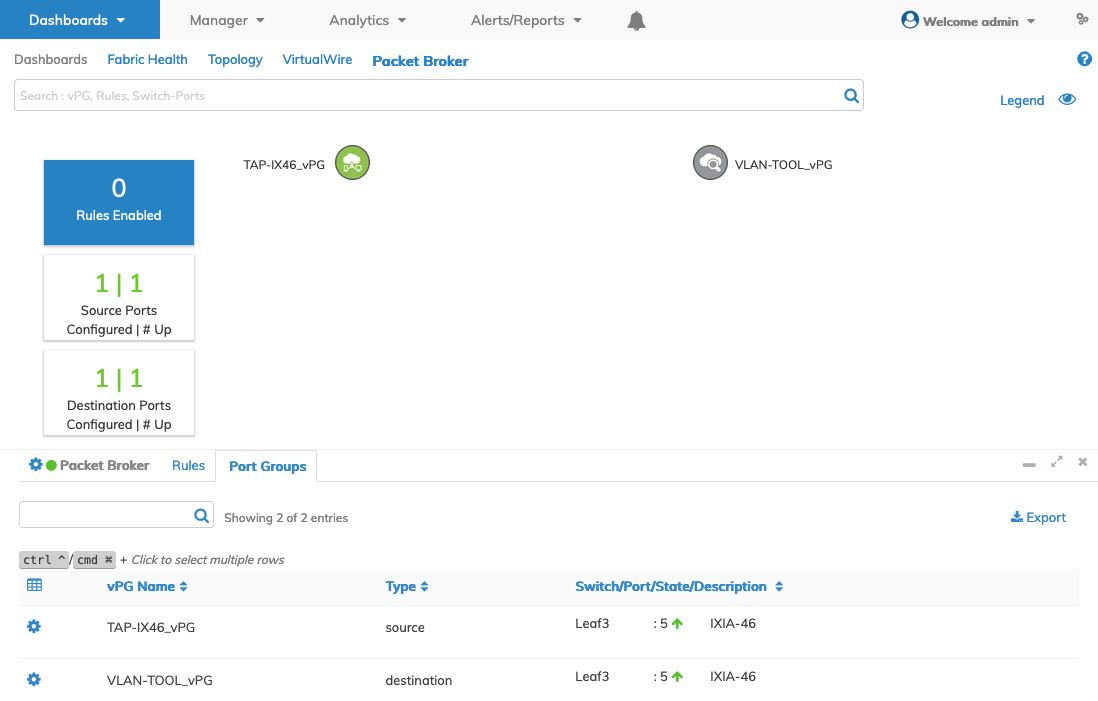
Manager Virtual Port Groups - Manage vPG - Packet Broker Dashboard - Additional vPGs
Note: A vPG displayed in the Manage vPG dashboard may appear on either the Packet Broker or VirtualWire dashboard depending on which function originally created the vPG. A bi-directional vPG appears on the VirtualWire dashboard while source and destination vPGs appear in the Packet Broker dashboard. After creating a bi-directional vPG, use Manage vFlow to manually create a vFlow to display the bi-directional vPG in the VirtualWire dashboard.
Bi-directional vPG
The following is an example of a bi-directional vPG created in Manage vPG, and a vFlow created in Manage vFlow and then displayed on the VirtualWire dashboard.
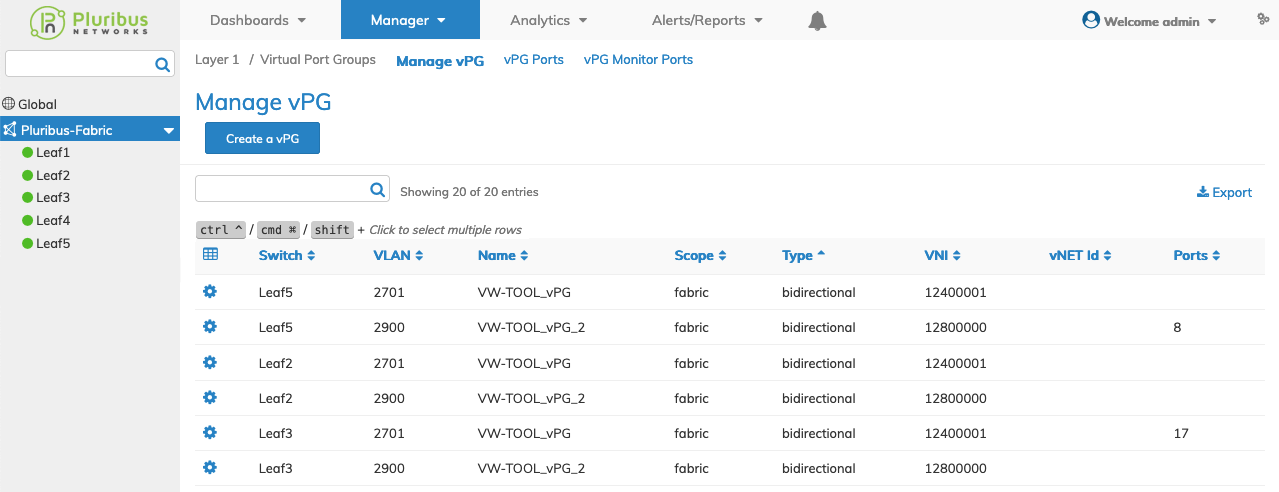
Manager Virtual Port Groups - Manage vPG -Manage vPG Dashboard - Bi-directional vPGs
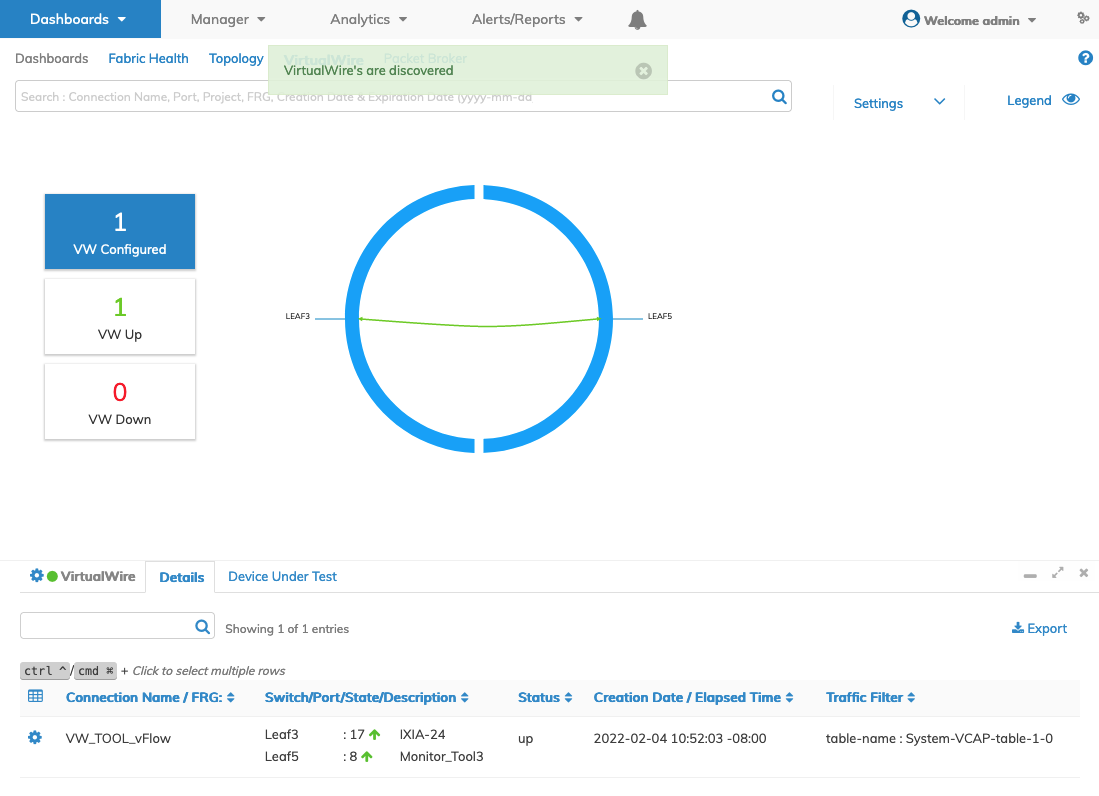
Manager Virtual Port Groups - Manage vPG - VirtualWire Dashboard - vFlow
Note: Destination and Bi-directional vPGs require the use of a vxlan-loopback-trunk. Please ensure ports are added to to the applicable trunks as shown in the example image below. To add a port to a trunk use the Manager Layer 2 LACP Trunks feature.
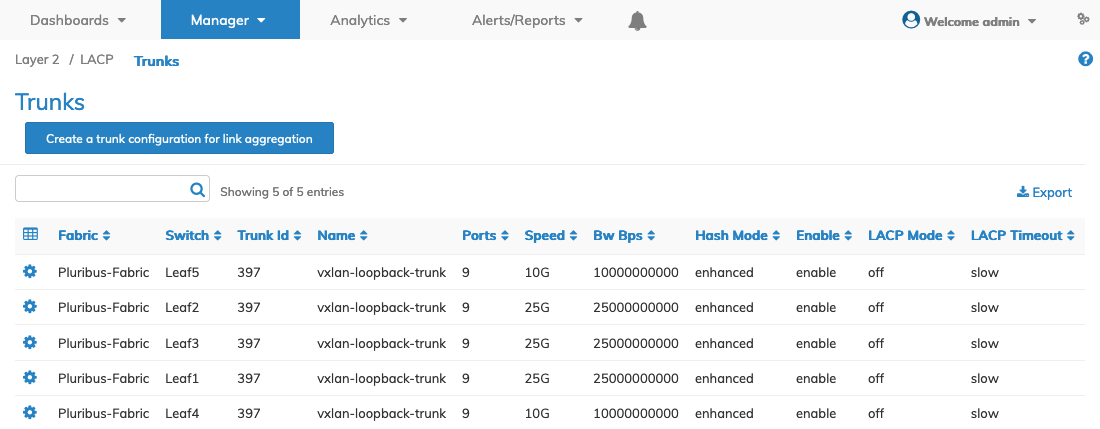
Manager Virtual Port Groups - Manage vPG - Trunks - vxlan-loopback-trunk
Delete Multiple vPGs
Highlight multiple rows using the ![]() feature.
feature.
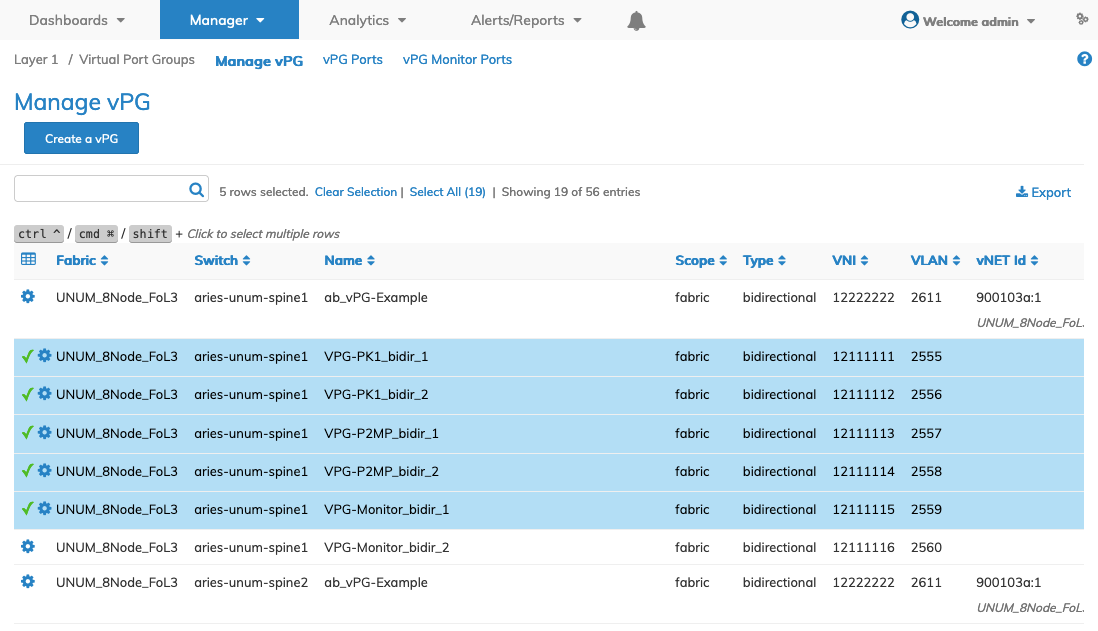
Manager Virtual Port Groups - Manage vPG - Multi-Select Rows
Delete the entries using the Delete function by selecting the Cog ![]() icon.
icon.
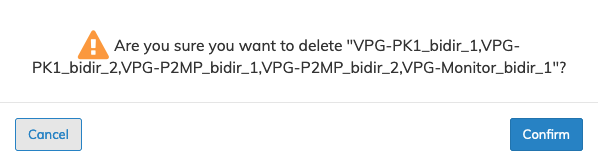
Manager Virtual Port Groups - Manage vPG - Multi-Delete
A confirmation message requires an acknowledgment to continue deletion. Click Confirm to continue or Cancel to return to the previous screen without making any changes.
Delete vPG
Delete an entry using the Delete function by selecting the Cog ![]() icon.
icon.

Manager Virtual Port Groups - Manage vPG - Delete
A confirmation message requires an acknowledgment to continue deletion. Click Confirm to continue or Cancel to return to the previous screen without making any changes.