
ZTP Switch
ZTP Switch
There are features and functions used in UNUM Manager and UNUM Analytics that are common throughout the user interface (UI). Please refer to the Common Functions section for more information on the use of these functions and features.
Selecting Manager → ZTP → ZTP Switch displays the ZTP Switch configuration dashboard.
ZTP Switch provides you with a method to configure bare metal switches in a convenient manner.
Note: Zero Touch Switch Provisioning (ZTP) uses a DHCP server built into the UNUM platform. Before powering on switches to be provisioned, we recommend temporarily disabling any current DHCP server in the management subnet until completing the switch provisioning process. If this is not possible, users could wait until they are ready to initiate the provisioning process to power on the switches. Configuration parameters used in the following screenshots are examples only and may not reflect the parameter information needed to complete your provisioning process.
The ZTP Switch workflow comprises:
1.Selecting or uploading a Netvisor ONE ONIE software installer.
2.Entering the switch information.
3.Provisioning the switch(es).
4.Monitoring the switch provisioning process.
5.Generating a hostfile, if applicable.
6.Confirming each switch is activated and listed in PN Cloud Activated Assets.
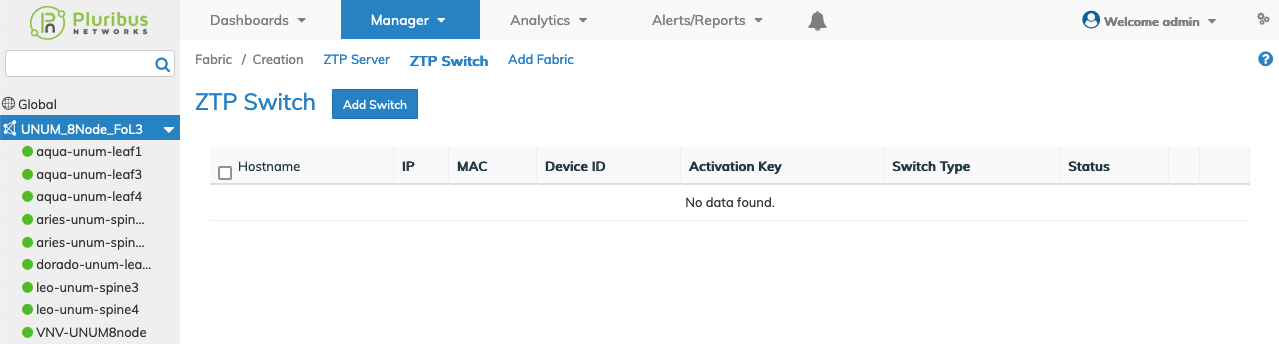
ZTP Switch Dashboard
To add a new Switch click Add Switch.
Available Software (ONIE) Installers are displayed in the dashboard under Software Version. You must select a Software Version to proceed with adding a Switch.
Select an ONIE image from the list of available images or upload a different image from your computer.
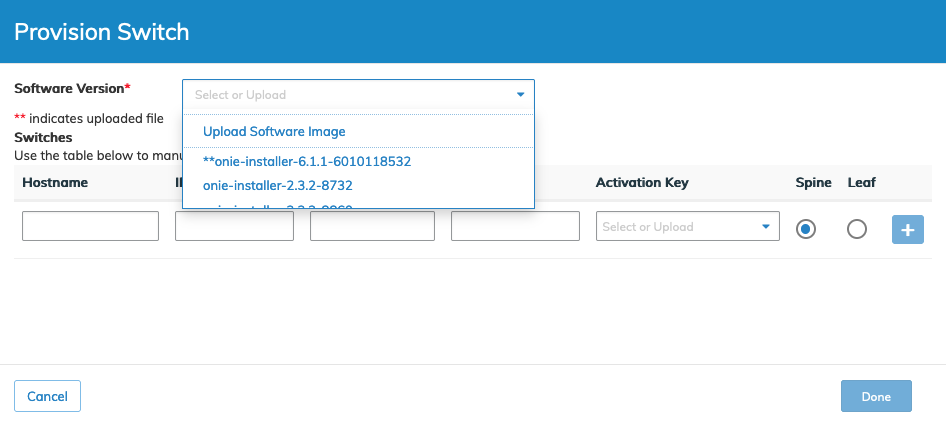
ZTP Switch ONIE Installers
Note: ** indicates uploaded file - Example: onie-installer-6.1.1-6010118532 was previously uploaded as shown in the image above.
Enter the requisite switch detail information which includes: Hostname, IP Address, MAC Address, Device ID / Service Tag
•Hostname – This will become the hostname of the switch.
•IP – The assigned IP Address from the DHCP pool.
•MAC Address – MAC Address. You retrieve this information from your order receipt or from the back of the target Switch or on the shipping container label.
•Device ID / Service Tag – Device ID. You retrieve this information from your order receipt, the sticker on the Switch or via the onie-syseeprom command from the ONIE prompt by using a Console session to login to the target Switch.
•Activation Key – Select appropriate license from drop-down list or upload a license key previously obtained from the Pluribus Networks Cloud.
•Spine / Leaf – Specify the role of the switch in the fabric.
Note: You must obtain the requisite license from the Pluribus Networks Cloud.
When the required information is entered click ![]() to provision another switch.
to provision another switch.
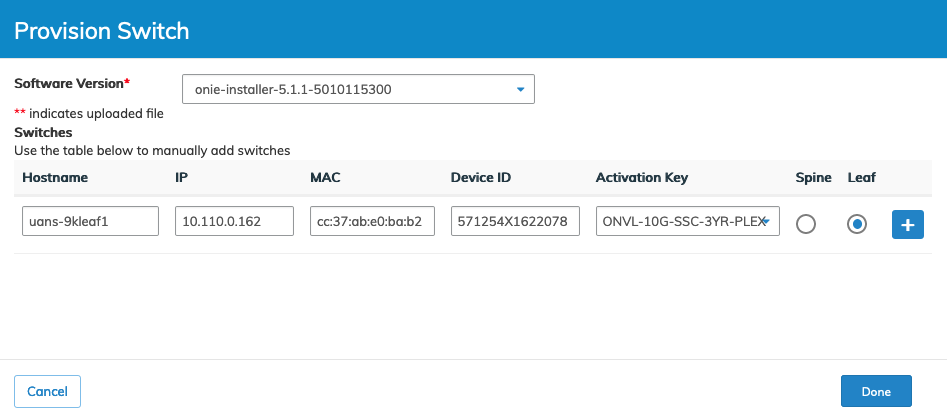
ZTP Switch - Provision Switch
If no other switches are to be provisioned click Done to proceed with provisioning and Power On the switches.
Click Cancel to return to the previous screen if you do not want to continue with provisioning the switches.
A message appears confirming the hosts are added successfully.
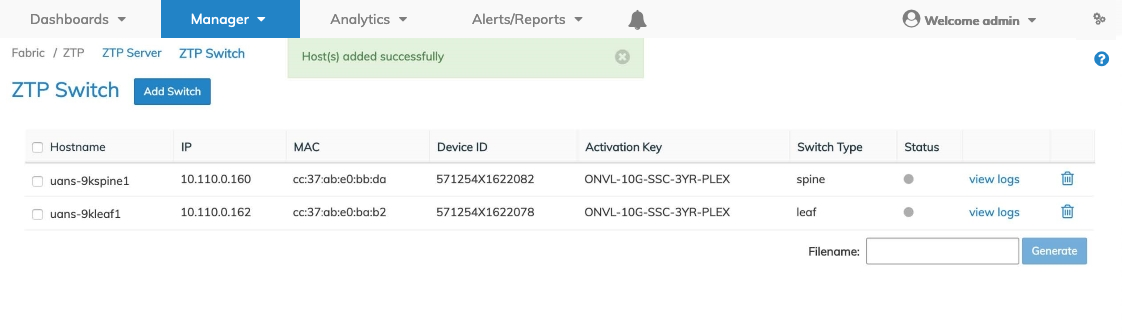
ZTP Switch - Provision Switch - Hosts Added
Provisioning begins as indicated by the rotating provisioning icon in the dashboard. To monitor the provisioning status click View Logs.
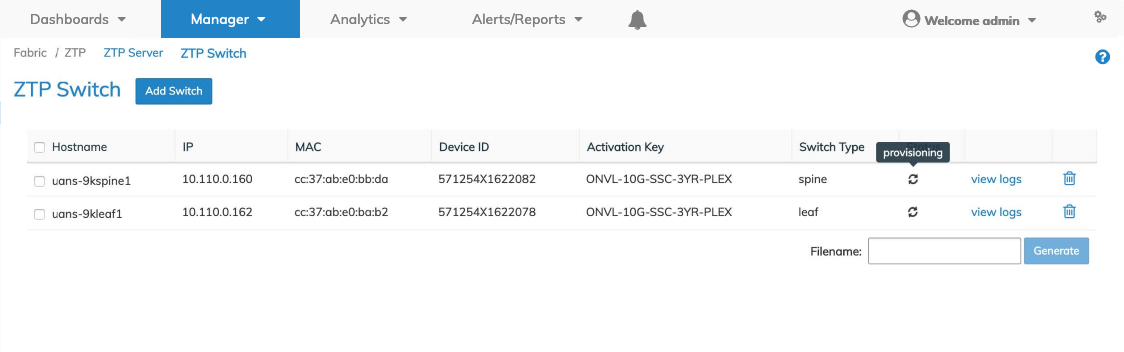
ZTP Switch - Provisioning Switch
View Logs
Individual Switch Logs are available for review.
Click View Logs for the applicable Switch from the dashboard.
A Host "switch_name" log is generated and displayed.
You scroll through the log entries to view the entire log.
The log window expands to provide a better view of the data. Click X to close the window and return to the ZTP Switch dashboard.

ZTP Switch - Provisioning Logs
Once the switches are provisioned, the status indicator turns green and a provisioned message appears.
The Status light indicates the following:
|
Red |
ONIE provision error (red). |
|
Grey |
ONIE provision not started. Device is offline or the IP is unreachable (grey). |
|
Green |
ONIE provision successful (green). |
|
Spinner |
ONIE provision "in progress". |
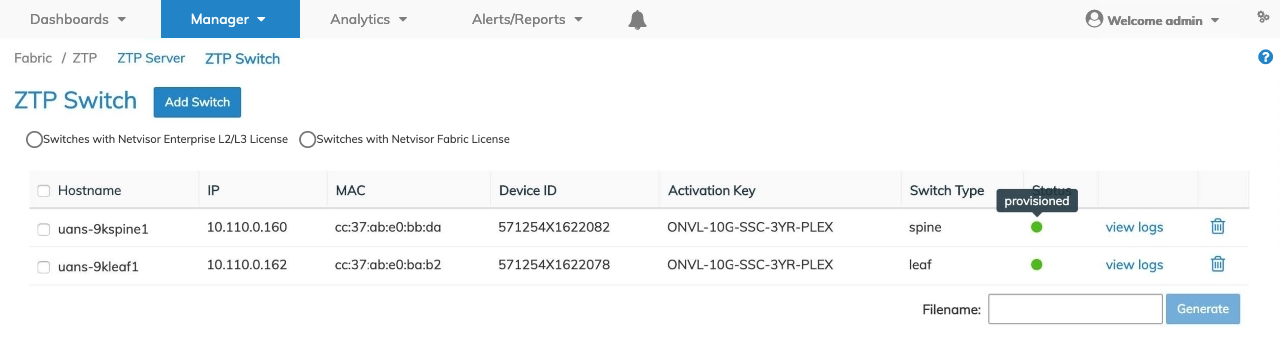
ZTP Switch - Provisioned Dashboard
Generate Hostfile
You generate host files specific to switches based on the license type purchased by selecting:
Switches with Netvisor Fabric License
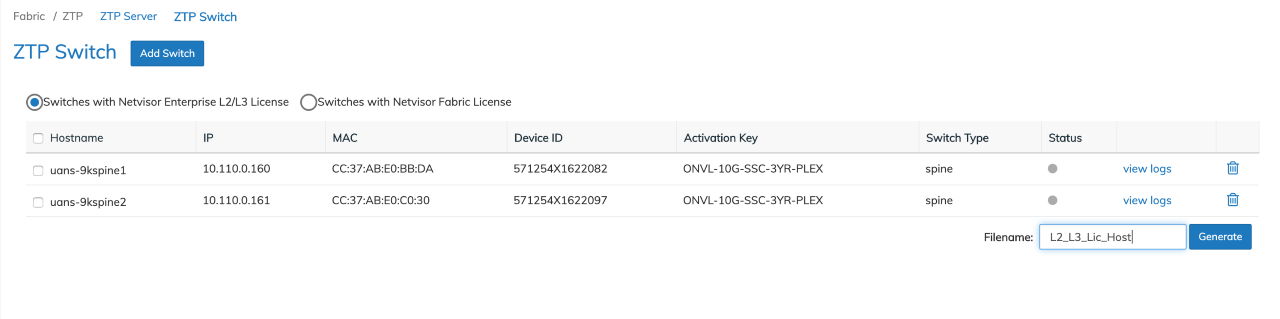
ZTP Switch - Provisioned Dashboard - Generate Hostfile - Switches with Netvisor L2/L3 License
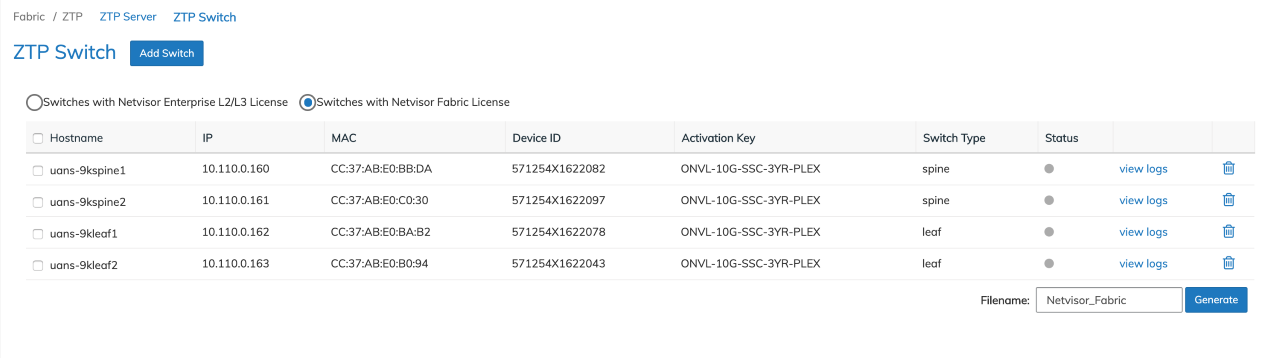
ZTP Switch - Provisioned Dashboard - Generate Hostfile - Switches with Netvisor Fabric License
Enter a file name for the host file and click Generate. A new host file is generated and available for use.
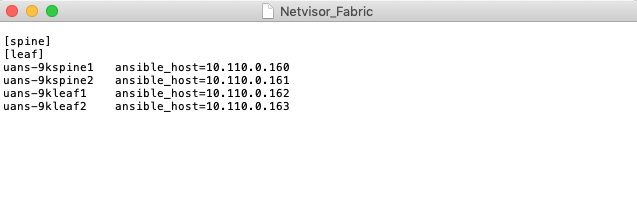
ZTP Hostfile Generation - Generated Host File - Example
Refer to Add Switches with Netvisor Fabric License section for actual use of the generated host file.
To delete a switch entry click on the Trash Bin ![]() icon. A Confirm Delete dialog window appears with detailed instructions on how to complete the deletion.
icon. A Confirm Delete dialog window appears with detailed instructions on how to complete the deletion.
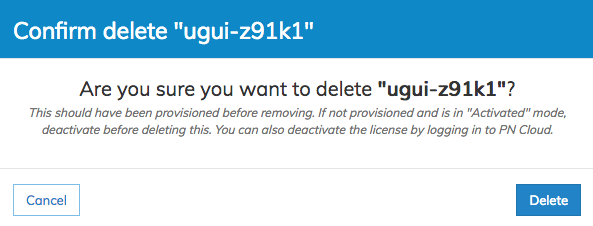
ZTP Switch - Provision Switch Dashboard - Delete Switch Example
Click Delete to continue or click Cancel to return to the previous screen without making any changes.
Note: You may download software directly from the Pluribus Networks Cloud. Instructions to access the Pluribus Networks Cloud (cloud.pluribusnetworks.com) are provided after the purchase of a UNUM license. A username and password are required to allow downloading of software. If you do not have credentials for the Pluribus Customer Support Portal, please register your product and you will receive your username and password in 1-business day.
Product Registration - http://www.pluribusnetworks.com/support/product-registration/