Add Switches with Netvisor Fabric License
Add Switches with Netvisor Fabric License
There are features and functions used in Arista NetVisor UNUM and Insight Analytics that are common throughout the user interface (UI). Please refer to the Common Functions section for more information on the use of these functions and features.
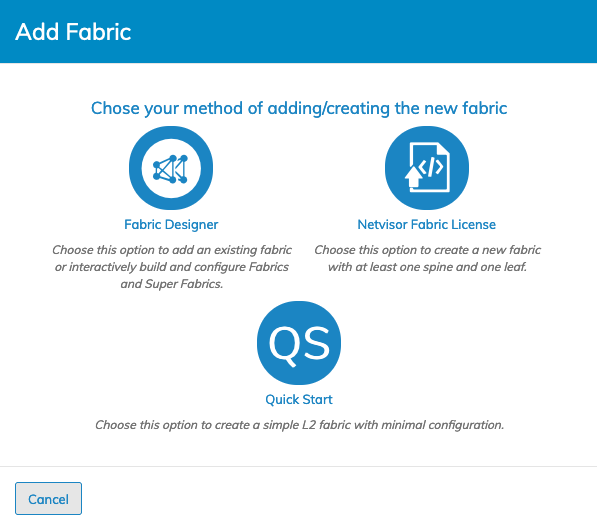
Choose the Netvisor Fabric License option if you wish to create a new fabric on switches that were added to NetVisor UNUM through the ZTP/ONIE process or were provisioned with NetVisor OS and had their management IP address set up manually.
After clicking Add from the Global Dashboard, click the Switches with Netvisor Fabric License icon and enter the required parameter to create a new Fabric.
NetVisor UNUM Platform Global - Add Fabric using Switches with Netvisor Fabric License
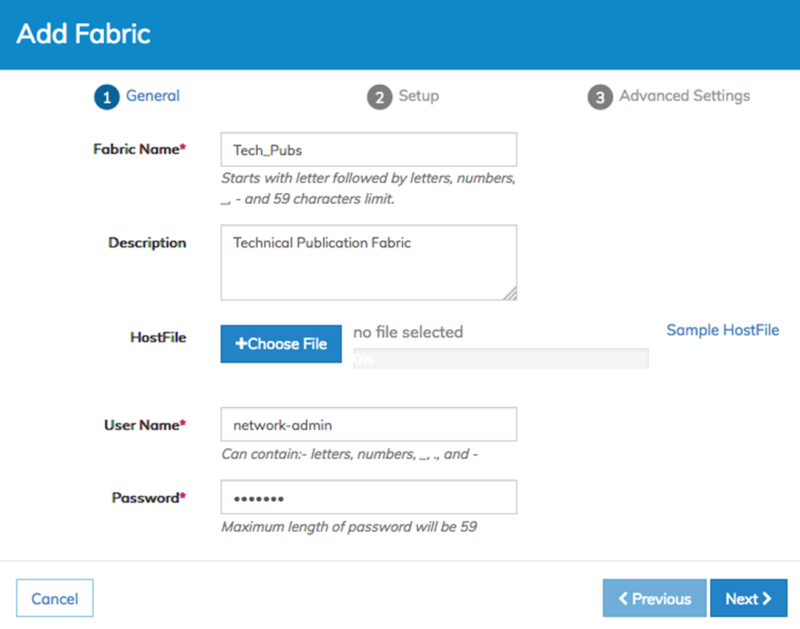
Step 1 General
Enter a Fabric Name for the new Fabric. The name begins with a letter followed by letters or numbers. The name cannot contain any spaces.
Use an underscore, as required.
Enter a description of the Fabric (optional) and click the Host File button to select the appropriate file containing the data which is used to create the Fabric.
A sample Host File is available by clicking the Sample Host File link. You use the host file generated in the ZTP Hostfile section to simplify the configuration process avoiding manual entry.
The use of a host file is optional. Enter a User Name and Password for the Fabric.
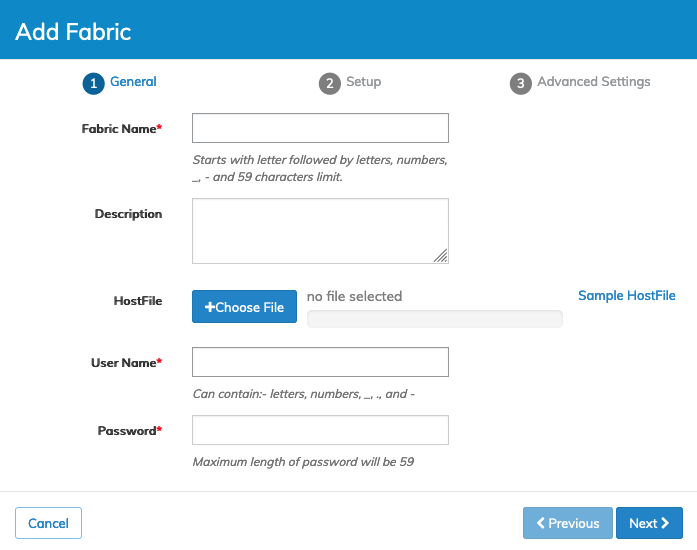
NetVisor UNUM Platform Global - Add Fabric using Switches with Netvisor Fabric License - Step 1
In the event you do not want to use a host file to configure the Fabric, enter a User Name and Password.
Note: User Name is “network-admin” or any “Netvisor user”.
No other User Names are allowed.
If you use any other names you may receive the following error message which will require you to re-do the configuration:
Fabric - Playbook Execution Failed - Authentication or permission failure.
Click Next to continue and refer to the Step 2 Setup section of this manual.
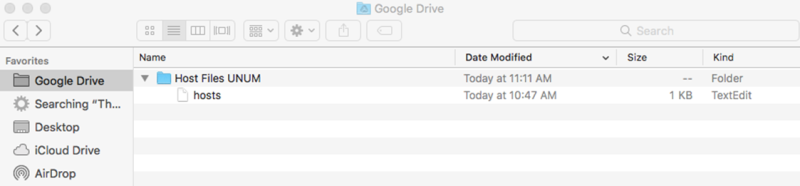
NetVisor UNUM Platform Global - Add Fabric Host File Directory
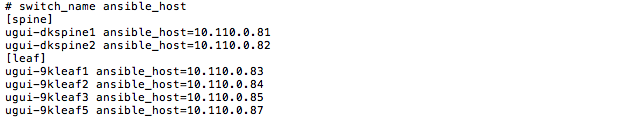
Sample Host File
Follow the instructions contained in the sample Host File and edit the required fields using your switch information.
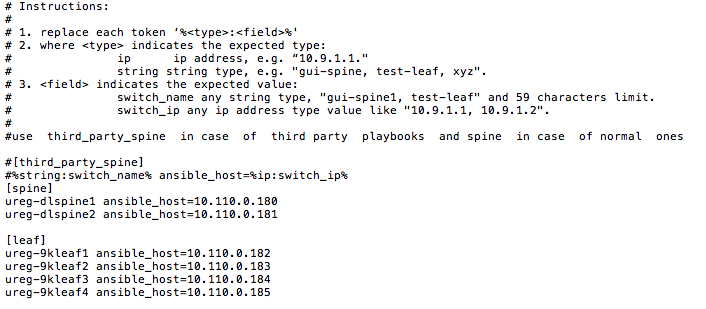
NetVisor UNUM Platform Global - Add Fabric Host File Sample
Save the host file to a convenient location and then upload by clicking the Host File button selecting the new host file containing the switch data.
Parsing the file will occur automatically and the system will return a COMPLETED message and a GREEN status bar in the event of a successful upload.
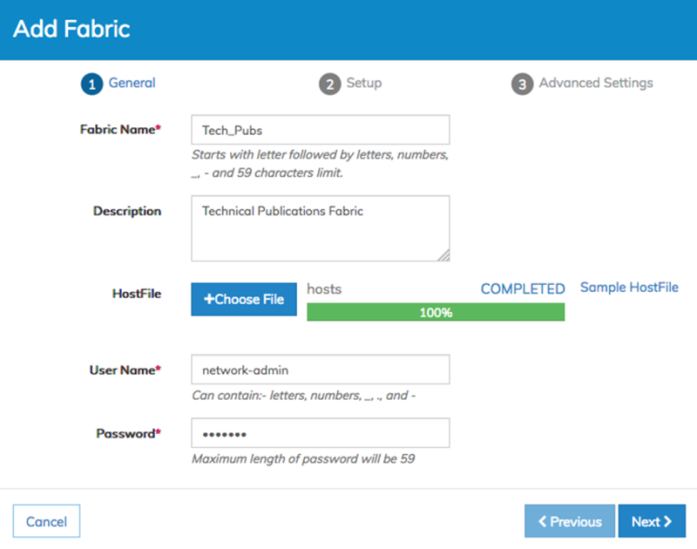
NetVisor UNUM Platform Global - Add Fabric Successful Host File Upload - Step 1 Populated
Click Next to continue.
If there is a problem with an entry in the host file, the system will return a ZTP (Zero Touch Provisioning) error message detailing the specifics of the failure.
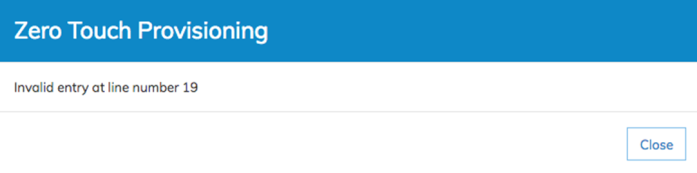
NetVisor UNUM Platform Global - Zero Touch Provisioning Error
The system will return a FAILED message and a RED status bar in the event of a successful upload.
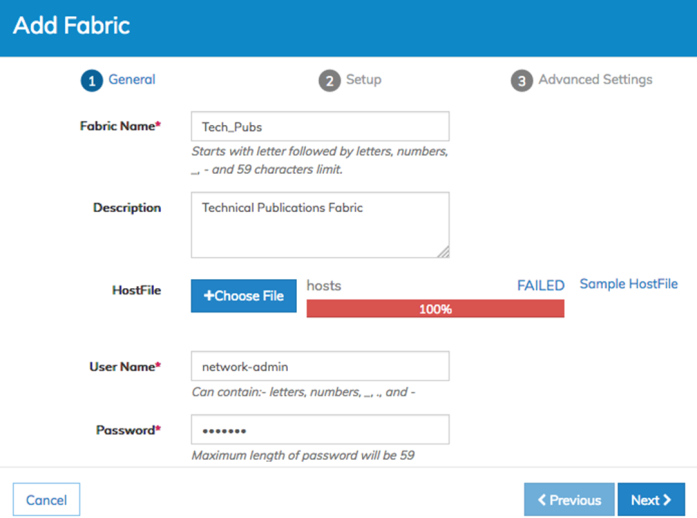
NetVisor UNUM Platform Global - Add Fabric Failed Host File Upload
Corrective action should be taken to remedy the entries in the host file.
The corrected host file can then be uploaded using the steps described previously.
When the system reports a successful completed upload, click Next to continue.
Step 2 Setup
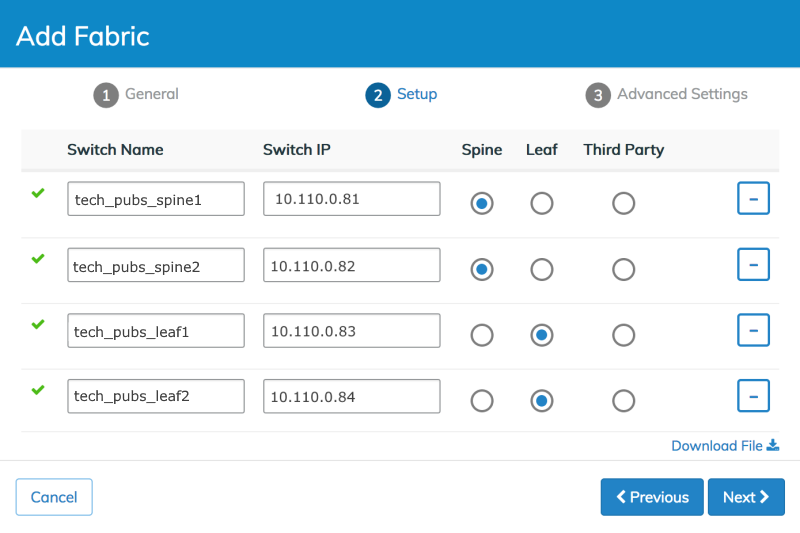
When a host file is used the Fabric information is displayed by Switch Name and Switch IP and the role of the switch defined as Spine, Leaf, or Third Party as defined by the host file.
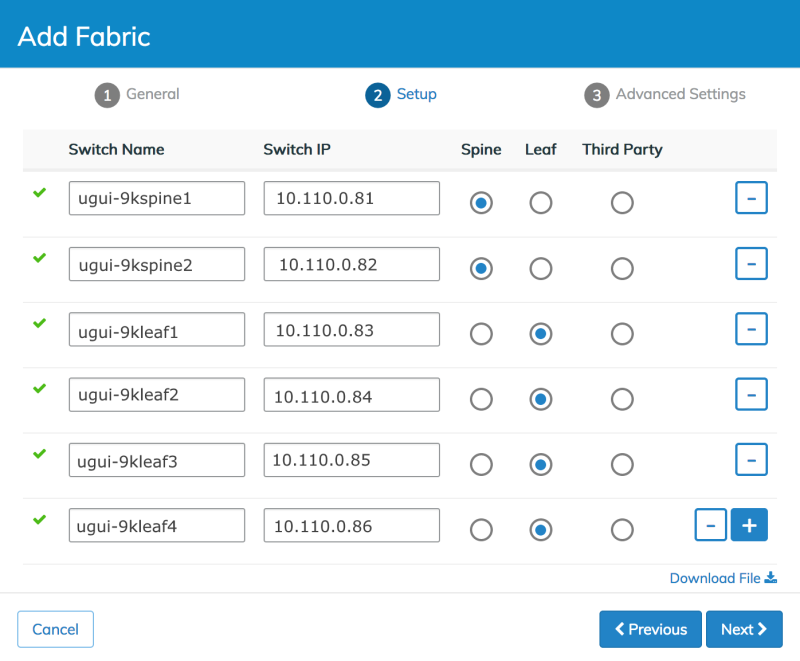
NetVisor UNUM Platform Global - Add Fabric Step 2 using Host File
You make additional configuration changes using the add switch ![]() icon. Conversely, you remove switches using the minus
icon. Conversely, you remove switches using the minus ![]() icon.
icon.
Legend
|
|
The green check indicates a switch is reachable and in an unconfigured (or reset) state. |
|
|
The red X indicates a switch is unreachable or already has Fabric information configured and will need a reset during the provisioning process. |
|
|
The rotating icon indicates a short discovery process to determine the switch configuration status. |
Enter the Switch Name and Switch IP information along with its role in the Fabric defined as Spine, Leaf, or Third Party.
If the switch is already in use in another Fabric, the following message appears.
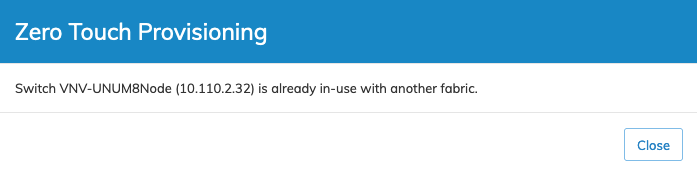
NetVisor UNUM Platform Global - Switch In Use
When multiple switch entries are required repeat the use of add switch ![]() icon for each entry and enter the additional switch information.
icon for each entry and enter the additional switch information.
Continue this process until all entries are complete.
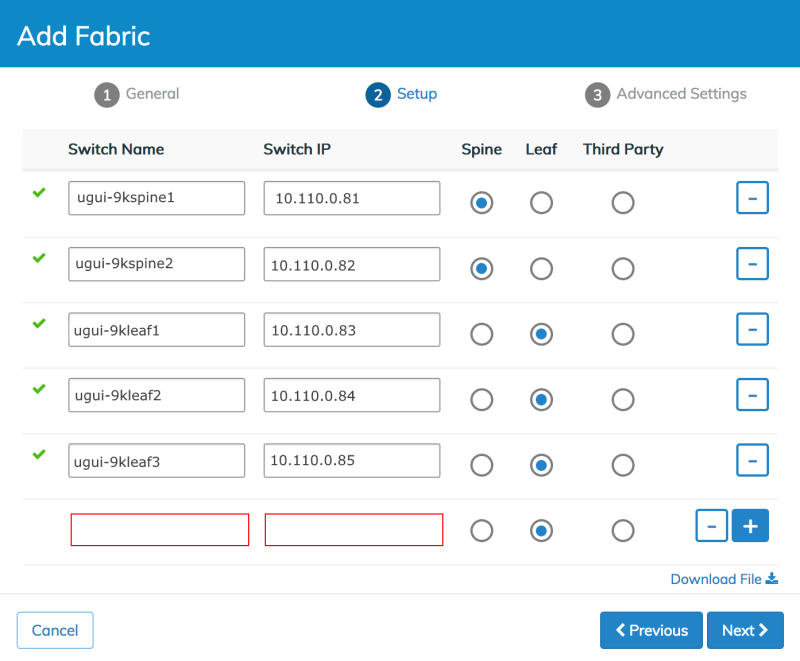
NetVisor UNUM Platform Global - Add Fabric Step 2 Add Switch
In this example, we delete a switch and manually add a new fourth leaf switch named ugui-9kleaf5 with an IP address of 10.110.0.87.
Added Switch

NetVisor UNUM Platform Global - Add Fabric Step 2 Manually Added Switch
Remove an entry using the minus ![]() icon. NetVisor UNUM auto-saves the setting change. Add the new switch using the
icon. NetVisor UNUM auto-saves the setting change. Add the new switch using the ![]() icon.
icon.
Click Next to complete the configuration.
Use the minus ![]() icon to delete an entry, if required.
icon to delete an entry, if required.
Using Download File, you save an updated host file containing the additional switch entry. Click Next to continue.
NetVisor UNUM Platform Global - Add Fabric Step 2 Updated Host File
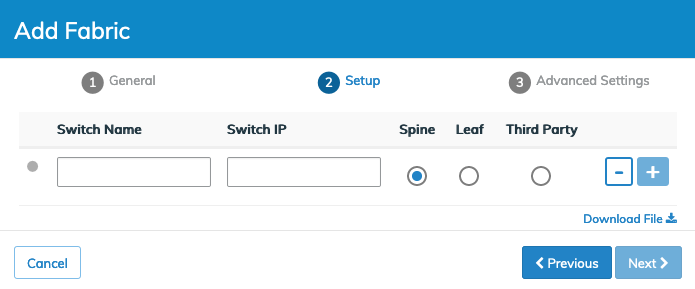
When a host file is not used you must enter the switch information manually providing the Switch Name, Switch IP and its role in the Fabric defined as Spine, Leaf, or Third Party. As previously described, enter the required information on the General page and do not choose a host file.
NetVisor UNUM Platform Global - Add Fabric Step 2 No Host File
Click Next to continue.
Use Add Switch+ and enter the Switch Name and Switch IP information along with its role in the Fabric defined as Spine, Leaf, or Third Party. Click Save to complete the configuration.
NetVisor UNUM Platform Global - Add Fabric Manual Switch Entry
When multiple switch entries are required repeat the use of Add Switch+ for each entry and enter the additional switch information. Continue this process until all entries are complete.
After all switch entries are complete click Save to complete the configuration setup. Use the minus ![]() icon to delete an entry, if required.
icon to delete an entry, if required.
You download the new host file with the manual entries using Download File. Save the configuration before downloading the file.

NetVisor UNUM Platform Global - Add Fabric New Host File Manual Multiple Entries
Click Next to continue.
NetVisor UNUM Platform Global - Add Fabric Added Switches
Note: The switch names used in the above figure are for illustration purposes only and are documentation examples.
Step 3 Advanced Settings
The Advanced Settings window displays advanced Fabric configuration information and includes the following parameters:
|
|
Inband IP – The IP Address with CIDR subnet mask Fabric Network – mgmt (management) or inband Fabric Network - mgmt (management) or inband Fabric Control Network – mgmt (management) or inband Mgmt IP Subnet – Subnet mask Gateway IP – IP address of the gateway DNS IP – IP address for DNS DNS Secondary IP – Secondary IP address for DNS Domain Name – Domain name NTP Server – FQDN or IP address for the NTP server Auto-trunk – enable or disable Auto-neg – True or False |
|
|
|
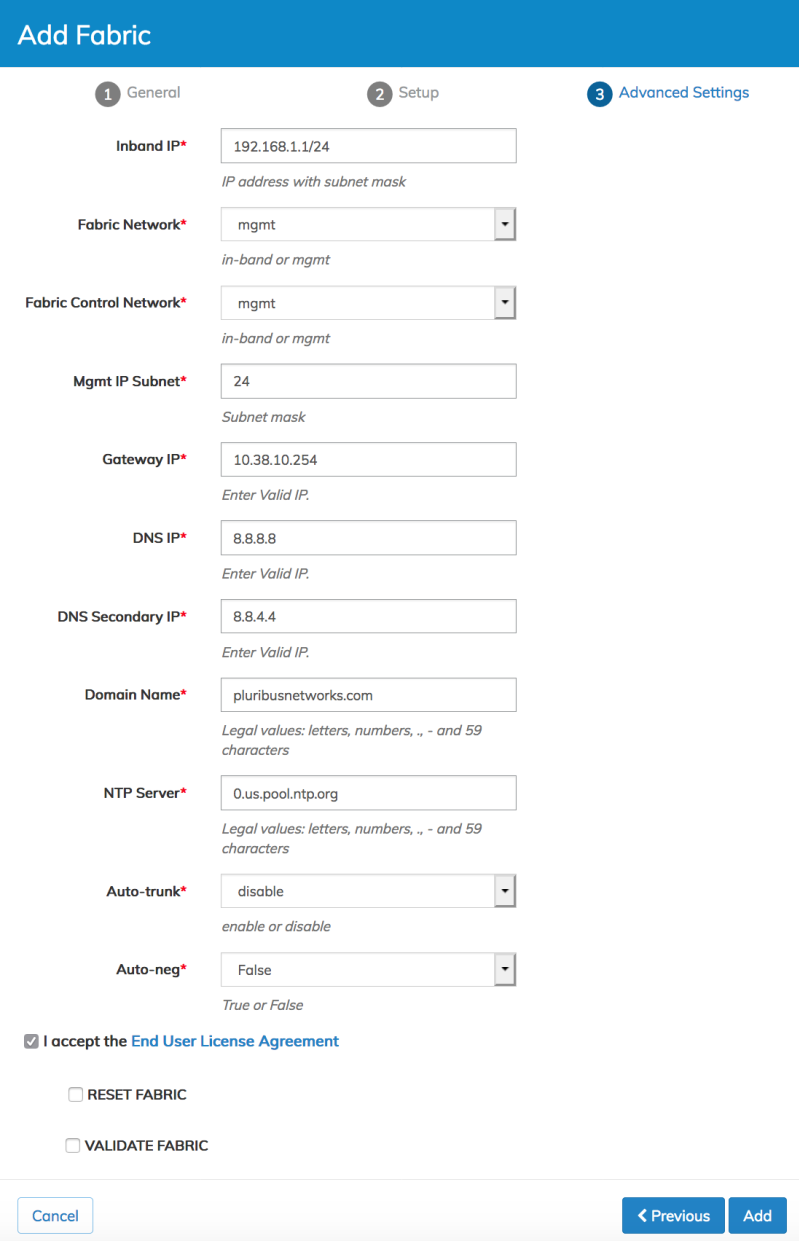
NetVisor UNUM Platform Global - Add Fabric Step 3 Advanced Settings
You edit any of the parameters as required. Mandatory fields are highlighted with a RED asterisk.
Options include returning to the Previous setting screen, Add the new parameters or Cancel to exit without making any changes.
Reset Fabric
Reset Fabric provides a reset function for existing Leaf and Spine or ALL fabrics.

NetVisor UNUM Platform Global - Reset Fabric
Validate Fabric
When selected, NetVisor UNUM evaluates the initial Fabric build as a check to ensure NetVisor UNUM can deploy the playbook.
EULA Acceptance
Click the check box to accept the EULA (End User License Agreement). You cannot add the Fabric without accepting the EULA. Click Add to continue. Fabric Provisioning begins automatically.
Provisioning Fabric
The following screens are example only.
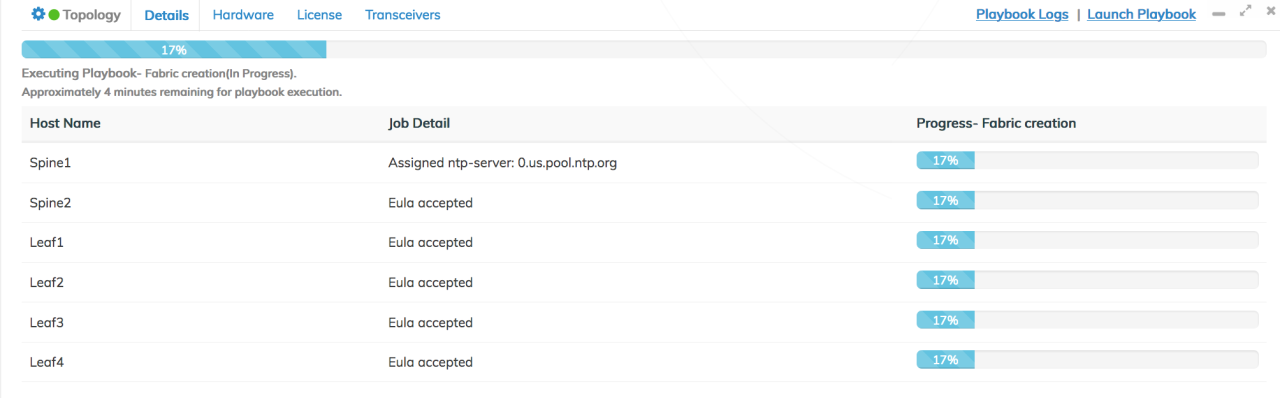
NetVisor UNUM Platform Global - Add Fabric - Provisioning Fabric
During provisioning the topology map updates with the Fabric switch details entered during the configuration steps.
Various dialog configuration messages appear as well as animated icons indicating provisioning activities on the switches in the Fabric.
The progress bar provides a visual indicator of progress.
|
Graphic |
Provisioning Step (examples) |
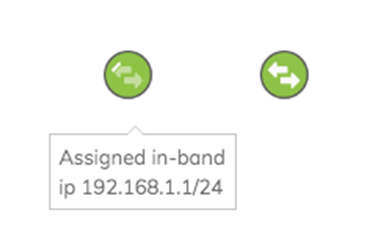
|
|
Inband IP address assigned to Spine. |
|
|
|
|
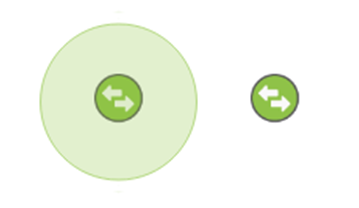
|
Provisioning occurring on a switch. |
|
|
|
|
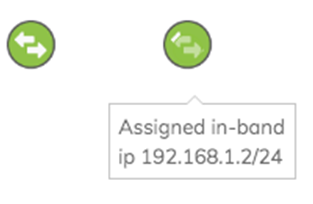
|
Inband IP address assigned to second Spine. |
|
|
|
NetVisor UNUM Platform Global - Add Fabric Provisioning Actions
Provisioning duration of the switches in dependent on the number of configuration parameters selected during setup.
When provisioning is complete the dashboard updates and displays the Fabric topology.
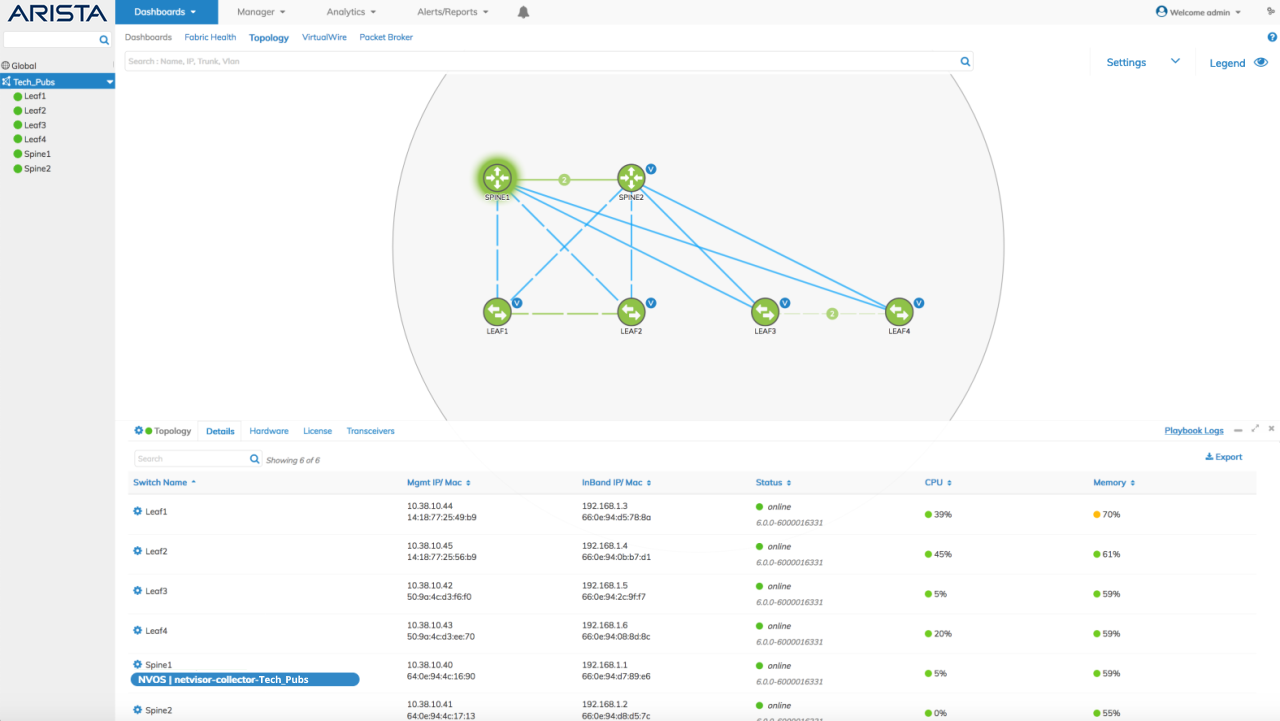
NetVisor UNUM Platform Global - Add Fabric - Provisioning Complete
Note: The switch names, IP addresses, and associated switch data used in the above figure are for illustration purposes and are documentation examples only.
Below are two links to videos that walk through adding a fabric with the Netvisor Fabric License option.
•NetVisor UNUM - Automated Fabric Build
|
|
Use your mobile device to access the instructional video. |
•NetVisor UNUM - Automated Underlay Build
|
|
Use your mobile device to access the instructional video. |