
Manage Workflows
Manage Workflows
There are features and functions used in Arista NetVisor UNUM and Insight Analytics that are common throughout the user interface (UI). Please refer to the Common Functions section for more information on the use of these functions and features.
NetVisor UNUM provides a high level of automation to reduce repetitive configuration steps using Manage Workflows in conjunction with Manage Groups and Manage Templates.
An Administrator creates workflows using Manage Workflows and subsequently runs templates created from Manage Templates.
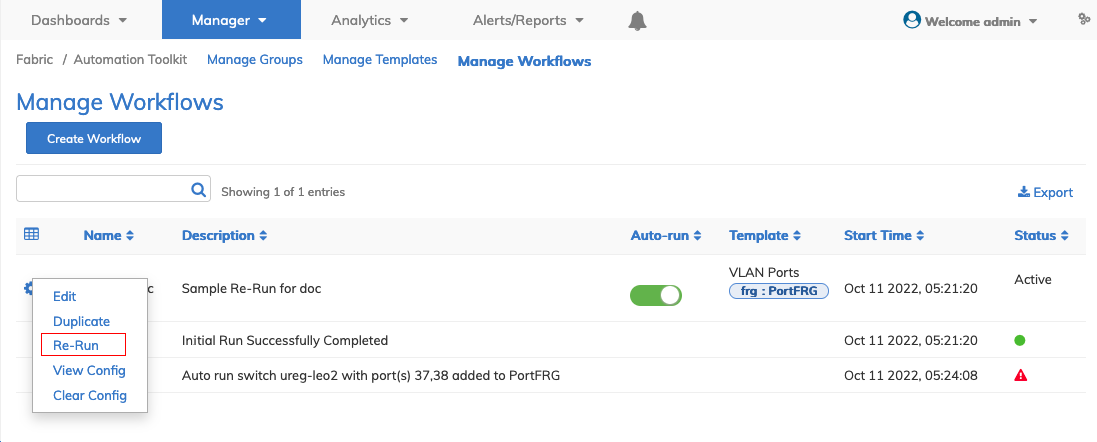
Selecting Manager → Fabric → Automation Toolkit → Manage Workflows displays the Manage Workflows dashboard.
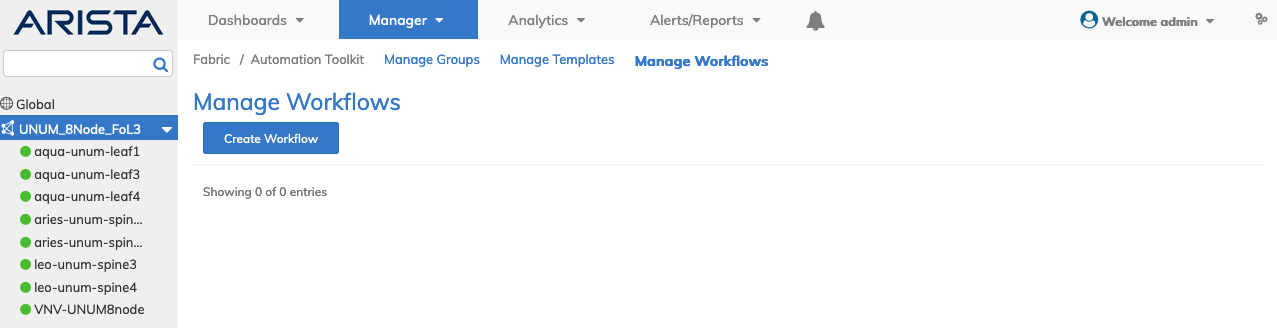
Manage Workflows - Default Dashboard
Create Workflow
Use Create Workflow to create a new workflow. Enter the required parameters, which include:
•Name – Enter a unique name for the workflow.
•Description – Enter a description of the workflow. Please be as explicit as possible and describe the workflow in great detail. Description details are not displayed in the dashboard after creating the workflow.
•Auto-run – When Auto-run is enabled, it associates the workflow to the given FRG (Fabric Resource Group). Any changes to the FRG will auto-run the workflow. This function can be disabled using the auto-run selector switch.
•Template Name – Select from the list of configlets or custom templates from the drop-down. These include:
▪BD Ports
▪Distributed VRF
▪Manage Port
▪Manage Subnet
▪Port Storm Control
▪VLAN
▪VLAN Ports
▪Any custom template created in Manage Templates.
|
Usage Notes: |
|
•When selecting untagged ports in the VLAN configlet, only one VLAN may be added even though a range option is stated. |
|
•The VLAN configlet supports VXLAN. However, you cannot create a VLAN range with VXLAN. VLAN range (with more than one VLAN) works without VXLAN. VLAN range (with only a single VLAN entered) works with VXLAN. |
|
•A template cannot contain a combination of VLAN and VLAN Ports. |
|
•VLAN, VRF, and Subnet do not support Auto-run. |
|
•The Auto-run switch appears active when selecting the VLAN, VRF, and Subnet configlets. However, NetVisor UNUM automatically disables Auto-run for these configlets. The Manage Workflows dashboard displays the Auto-run as disabled. |
|
•Manage Port and Port Storm Control require the use of a Port FRG. |
|
•An initial workflow execution occurs at the time of the workflow creation regardless of the Auto-run setting. Any changes to the FRG will auto-run the workflow. |
|
•The workflow creation pop-up dialog remains open until the workflow completes successfully. After successful completion, the pop-up closes. Further edits are limited to the workflow description. No other changes are permitted. |
|
•If an error occurs during the workflow creation, the dialog pop-up remains open, and a failure message displays. Attributes may be edited, and the workflow submitted again with the updated values. |
|
•On the initial run, and in the event of a failure, if a partial configuration exists, NetVisor UNUM ignores it. Only previously unconfigured resources are subsequently configured. |
|
•After each auto-run, the dashboard updates with a new row of data. Each workflow executes at least one time. |
|
•Workflows cannot be re-executed manually (there is no need to execute the same configuration more than once, as it would create an error condition). |
|
•Duplicate workflows create new workflows. Attributes may differ in the duplicated workflow. |
|
•Each auto-run saves a description of the auto-run due to any modifications made to the FRG configuration. |
|
•Deleting an FRG associated with a given workflow marks that workflow as inactive. A warning message displays when deleting the FRG. |
|
•All created workflows display in the dashboard, along with a separate row for the auto-run, which would be a child row for the workflow row. |
|
•Deactivate workflows by toggling the Auto-run button. A deactivated workflow can be re-activated by toggling the Auto-run button. Any resource changes made (added or removed) while the workflow is inactive will not be configured upon re-activation. |
|
•When removing resources from an FRG, the workflow automatically rolls back any changes to that resource. Certain limitations apply, for example in Manage Port and Port Storm Control, port parameters will not be changed. |
In the following example, a custom template created in Manage Templates named "TechPubs" appears in the drop-down along with the list of default configlets.
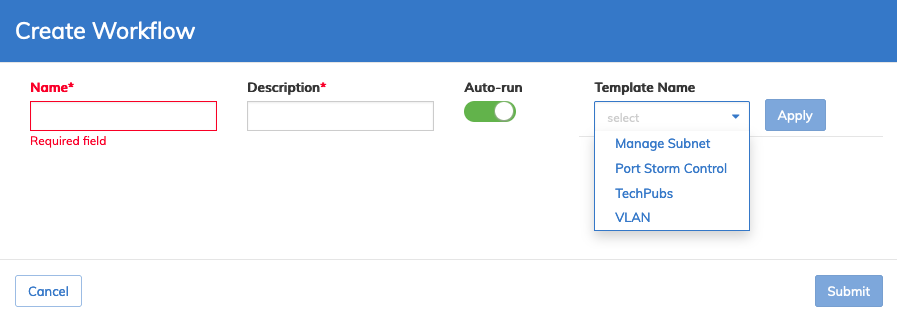
Manage Workflows - Create Workflow Templates and Configlets
After selecting a configlet or template the specific configuration attributes for each are displayed.
In the following example, the VLAN configlet displays its associated attributes. Enter the required parameters and any optional parameters.
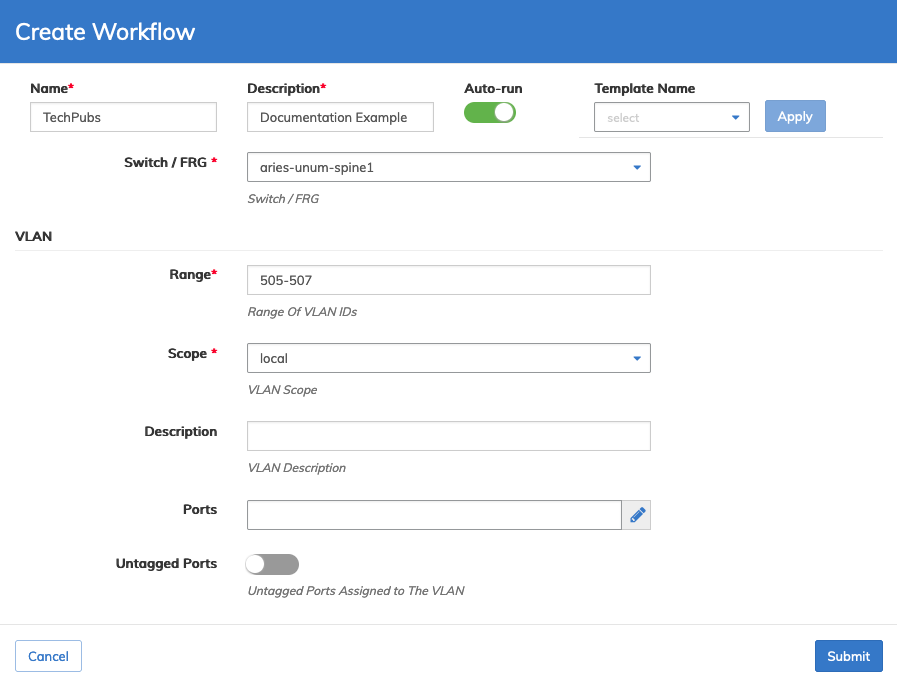
Manage Workflows - Create Workflow VLAN Example
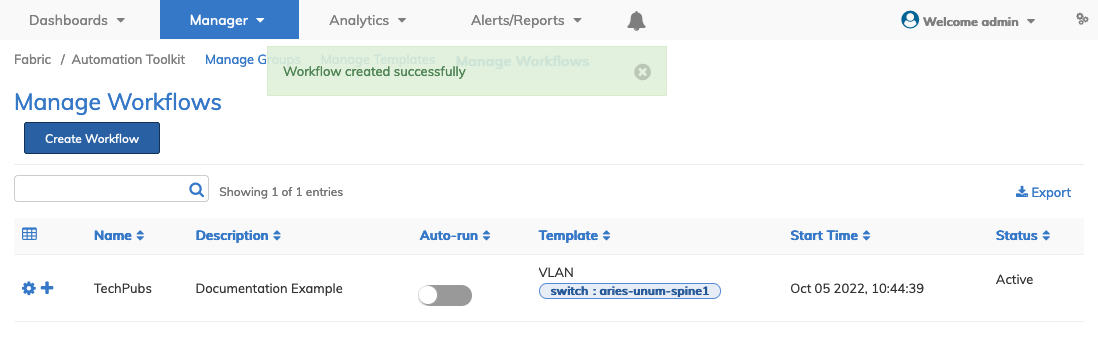
Click Submit to continue or Cancel to return to the previous screen without making any changes.
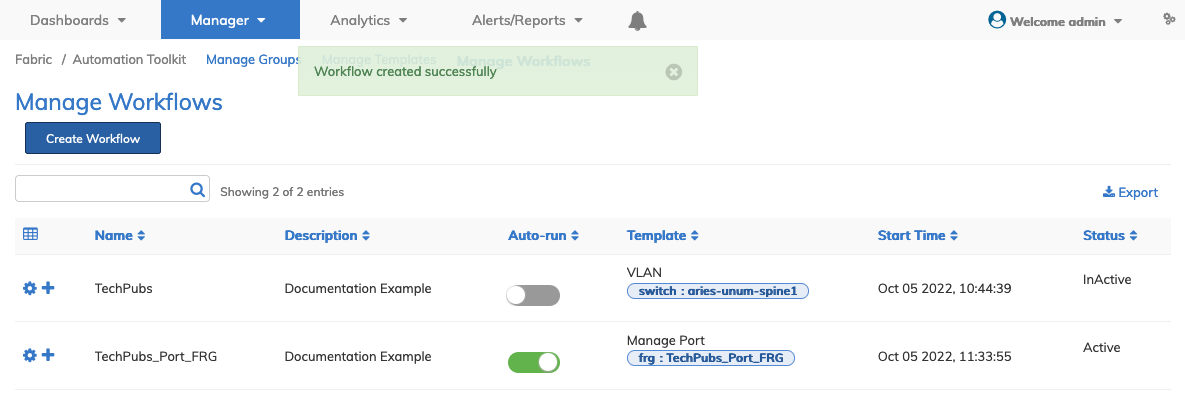
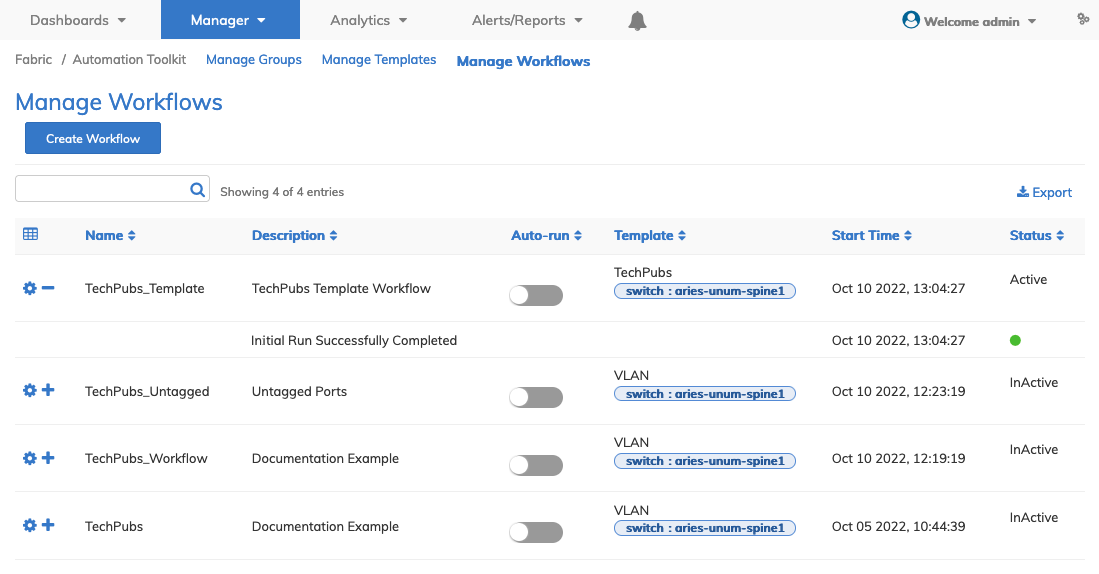
The workflow runs and the dashboard updates with the workflow.
The dashboard displays the workflow by Name and sorted using a drop-down selector.
Additional parameters include: Description, Auto-run (On /Off), Template, Start Time, and Status.
Manage Workflows -Workflow Added to Dashboard
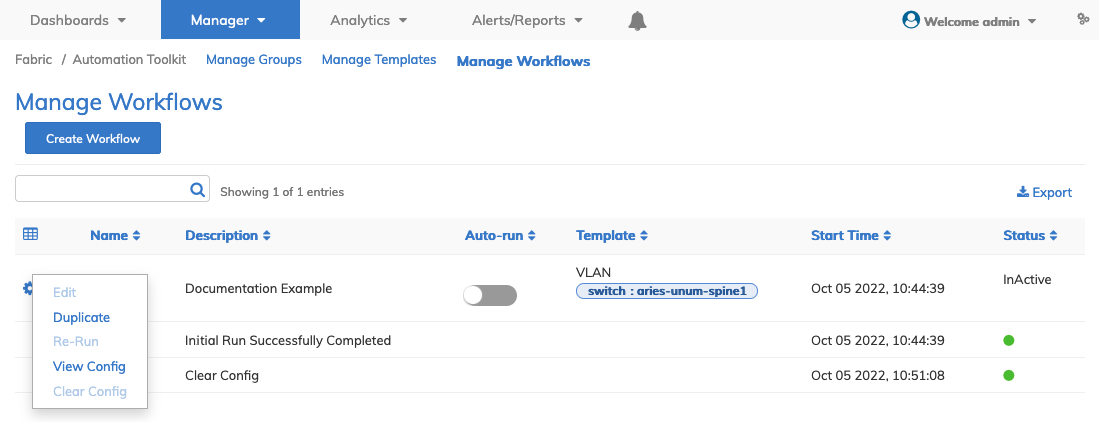
Manage Workflow Entry
Manage workflow entries by selecting the Cog ![]() icon.
icon.
•Edit – Only the description can be modified.
•Duplicate – Duplicate a workflow. You must change the name, description, and other fields before saving.
•Re-Run – Use this option for failed auto-run cases triggered on changes to the FRG.
•View Config – View the saved configuration.
•Clear Config – Clear Config removes the FRG association and removes the stored configuration. Performing this action removes the configuration from the fabric for the associated FRG and deactivates the workflow.
Note: Grayed-out functions cannot be selected for the given workflow.
In the following example, the workflow initially ran and the user used Clear Config to deactivate the workflow.
Manage Workflows - Workflow Entry Menu
Click on a green status icon to display Workflow Transaction Details.
![]()
Manage Workflows - Workflow Transaction Details
In the event of a failed workflow execution select the Cog ![]() icon.
icon.
•Re-Run – Use this option for failed auto-run cases triggered on changes to the FRG.
Click Cancel to close the pop-up.
Re-Run Workflow
In the event of a failed workflow, use the Re-Run option.
The following dashboard illustrates a failed workflow entry denoted by the ![]() (Alert) icon.
(Alert) icon.
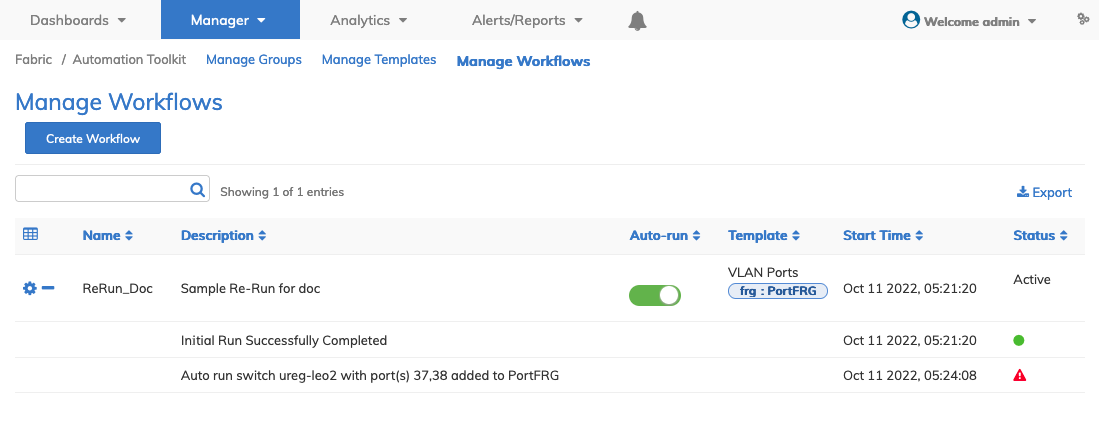
Manage Workflows - Failed Workflow
Click on the ![]() icon to view the workflow transaction details.
icon to view the workflow transaction details.
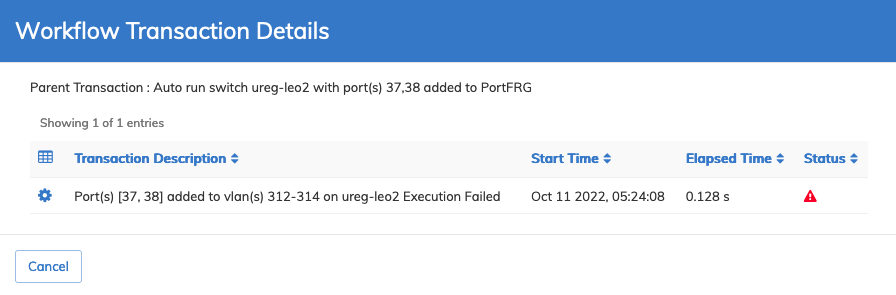
Manage Workflows - Failed Workflow Transaction Details
Make the required corrections to the workflow (as needed) and re-run the workflow by clicking the Cog ![]() icon and selecting Re-Run.
icon and selecting Re-Run.
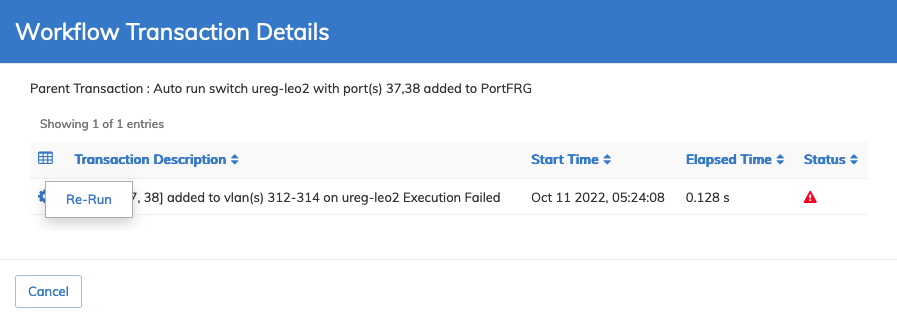
Manage Workflows - Failed Workflow - Re-Run Function
Alternately, re-run the workflow by clicking the Cog ![]() icon from the Manage Workflow dashboard and selecting Re-Run.
icon from the Manage Workflow dashboard and selecting Re-Run.
Manage Workflows - Failed Workflow - Re-Run Function from Dashboard
Confirm the workflow re-run or click Cancel to return to the previous screen without making any changes.
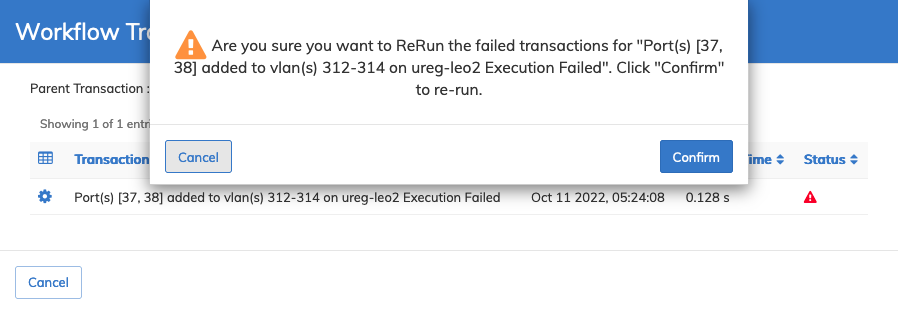
Manage Workflows - Failed Workflow - Confirm Re-Run
The workflow transaction pop-up updates with the results of the re-run workflow and displays a message. In this case, the workflow successfully completed and the Status indicator returns to green.
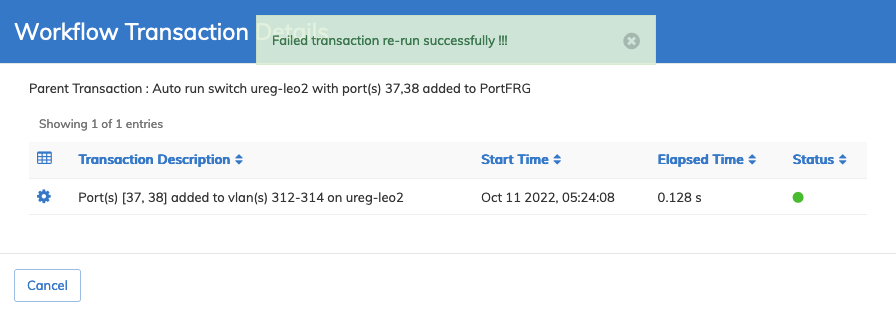
Manage Workflows - Successful Re-Run
The Manage Workflow dashboard updates with the new status.

Manage Workflows - Successful Re-Run - Updated Dashboard
FRG Based Workflows
Note: Both Port and Switch FRGs are fully supported. However, changing the FRG type once an FRG is associated with a workflow is not allowed.
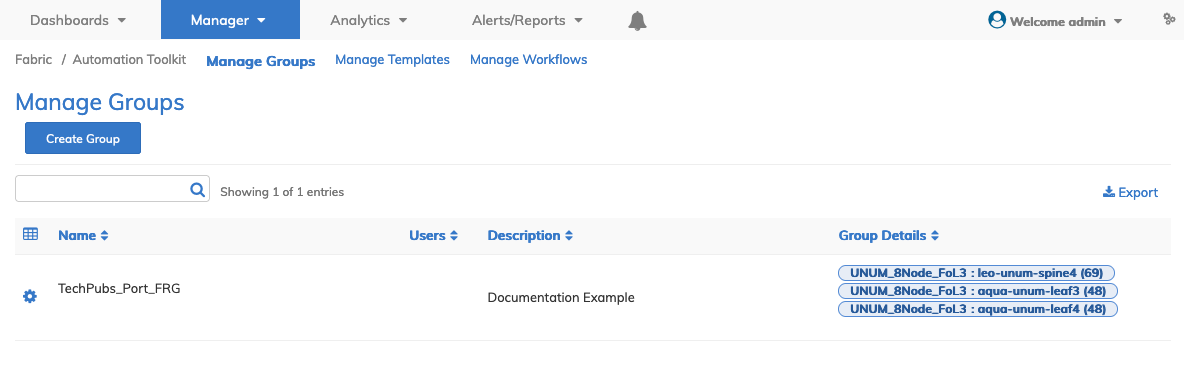
Use Manage Groups to create a Port FRG.
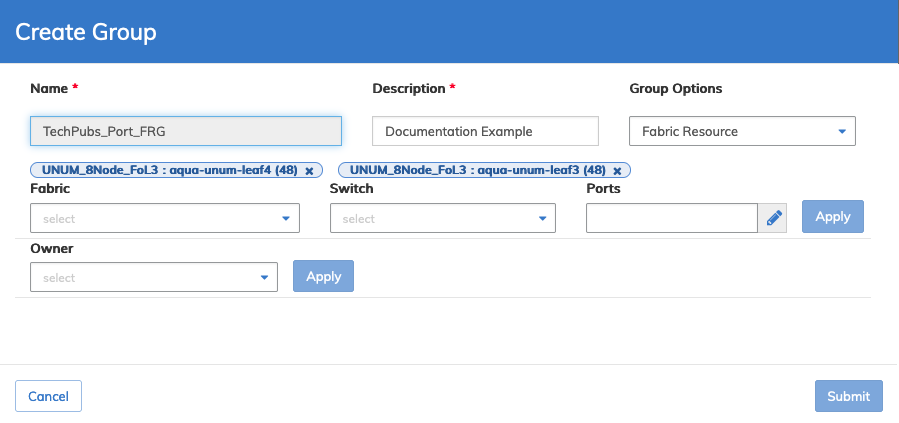
Manage Workflows - Manage Groups Port FRG
The Manage Groups dashboard displays the Port FRG.
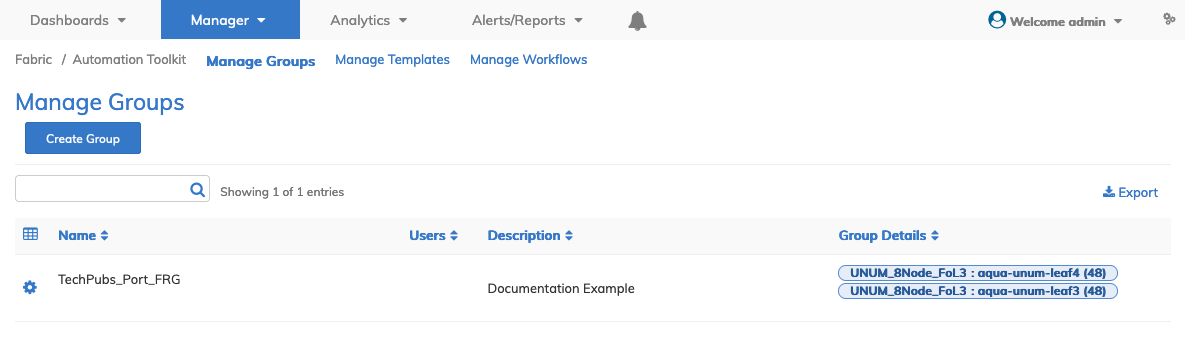
Manage Workflows - Manage Groups Port FRG Dashboard
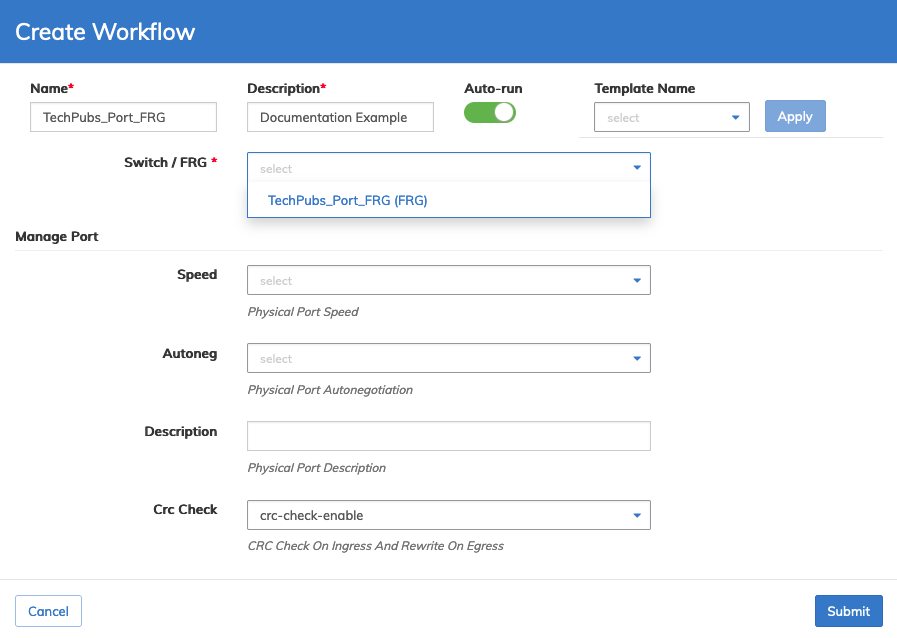
Select Create Workflow from the Manage Workflows dashboard and select a configlet (Manage Port in this example).
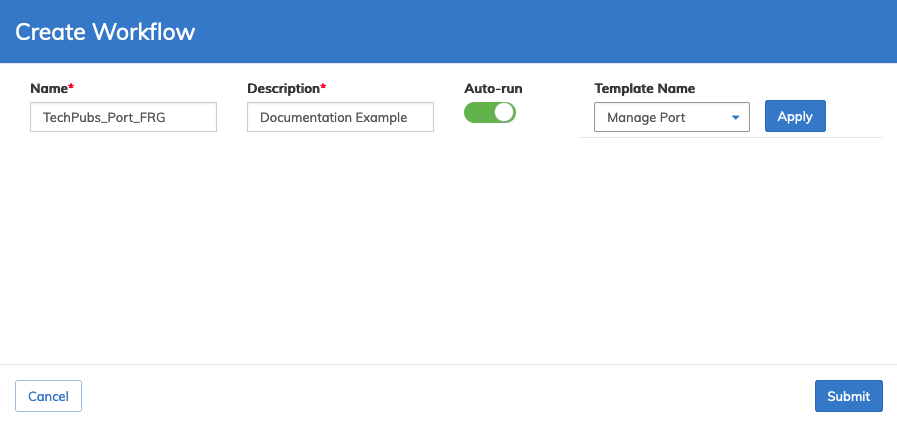
Manage Workflows - Create Workflow
Enter the Name, Description and enable Auto-run (auto-run selected to accommodate future FRG changes) and select the required FRG.
Manage Workflows - Create Workflow for Manage Port Configlet
Enter the required attributes (in this example the parameters for Manage Port).
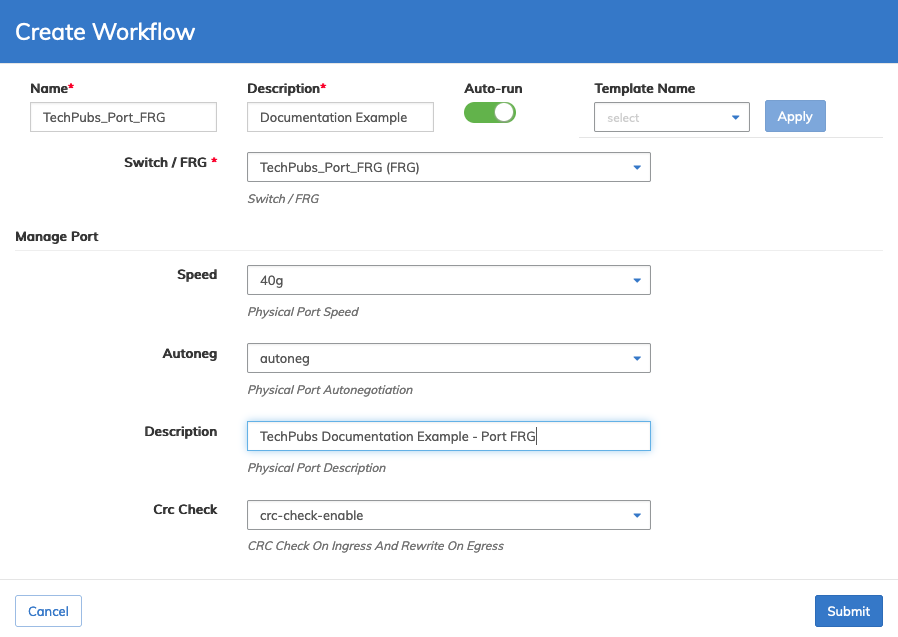
Manage Workflows - Manage Port Configlet Parameters
Click Submit to continue or Cancel to return to the previous screen without making any changes.
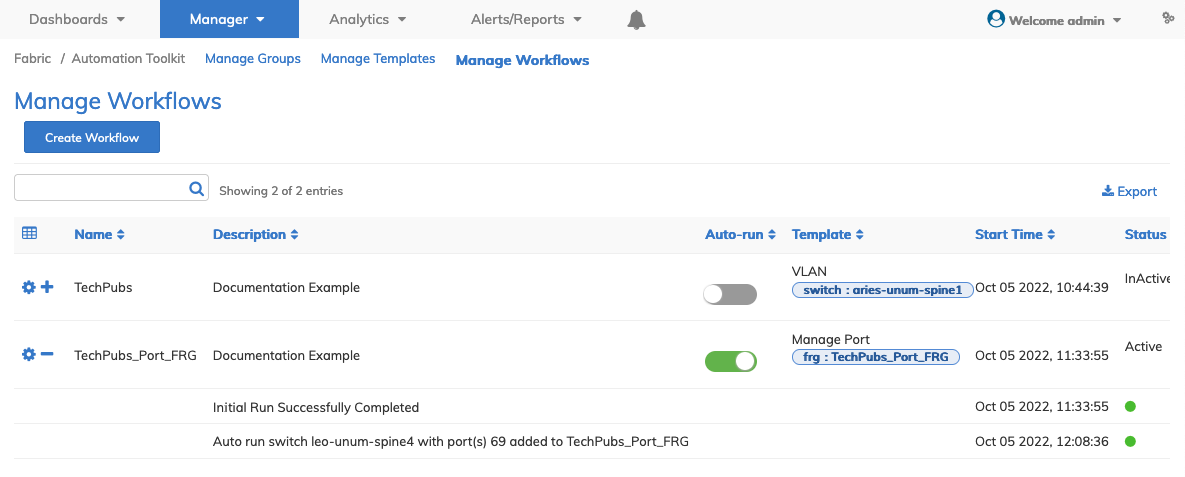
The workflow runs and the dashboard updates with the workflow and marked as Active with Auto-run enabled.
Manage Workflows - Workflows Dashboard
Expand the workflow using the ![]() icon to review the activity.
icon to review the activity.
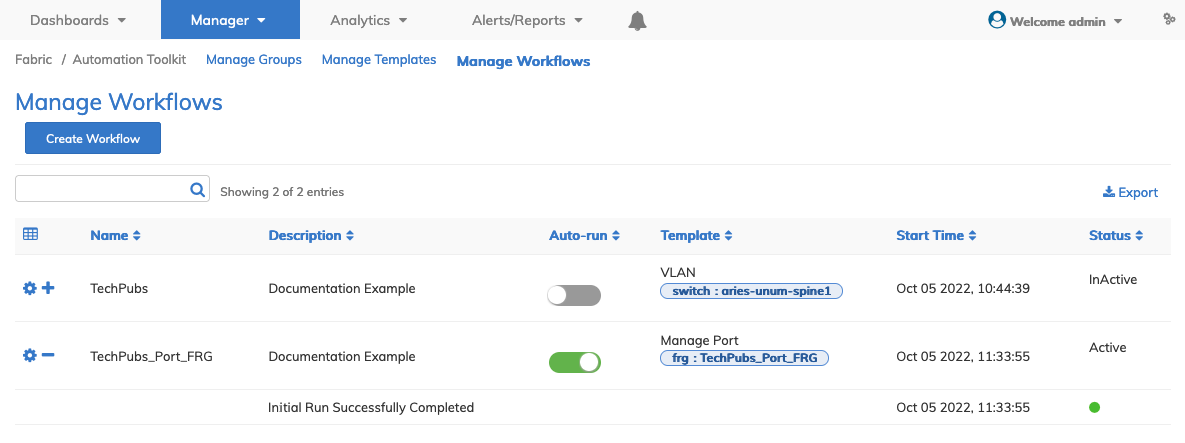
Manage Workflows - Workflows Expanded Dashboard
Click on a green status icon to display Workflow Transaction Details.
![]()
Manage Workflows - Workflow Transaction Details
Click Cancel to close the pop-up.
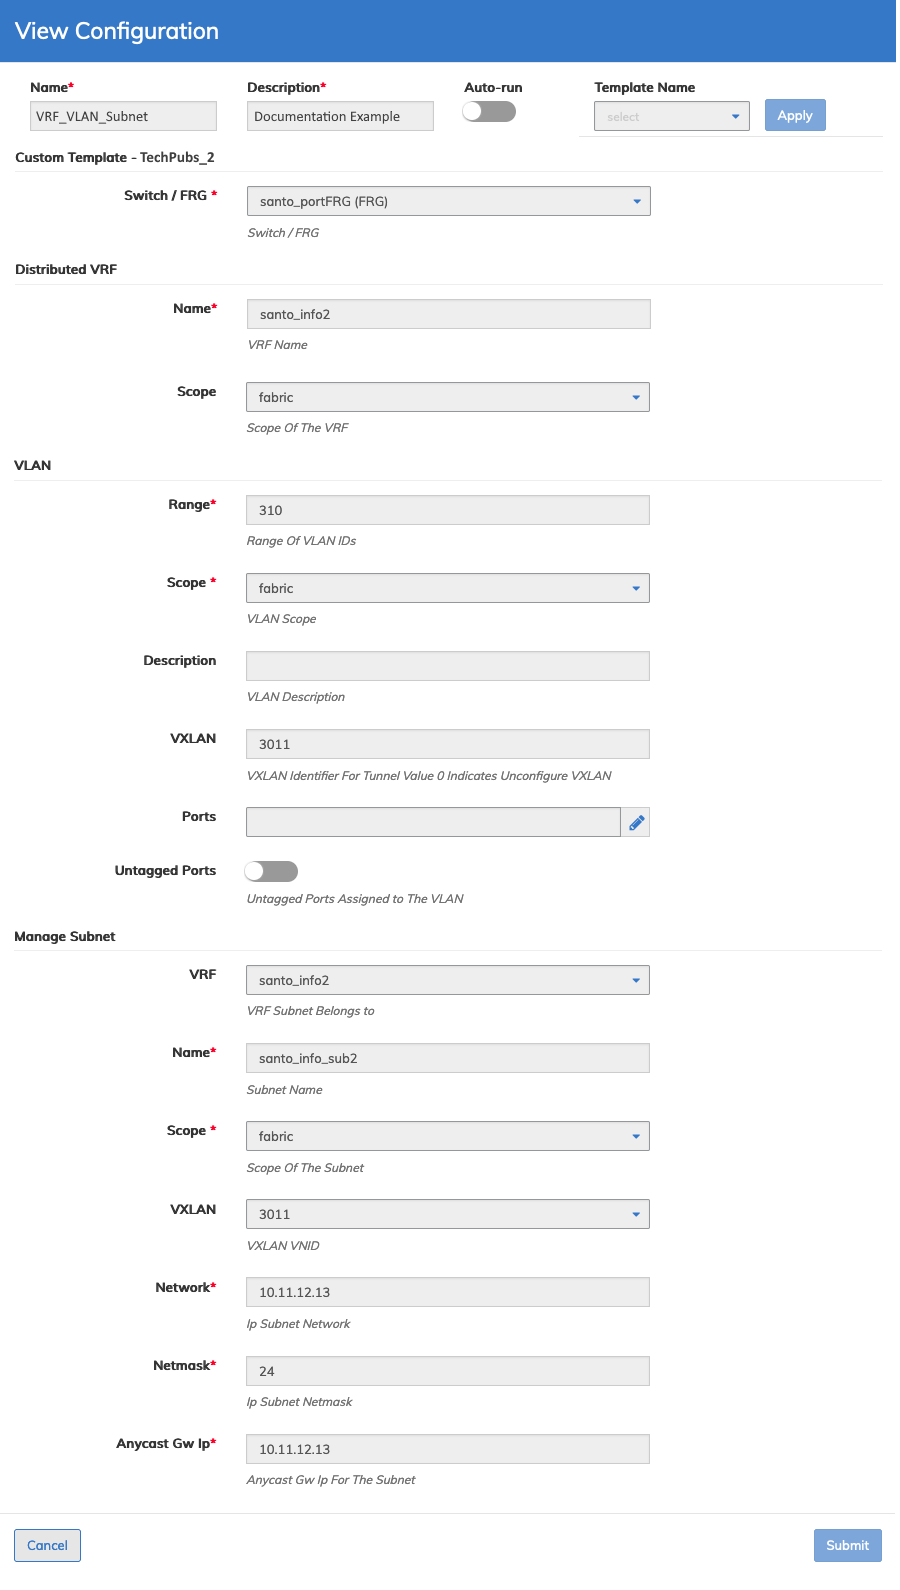
Use View Config to review the settings.
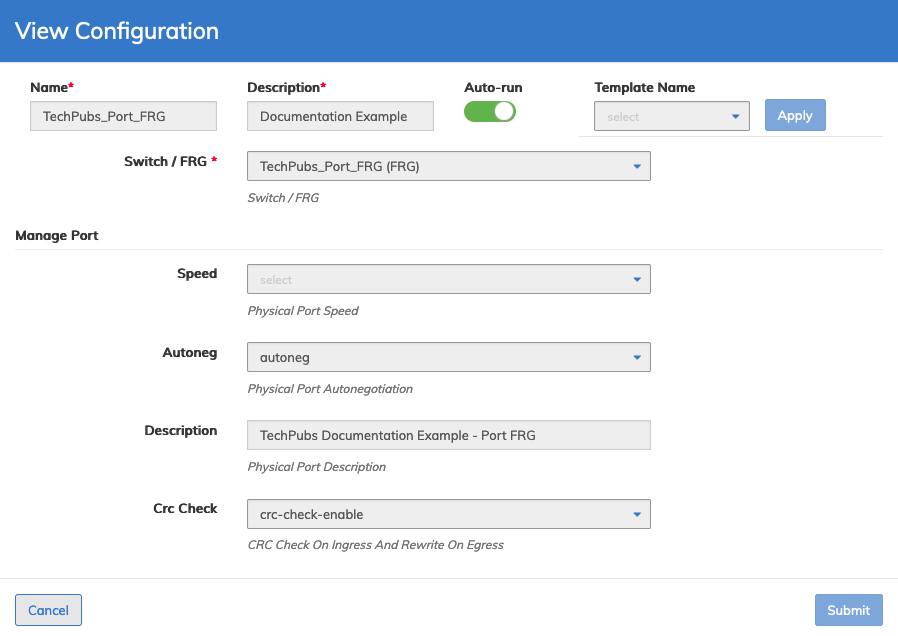
Manage Workflows - View Configuration
Using Manage Groups, update the Port FRG with new resources.
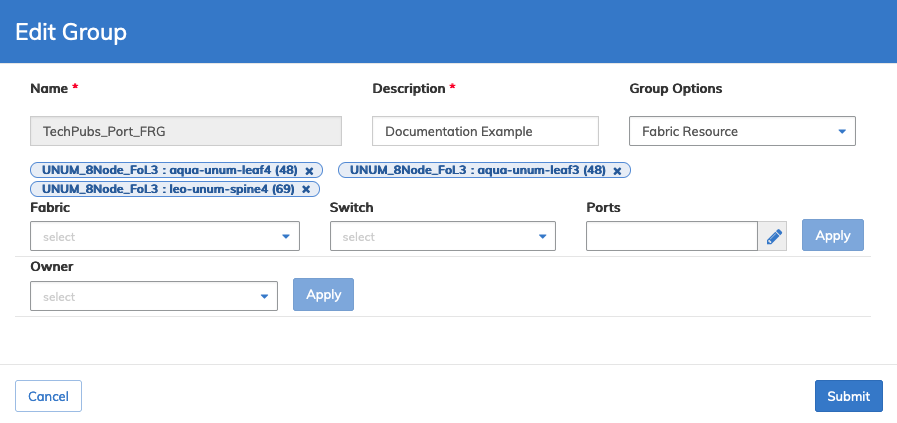
Manage Workflows - Edit Group Add Resources
Click Submit to continue or Cancel to return to the previous screen without making any changes.
Manage Workflows - Manage Groups - Updated Dashboard
After a short interval, the Manage Workflow dashboard updates with the re-run (Auto-run) workflow based on the changes made to the FRG.
Manage Workflows - Updated Dashboard - Auto-run FRG Changes
Template Based Workflow
Using Manage Templates, create a template with two configlets.
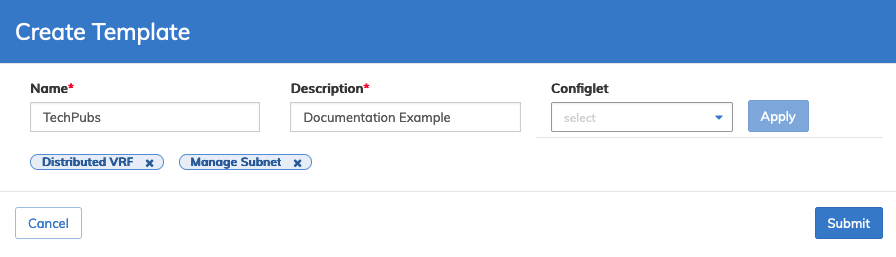
Manage Workflows - Manage Template - Create Custom Template
Click Submit to continue.
From the Manage Workflows dashboard, select the custom template (TechPubs) from the drop-down list.
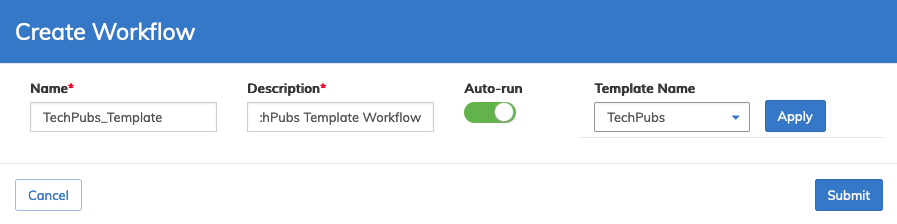
Manage Workflows - Select Custom Template
Click Submit to continue.
Enter the required parameters for the custom workflow.
Usage Note:
Dependent templates, such as the Distributed VRF and Manage Subnet configlets, when combined in a custom template, several of the fields in the subnet configlet are dependent on the field from the Distributed VRF configlet.
In this case, only enter the name in Distributed VRF and the same name used in the Manage Subnet configlet. The VRF name field in the subnet appears grayed out as its value derives from the Distributed VRF configlet.
Manage Workflows - Template - Select Custom Template
Click Submit to continue.
The dashboard displays the custom template workflow at the top of the list. Expanding the entry shows the status.
Manage Workflows - Updated Dashboard with Custom Template and Status
Click on a green status icon to display the custom template workflow transaction details.
![]()
Manage Workflows - Custom Template / Workflow Transaction Details
Click Cancel to close the pop-up.
Template Based Workflow - Example
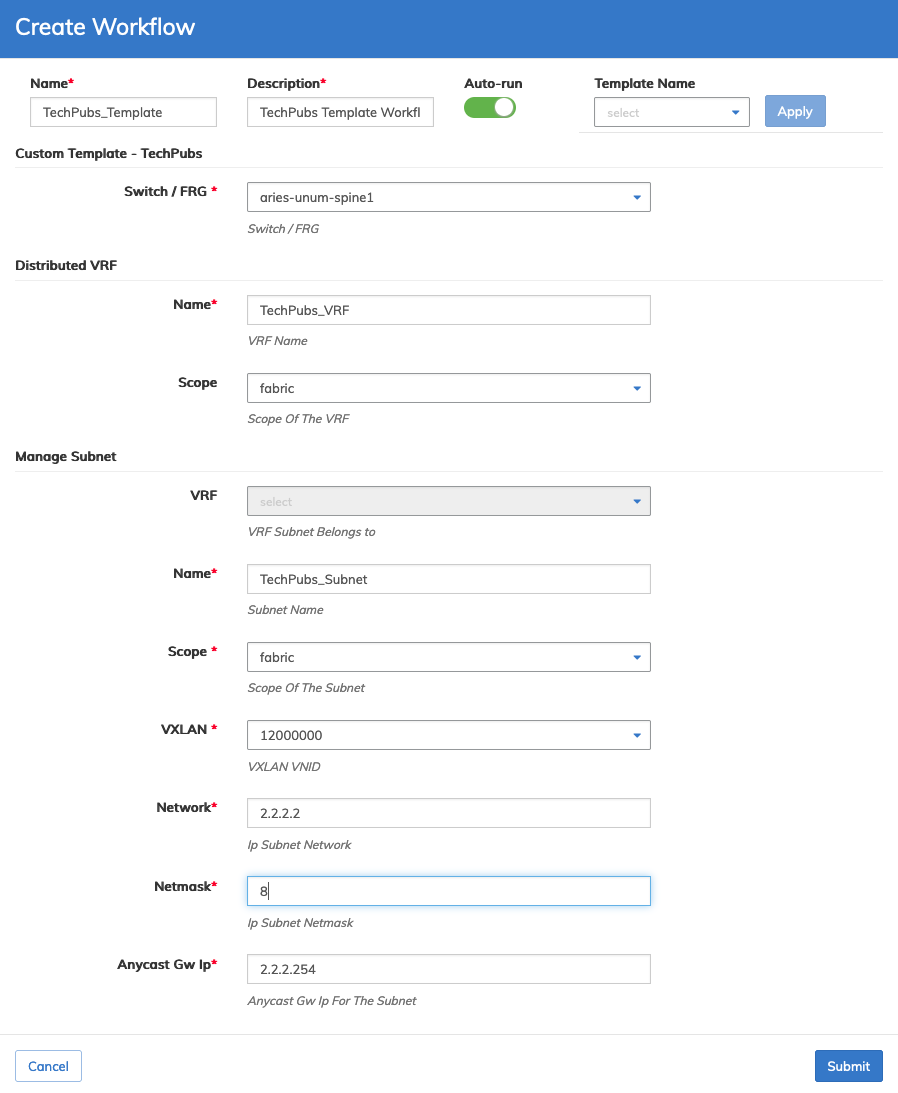
The following images illustrate a more complex custom template and workflow combining three configlets - Distributed VRF, VLAN, and Manage Subnet, and their associated settings.
Manage Workflows - Complex Custom Template and Workflow Example
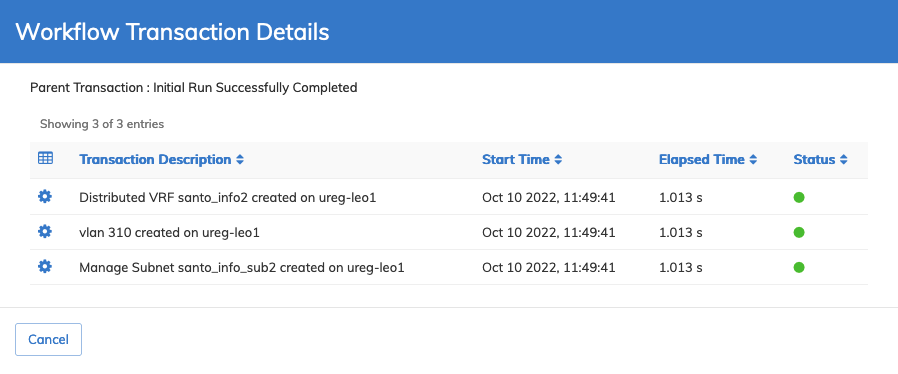
Manage Workflows - Complex Custom Template and Workflow Transaction Details Example
Configlets and Associated Attributes
BD Ports
•Switch / FRG – Switch or Fabric Resource Group.
•Bridge Domain – Select the required bridge domain.
•Port – Select ports using the interactive port selector.
•L2 Learning – MAC learning provisioning (none, enable, disable).
•Outer VLAN – Outer VLAN for Q in Q VLAN.
•VLANs – Access VLANs for Q in Q.
•Inner VLAN – Inner VLAN for ports assigned to the network.
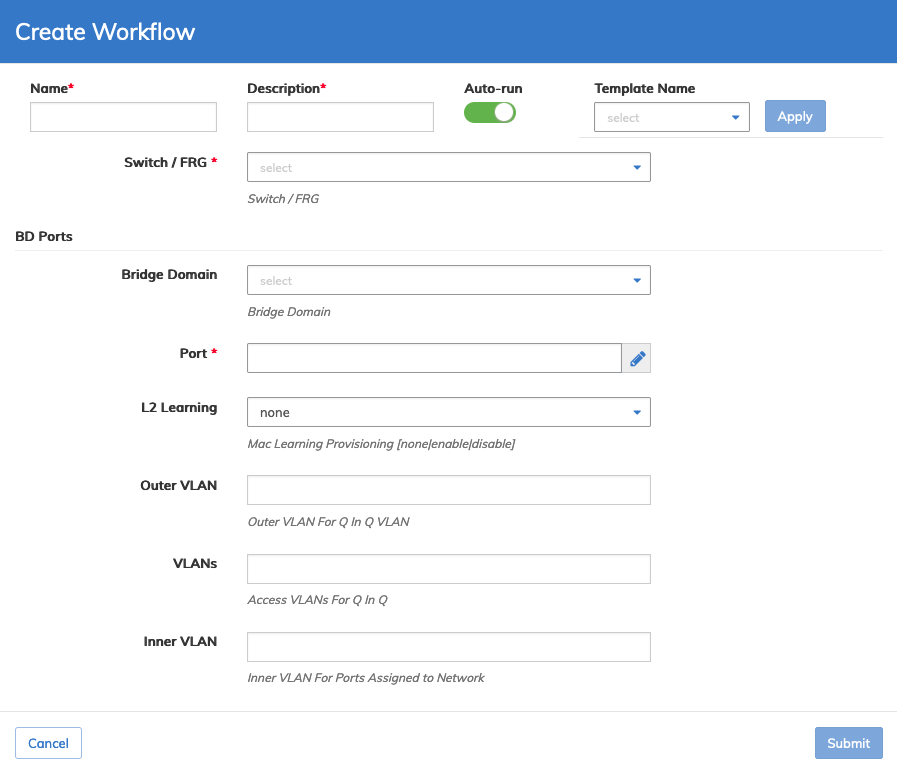
BD Ports Configlet
Distributed VRF
•Switch / FRG – Switch or Fabric Resource Group.
•Name – The VRF name.
•Scope – Scope of the VRF (local, fabric or cluster).
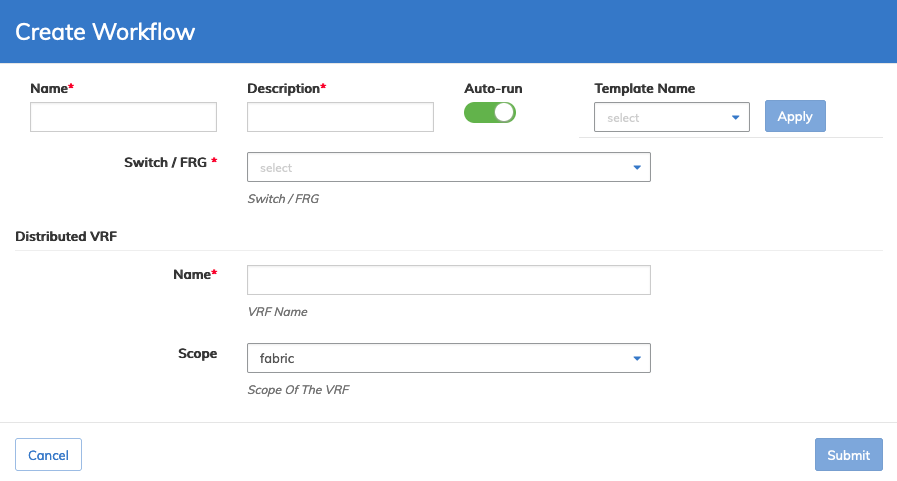
Distributed VRF Configlet
Manage Port
•Switch / FRG – Switch or Fabric Resource Group.
•Speed – Physical port speed.
•Autoneg – Auto-negotiate (auto, no-negotiate).
•Description – Physical port description.
•CRC Check – CRC check ( enable or disable).
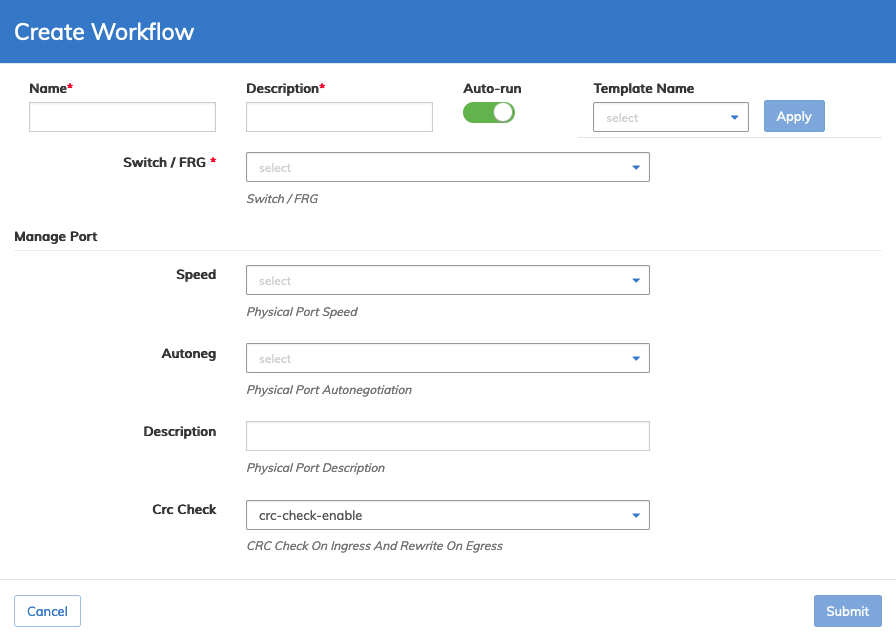
Manage Port Configlet
Manage Subnet
•Switch / FRG – Switch or Fabric Resource Group.
•VRF – VRF subnet belongs to.
•Name – Subnet name.
•Scope – (local, fabric or cluster).
•VXLAN – VXLAN VNID.
•Network – IP Subnet Network.
•Netmask – IP Subnet Mask.
•Anycast GW IP – Anycast gateway IP address for the Subnet.
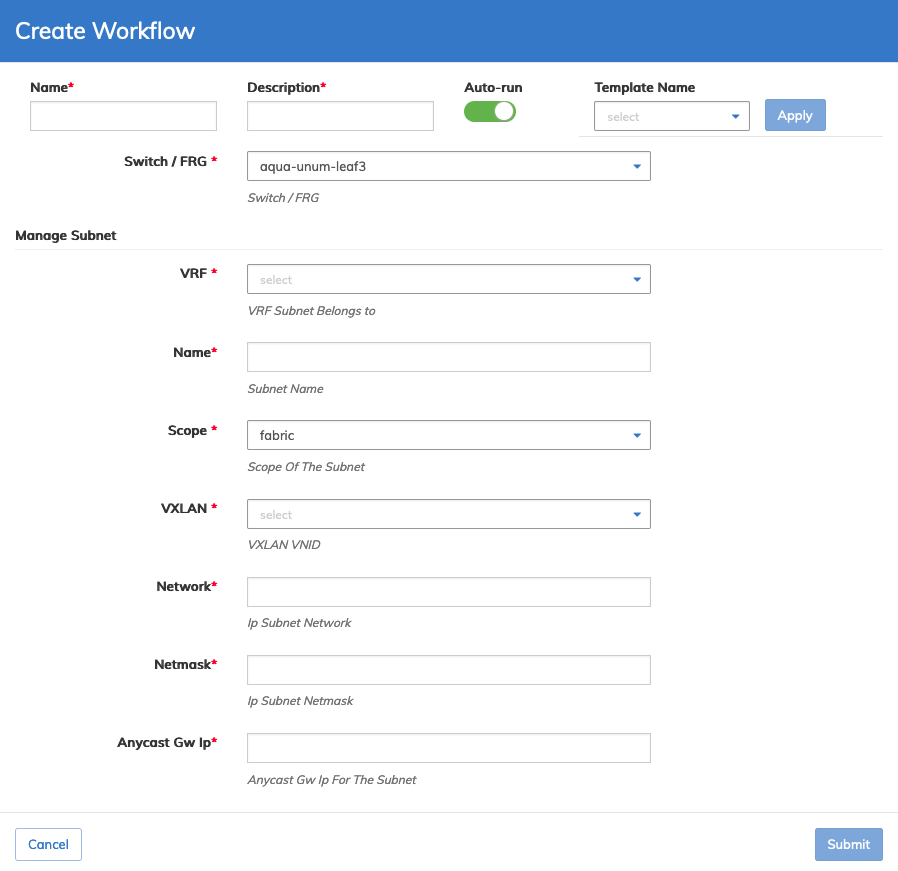
Manage Subnet Configlet
Port Storm Control
•Switch / FRG – Switch or Fabric Resource Group.
•Unknown Ucast Level – Unknown Unicast Level in percentage (default is 30%).
•Unknown Mcast Level – Unknown Multicast Level in percentage (default is 30%).
•Broadcast Level – Broadcast Level in percentage (default is 30%).
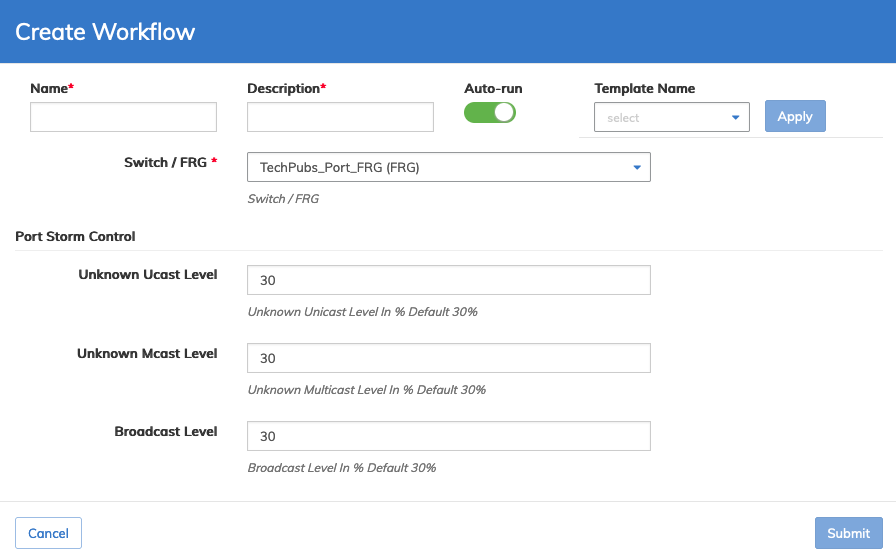
Port Storm Control Configlet
VLAN
•Switch / FRG – Switch or Fabric Resource Group.
•Range – Range of VLAN IDs.
•Scope – VLAN Scope (local, fabric or cluster).
•Description – VLAN description.
•Ports – Select ports using the interactive port selector.
•Untagged Ports – Untagged ports assigned to the VLAN.
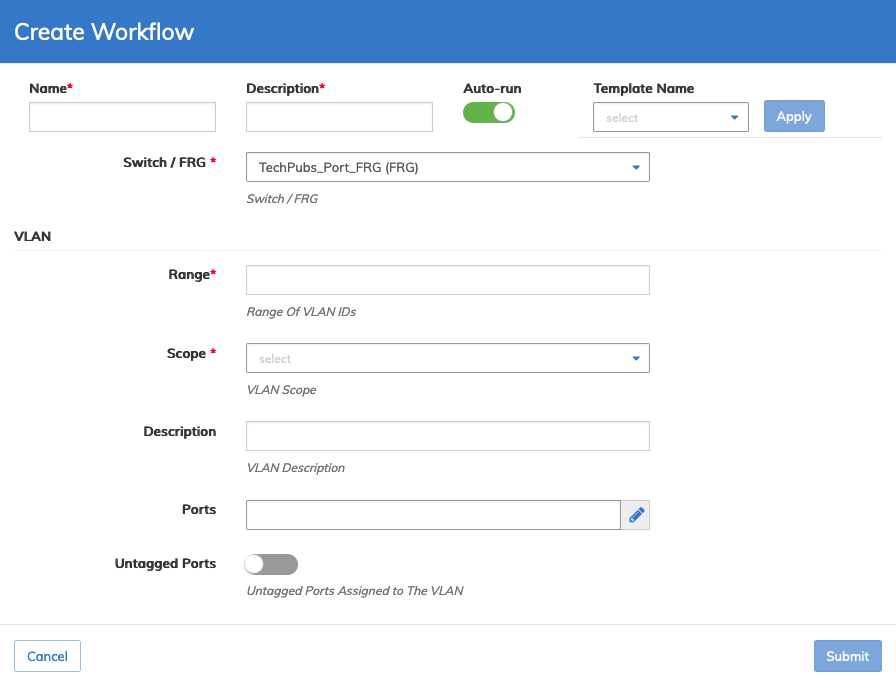
VLAN Configlet
VLAN Ports
•Switch / FRG – Switch or Fabric Resource Group.
•Range – Range of VLAN IDs.
•Untagged – Untagged ports assigned to the VLAN.
•Ports – Select ports using the interactive port selector.
•Port Desc – Description for the port.
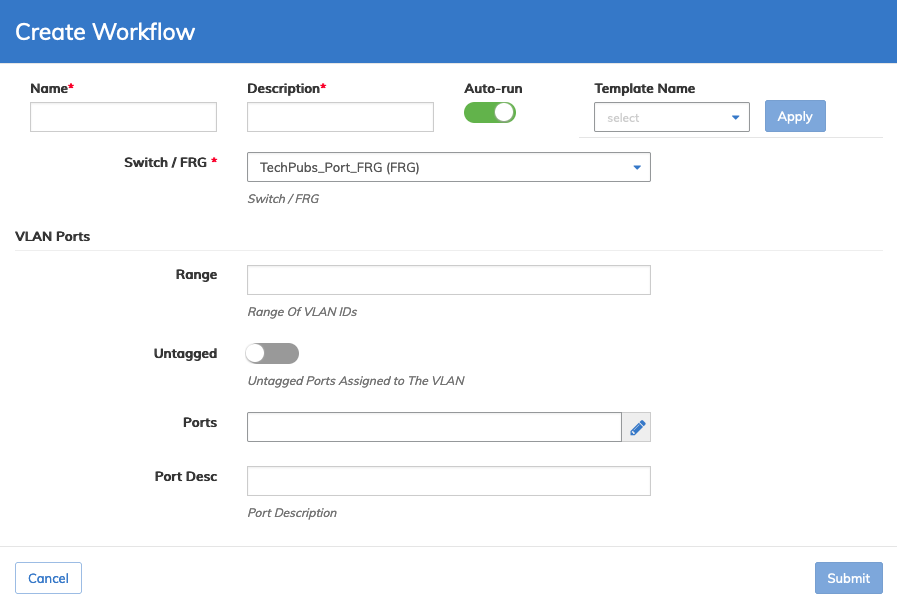
VLAN PortsConfiglet