
UNUM Medium Capacity Appliance Configuration
Medium Capacity Appliance - Arista NetVisor UNUM Configuration
The Arista NetVisor UNUM Medium Capacity (MC) virtual machine is a software download that can be installed on any server running ESXi 6.7 or 7.0 that meets the specifications called out in the Arista NetVisor UNUM Data Sheet.
Below is an example of deploying the Arista NetVisor UNUM MC virtual machine on the Dell VEP 6400, which comes with ESXi pre-installed.
General Configuration Steps
1.Download the requisite OVA files from the Pluribus Network Cloud (PNC) and save them to your local PC. Access the PNC using the Pluribus Customer Portal and select the Downloads tab.
You may download software directly from the Customer Portal. Use your provided support credentials.
If you do not have credentials for the Customer Portal, please Contact Support AND fill out the following:
Product Registration - https://www.pluribusnetworks.com/support/product-registration/
Note: The Serial Number is equivalent to Arista NetVisor UNUM's Machine ID. You may not have a Serial Number if you have not previously installed Arista NetVisor UNUM. In that event, please indicate "Do Not Have One" in the Serial Number field on the registration form.
Log in to the Customer Portal using the credentials provided.
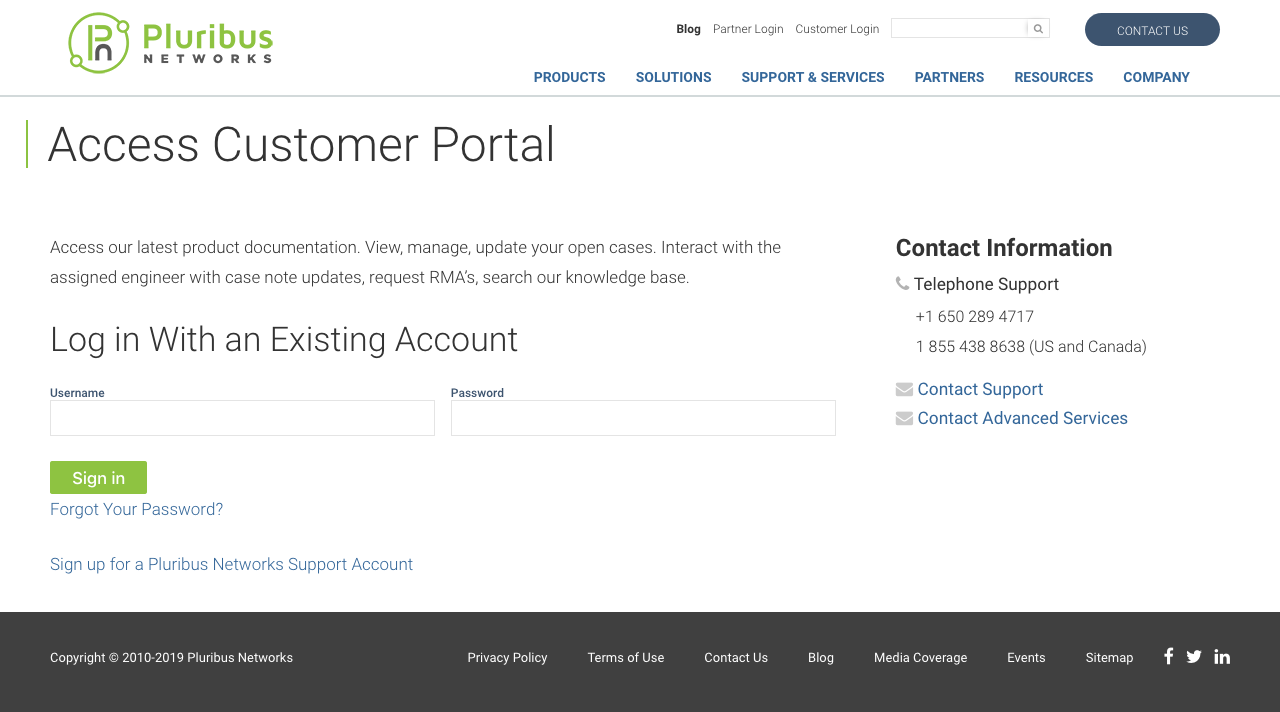
Pluribus Networks Customer Portal
Upon successfully logging in you are greeted by a welcome screen.
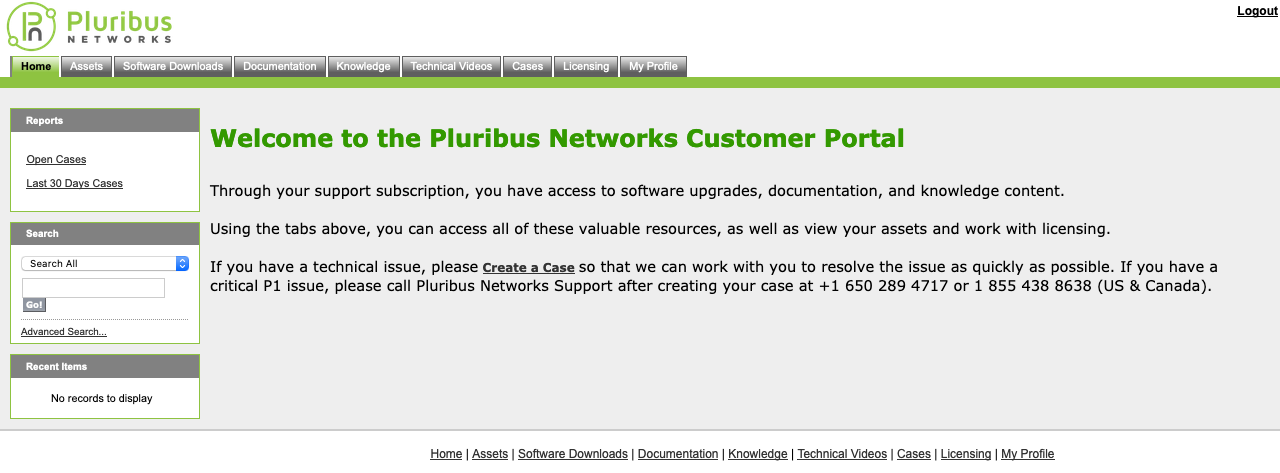
Pluribus Networks Customer Portal Welcome Screen
Select Software Downloads and follow the login instructions on the screen. Please verify your support credentials again.
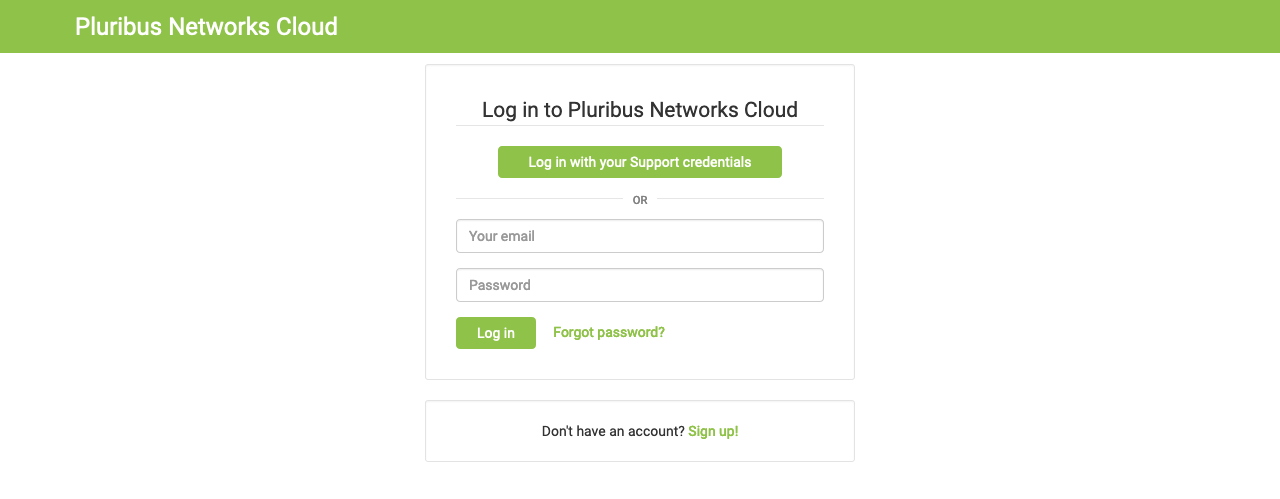
Pluribus Networks Cloud UNUM Login Screen
PN Cloud Software User Interface
Pluribus Networks Cloud Welcome Screen and Menu
Download Arista NetVisor UNUM Image
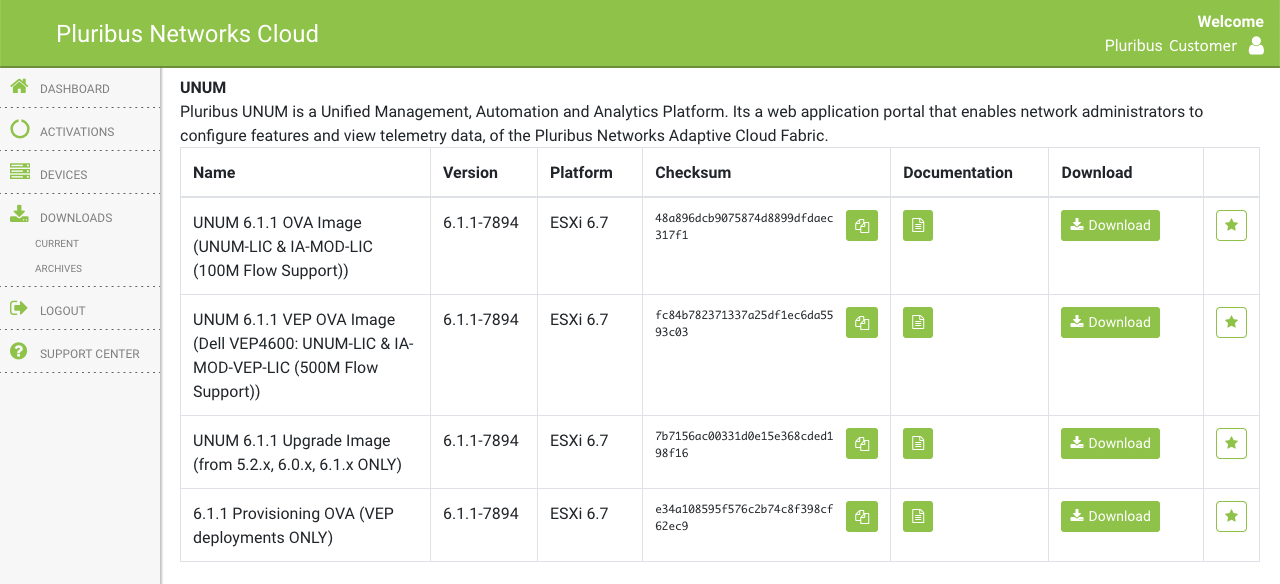
The Arista NetVisor UNUM image is available from the current downloads page. Select CURRENT from the DOWNLOADS section of the sidebar menu.

Pluribus Networks Cloud UNUM Download
Download the software to a local system.
You need to download and have readily available:
▪UNUM Provisioning OVA - UNUM-provision-6.3.0-xxxx.xx.ova
▪UNUM Appliance OVA - UNUM-6.3.0-xxxx.xx.-st.ova
▪Virtual Netvisor OVA - VNV-6300315465.ova (example version number only).
Note: The downloaded vNV version has to match your installed switch OS version.
2.Activate VMware License using the steps illustrated below.
Usage Note: DHCP or Static IP addresses can be assigned. A DHCP server must be running for an automatic IP address assignment during ESXi configuration.
For Static IP addressing, select static from the unum_provision.sh setup script and enter the static IP parameters for UNUM and vNV.
3.Configure ESXi and create a new Virtual Machine (VM) using the configuration examples illustrated below.
4.Connect to the UNUM host via a terminal session using SSH (using the assigned IP address) and run the following script:
./unum_provision_sh
5.Deploy a standalone VM.
ESXi Obtain License
From the ESXi Management Interface, determine if a license is enabled.
Click the Licensing tab to display the current license status.
If a valid license is missing, the following dashboard is displayed.
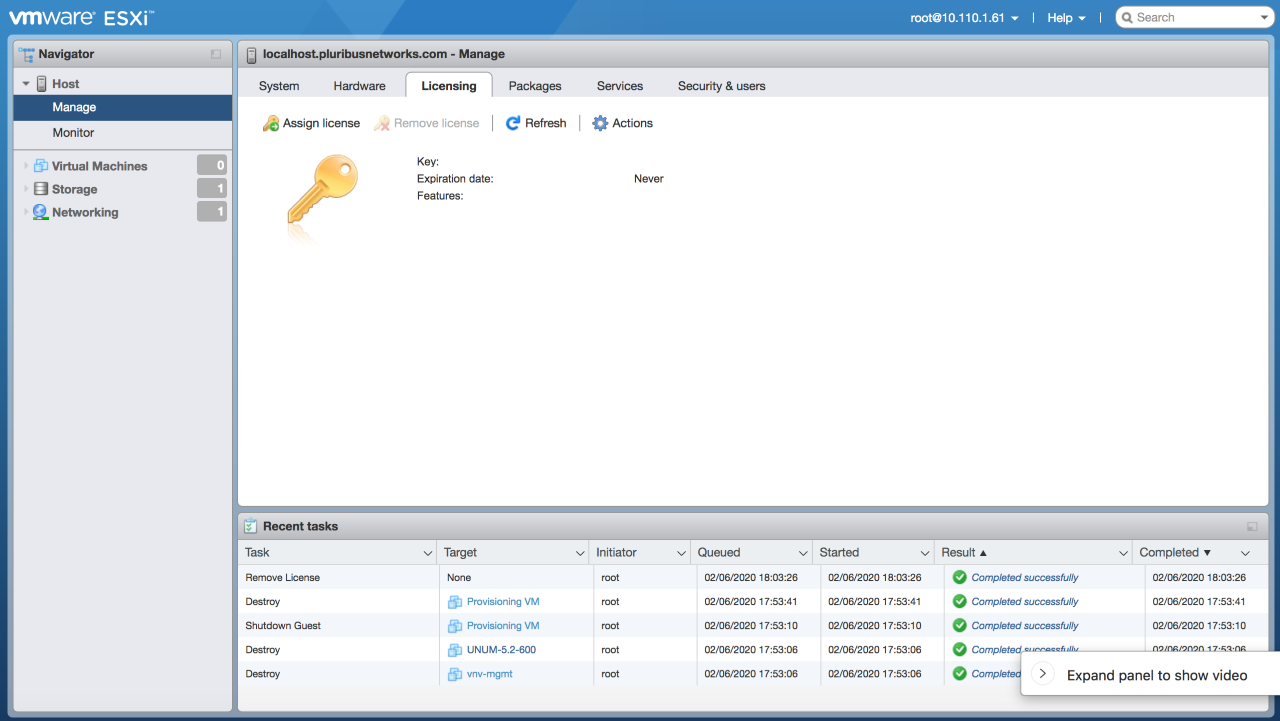
ESXi Management Interface - Licensing Tab - No License
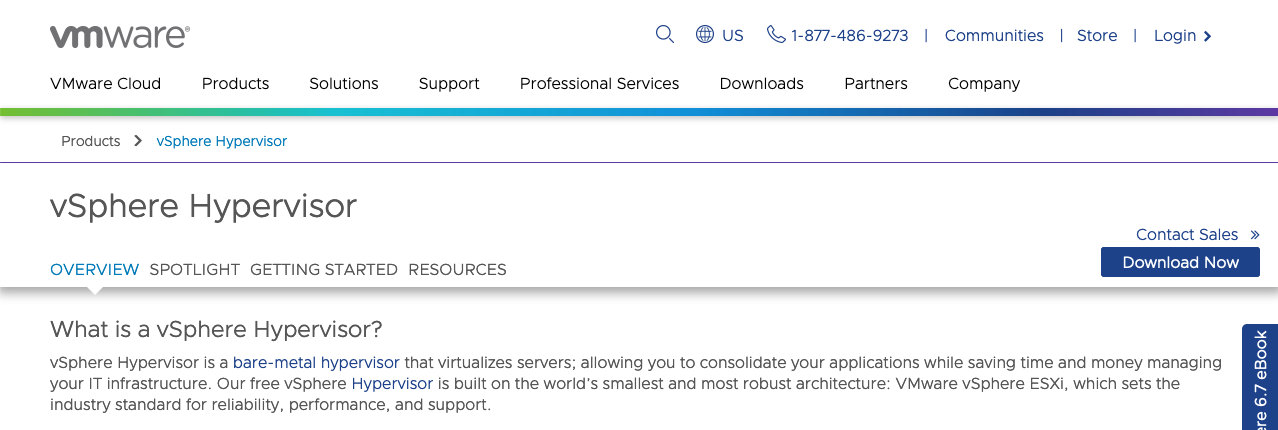
Obtain a valid license key from the VMware website using the following steps and as illustrated in the following images.
1.Navigate to https://www.vmware.com/products/vsphere-hypervisor.html and select Download Now. You may need to create a free account to continue.
2.Register for the download when prompted.
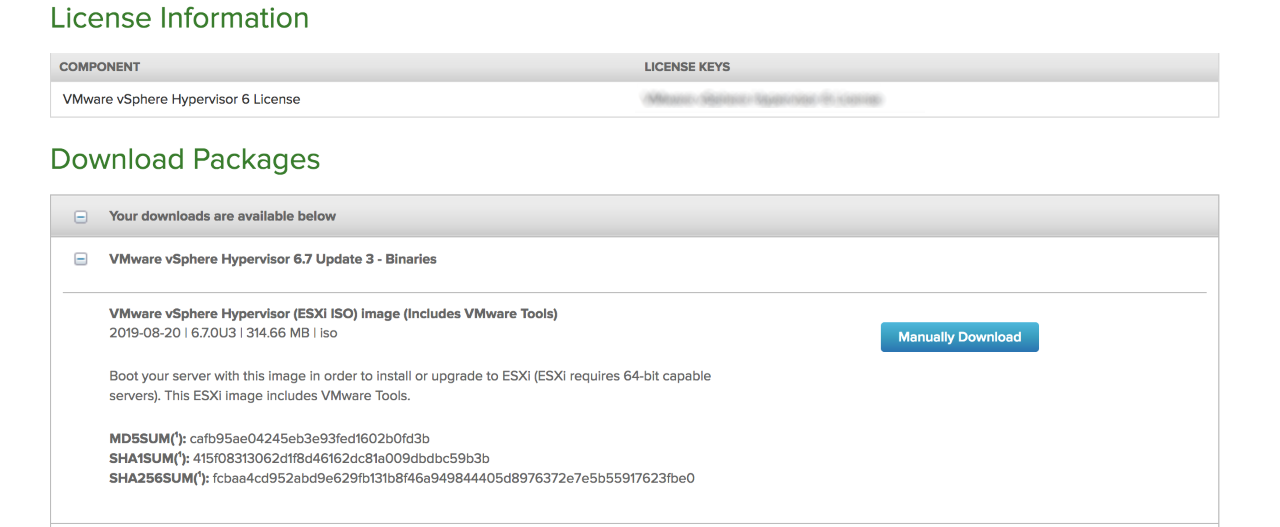
3.After registration you will be redirected to the license and download page.
4.Make a note of your license key (In this example the license is an evaluation version).
5.Select Manually Download to begin the download process.
vSphere Hypervisor User Interface
WMware Website - Download License
WMware Website - VMware Licenses
Enter the key using Assign License.
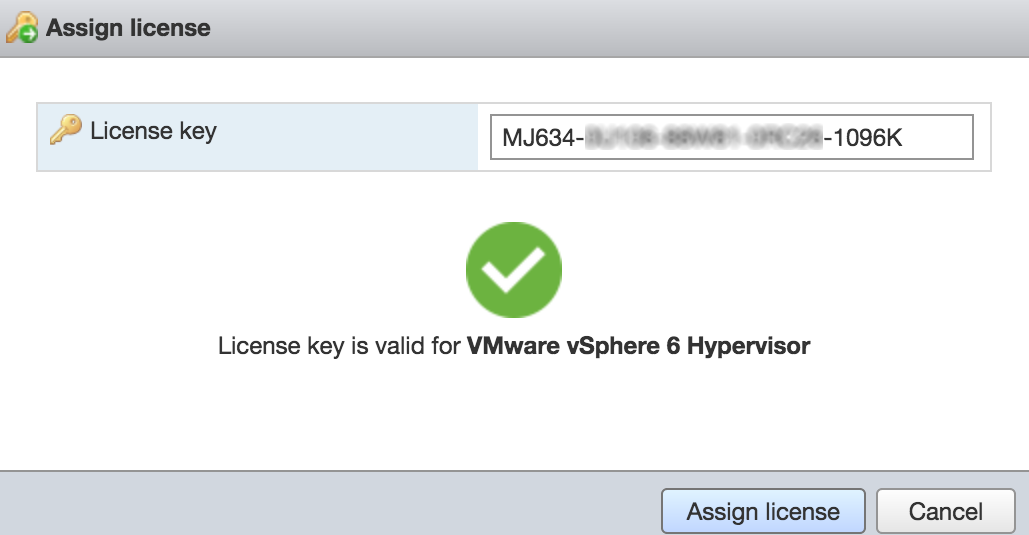
ESXi Management Interface - Licensing Tab - Assign License
The ESXi dashboard updates with the valid key information.
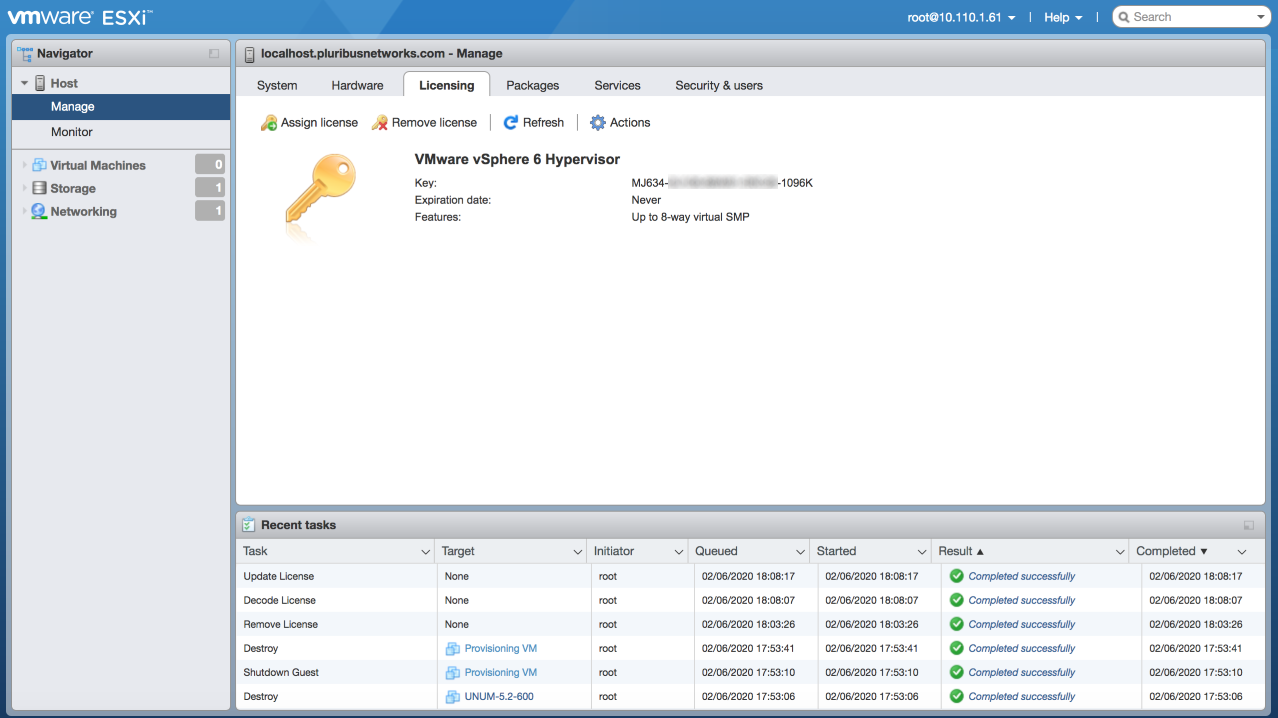
ESXi Management Interface - Licensing Tab - New License
Configure ESXi and Create VM
From the ESXi Management Interface select Create / Register VM.

ESXi Management Interface - Create VM
Select Creation Type and click deploy a virtual machine from an OVF or OVA file.
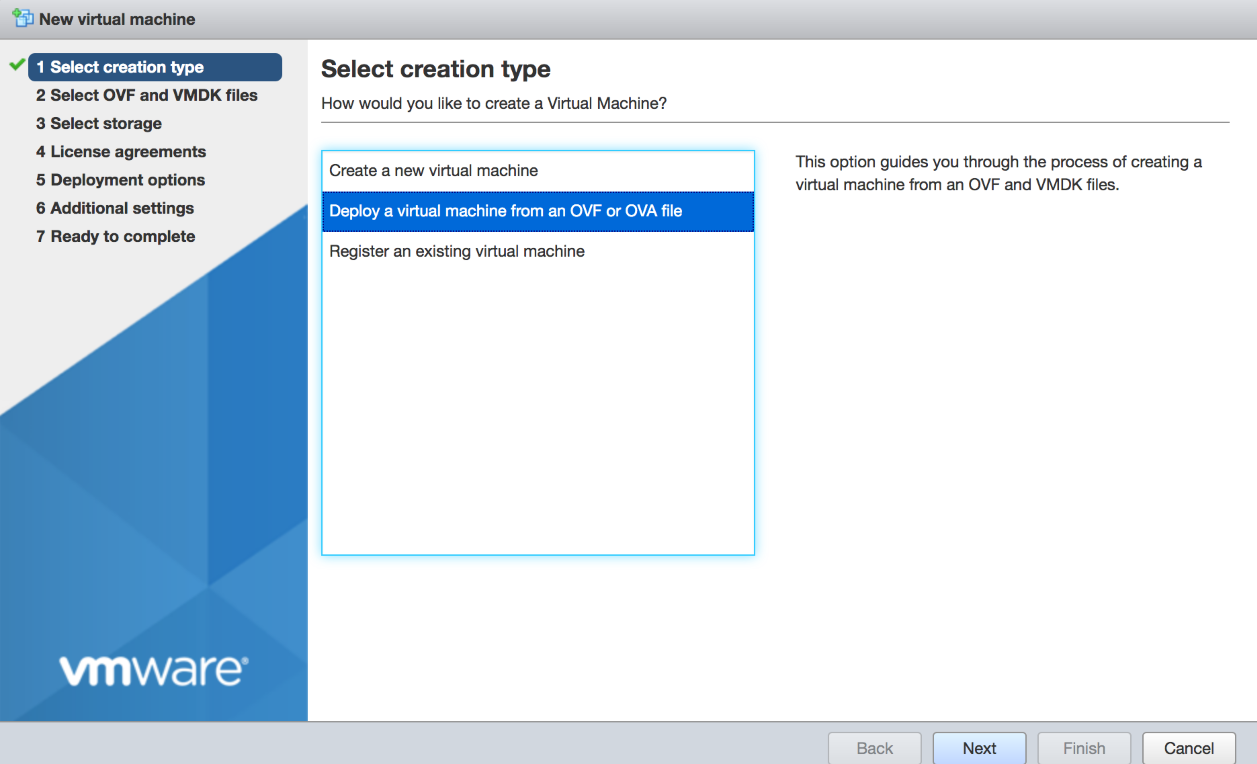
ESXi Management Interface - Deploy OVA
Enter a name for the VM and select the provisioning OVA file.
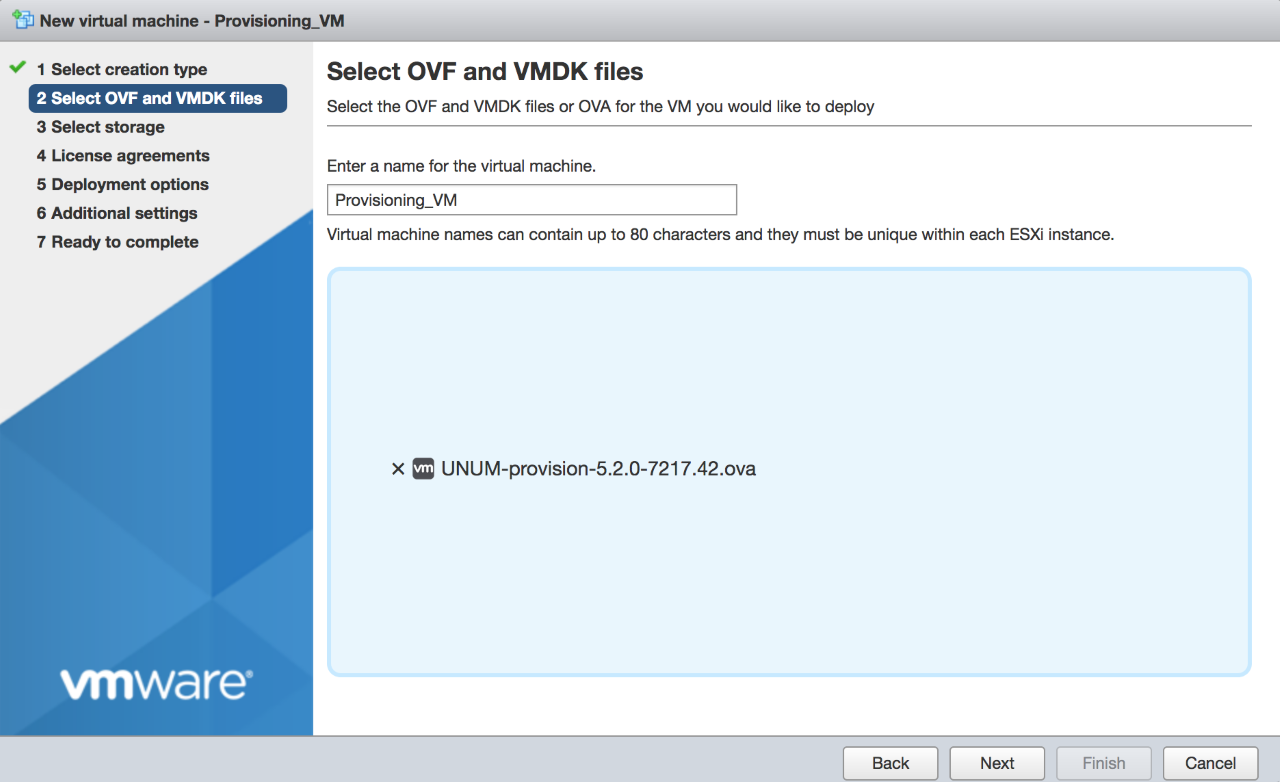
ESXi Management Interface - VM Name and OVA Installation File
Select Storage
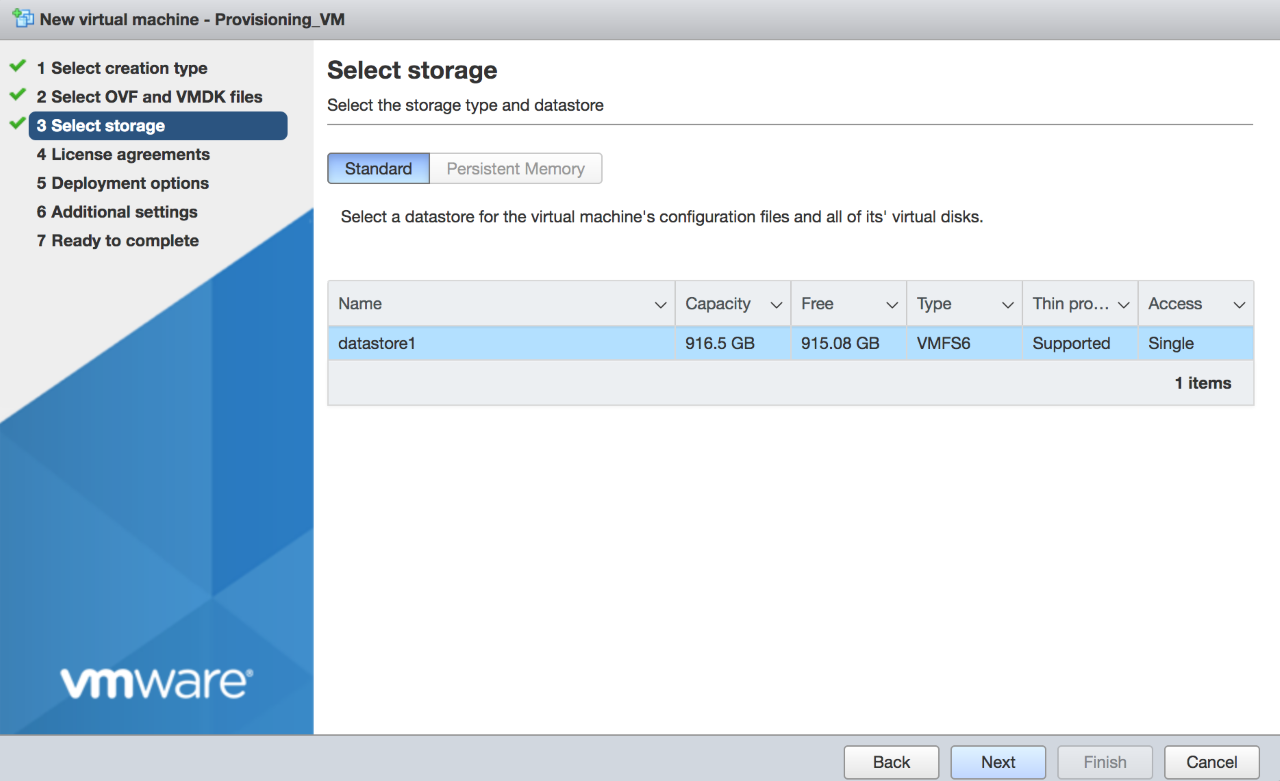
ESXi Management Interface - Select Datastore
Deployment Options
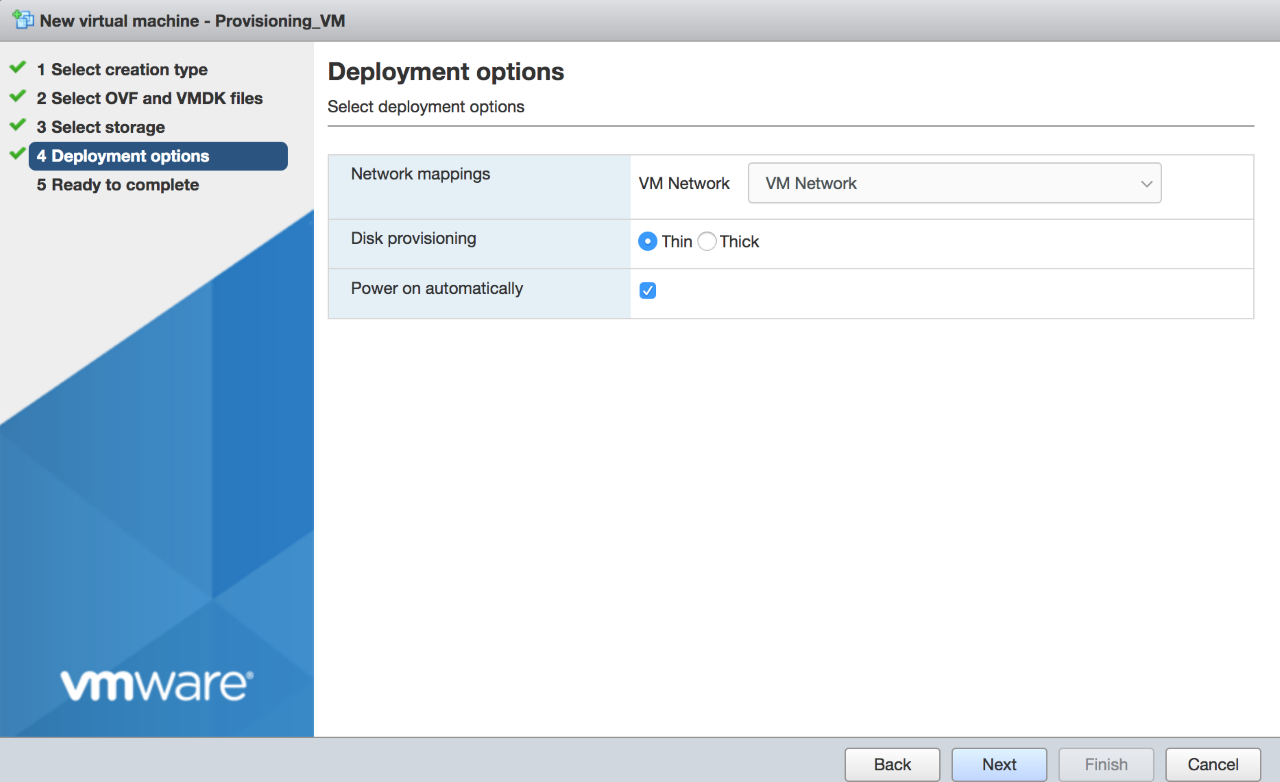
ESXi Management Interface - Deployment Options
Note: Arista Networks recommends using Thin Provisioning
Ready to Complete
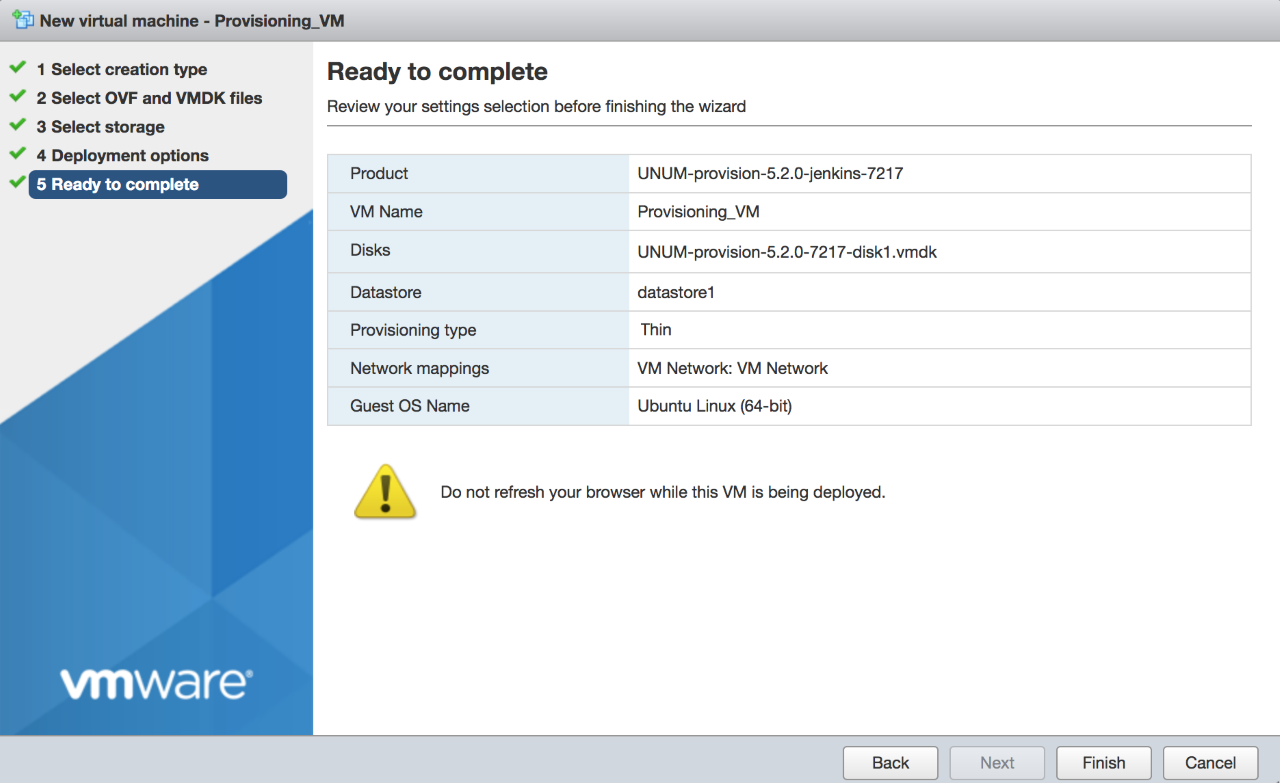
ESXi Management Interface - Ready to Complete
The ESXi Management Interface displays the progress of the VM provisioning status.
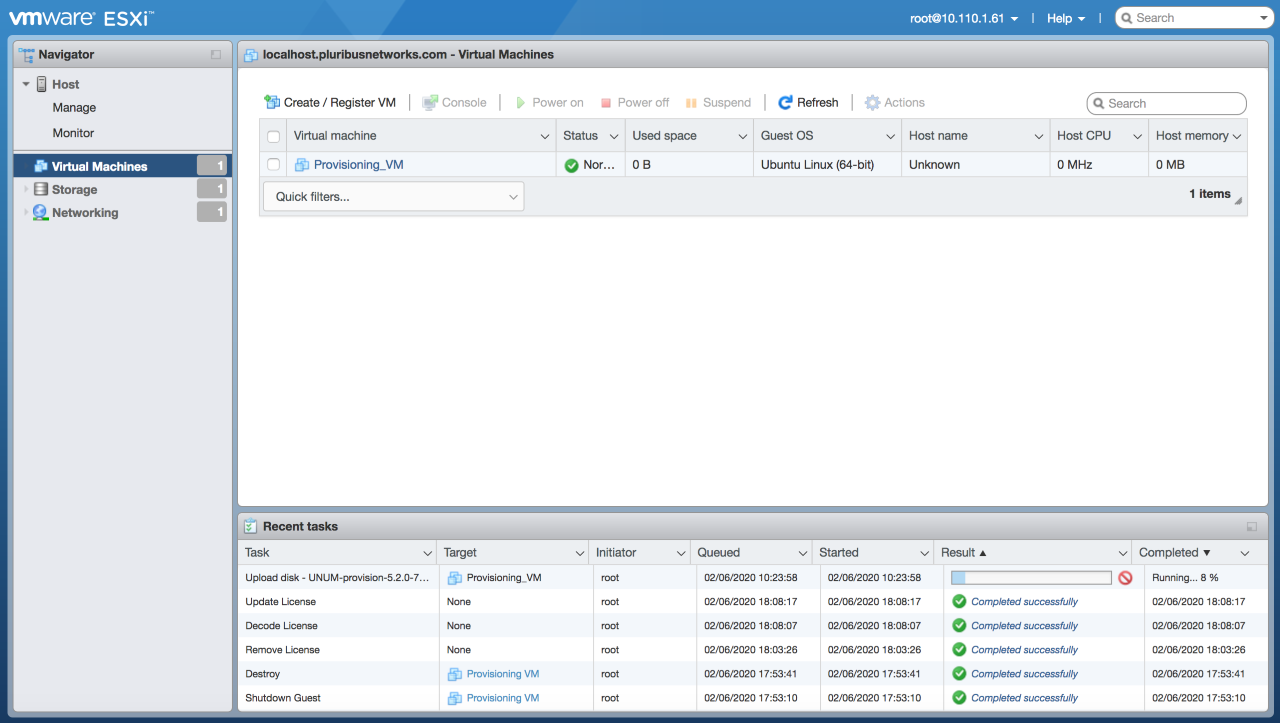
ESXi Management Interface - VM Provisioning Status
Upon successfully creating the VM, the ESXi management Interface updates.
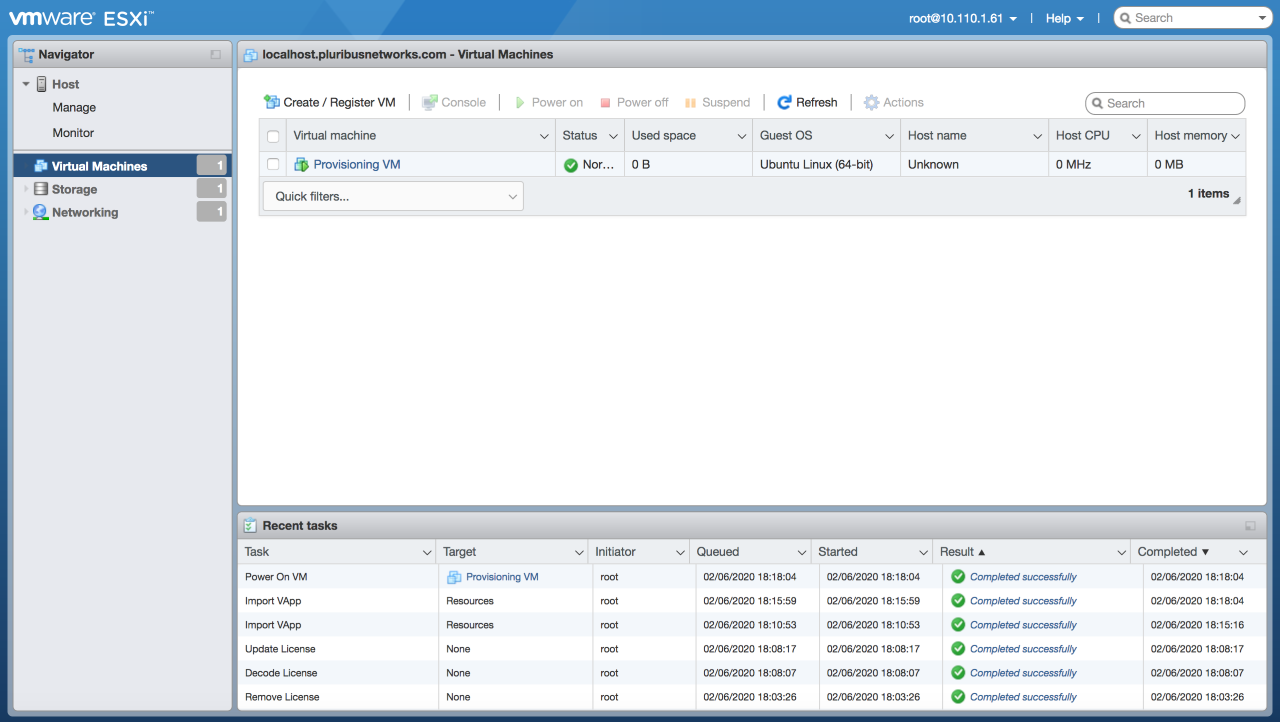
ESXi Management Interface - VM Provisioning Complete
Use the Console within the ESXi Management Interface to review and record the assigned IP address.
Enter the UNUM login information:
•username - vcf
•password - changeme
and run the command:
ifconfig eth0
The following screen is displayed. Take note of the assigned IP address.
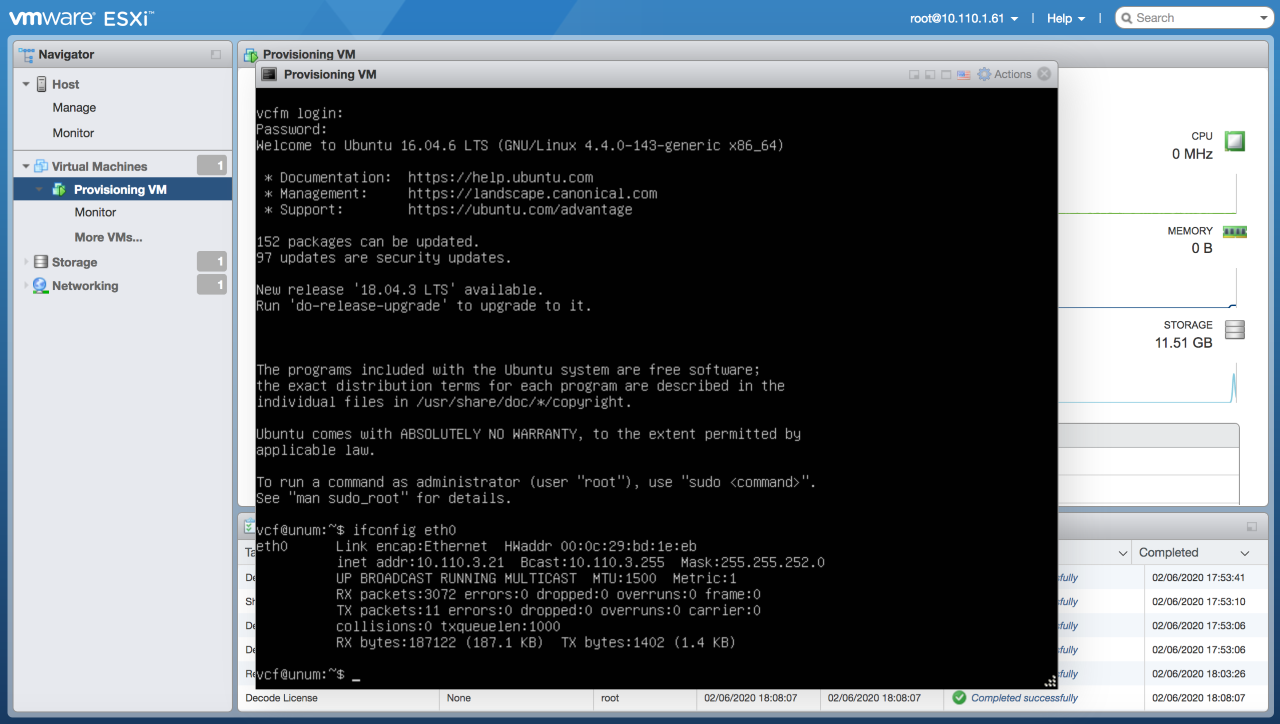
ESXi Management Interface - VM Console
From a Terminal session enter the following commands:
ssh vcf@10.110.3.21 (example only) - Enter the IP address you previously recorded from the steps above.
Enter the password: changeme
The following screen displays:
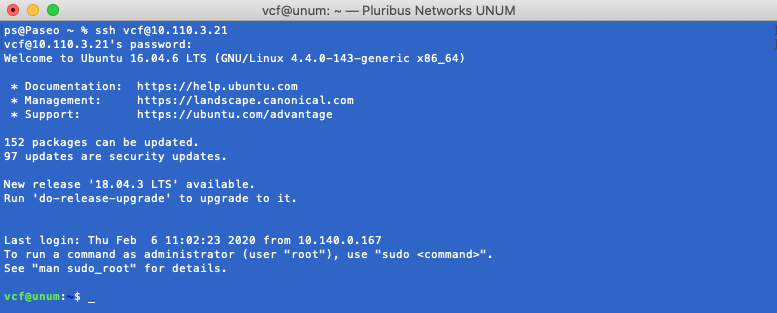
SSH Terminal - VM Login
OVA Files
Create a local directory to hold the OVA files.

SSH Terminal - UNUM Create OVA File Directory
Move the previously downloaded OVA files on your PC to the local OVA directory created above.

SSH Terminal - UNUM OVA File Directory
Provision Arista NetVisor UNUM
To access the requisite installation scripts enter: cd /home/vcf/srv/vcf/bin/tools/cluster at the command prompt.

SSH Terminal - Cluster Directory Scripts
Run the ./unum_provision.sh script.

SSH Terminal - UNUM Provision Script
The following menu displays.

SSH Terminal - Provision Menu
General Deployment Details and Management Scenarios
Arista NetVisor UNUM
1.Deploy VM.
2.Eth0 obtains a DHCP IP Address.
3.Login to the VM and set up the Eth1 IP address.
4.Add vnv(s) as a Seed Switch for UNUM. Performed post vNV config/ setup.
vNV
1.Deploy VM.
2.Obtain vmgmt0 IP address for vNV from DHCP.
3.Disconnect the Network adapter 1 on the VM.
4.Accept EULA.
5.If fabric name is specified: join fabric and errors out under the following conditions:
a)fabric doesn't exist or is not reachable or is running a different version
Provisioning Details and Steps for Inband Scenario
Configuration Steps for VEP
ESXi Configuration:
1.Create a Vswitch on the ESXi host with the following settings:
a)promiscuous mode enabled
b)allow forged transmits
2.Portgroup is created (with optional VLAN parameter; defaults to 0 (untagged))
3.Assign a vnic to the vswitch. This vnic is the physical port connected to the switch and needs to be entered correctly by the user for configuration to succeed. Without this is the physical link, the vNV cannot find the fabric to join.
vNV Configuration:
1.vNV’s Network Adapter 3 assigned to this port group.
2.vdata0 interface on vNV needs an IP address configured in the same network as the inband IP address of the switch.
3.vNV should have web-enabled on data using: admin-service-show if mgmt web (same as the management scenario).
Arista NetVisor UNUM Deployment Menu
Select Option 1, Deploy Standalone VM.
Enter the requisite information for each configuration prompt. See details below.
In many cases use the default value by hitting Enter or Return.
You may use DHCP assigned values or enter static IP parameters as required.
Static IP Assignment
Enter static and then follow the onscreen prompts to complete the configuration.
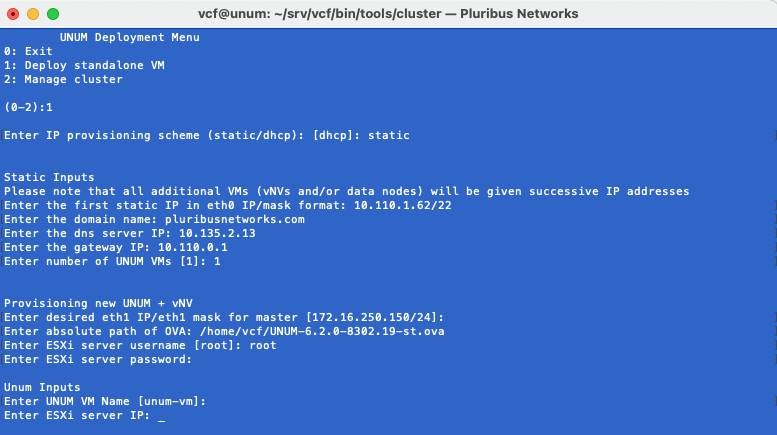
SSH Terminal - UNUM Provisioning Static IP Parameters Example
DHCP Assignment
Select the default dhcp and follow the onscreen prompts to complete the configuration.
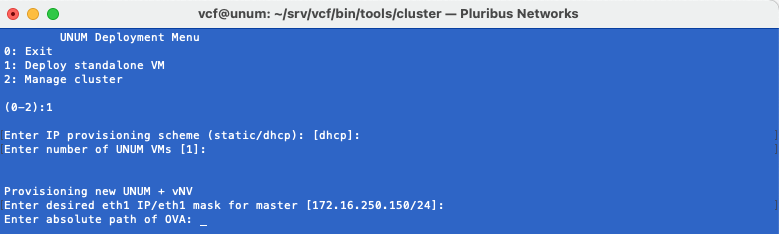
SSH Terminal - UNUM Provisioning DHCP Configuration Example
Configuration Script
After completing entering either the static or dhcp provisioning continue with the configuration script.
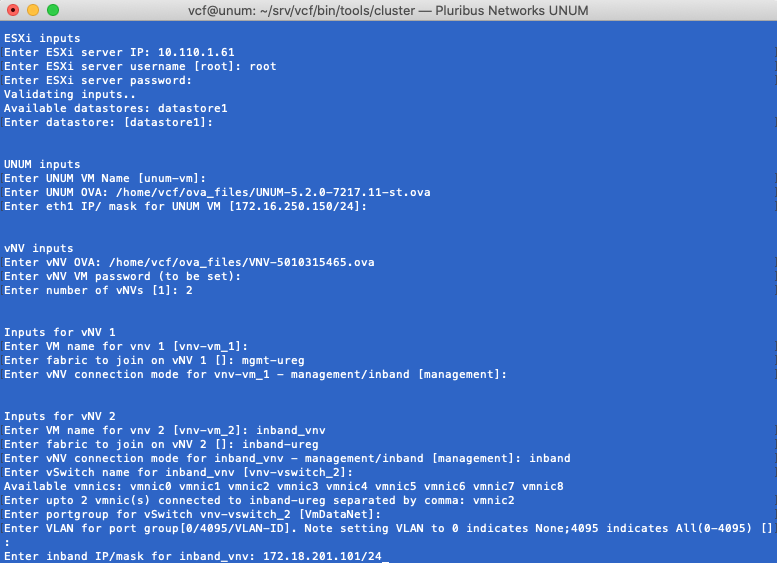
SSH Terminal - UNUM Provisioning new VEP Inputs
ESXi Inputs
•Enter ESXi server IP: 10.110.1.61 (example IP address)
•Enter ESXi server username [root]: root
•Enter ESXi server password: Enter your ESXi server password
UNUM validates the inputs.
•Available datastores: datastore1
•Enter datastore: [datastore1]:
Arista NetVisor UNUM Inputs
•Enter UNUM VM Name [unum-vm]: Enter a name for the VM or use the default value.
•Enter UNUM OVA: /home/vcf/ova_files/UNUM-6.2.0-7217.11-st.ova (example version number only)
•Enter eth1 IP/ mask for UNUM VM [172.16.250.150/24]: (default value)
vNV Inputs
•Enter vNV OVA: /home/vcf/ova_files/VNV-6100315465.ova (Example version only. The version you use must match the NetVisor OS version running on your switches.)
•Enter vNV VM Password: (The selected password must match password used on your switches.)
•Enter number of vNVs [1]: 2
Note: Switches must exist to create a fabric. Inband management only possible if switches exist.
Inputs for vNV 1
•Enter VM name for vnv 1 [vnv-vm_1]: Enter name or use default value
•Enter fabric to join on vNV 1 [ ]: mgmt-ureg (example only)
•Enter vNV connection mode for vnv-vm_1 - management/inband [management]:
Inputs for vNV 2
•Enter VM name for vnv 2 [vnv-vm_2]: Enter name or use default value
•Enter fabric to join on vNV 1 [ ]: inband-ureg (example only)
•Enter vNV connection mode for vnv-vm_1 - management/inband [management]: inband
•Enter vSwitch name for inband_vnv [vnv-switch_2]:
•Available vmnics: vmnic0 vmnic1 vmnic2 vmnic3 vmnic4 vmnic5 vmnic6 vmnic7 vmnic8
•Enter up to 2 vmnic(s) connected to inband-ureg separated by comma: vmnic2
•Enter portgroup for vSwitch vnv-switch_2 [VmDataNet]:
•Enter VLAN for port group [0/4095/VLAD-ID]. Note setting VLAN to 0 indicates None; 4095 indicates All (0-4095) [ ]:
•Enter inband IP/mask for inband_vnv: 172.18.201.101/24
Provisioning
After entering the requisite settings, UNUM begins the provisioning process and reports each configuration step.
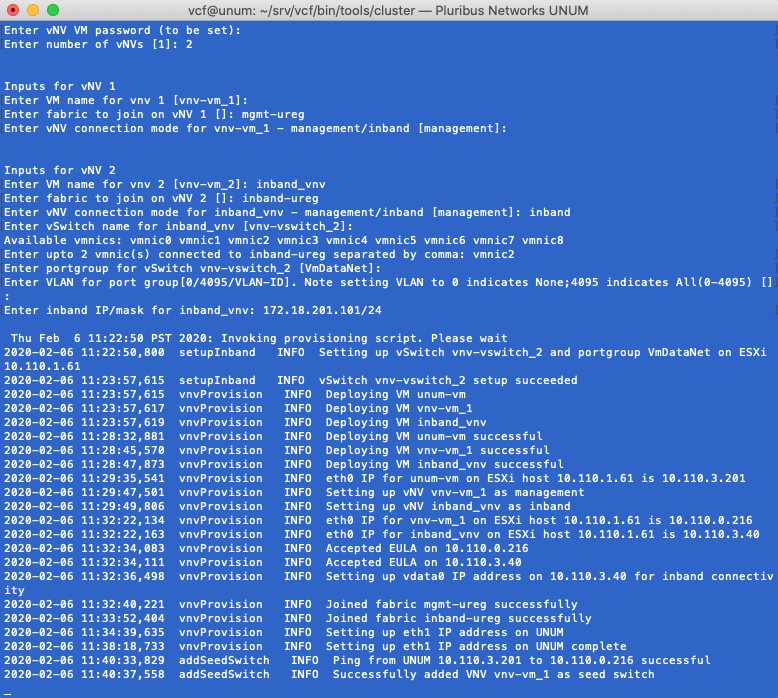
SSH Terminal - UNUM Provisioning
Optionally, monitor the provisioning from the ESXi Management Interface.

ESXi Management Interface - Monitor UNUM Provisioning
UNUM logs the provisioning output to the provision_log file, which is available for subsequent review.
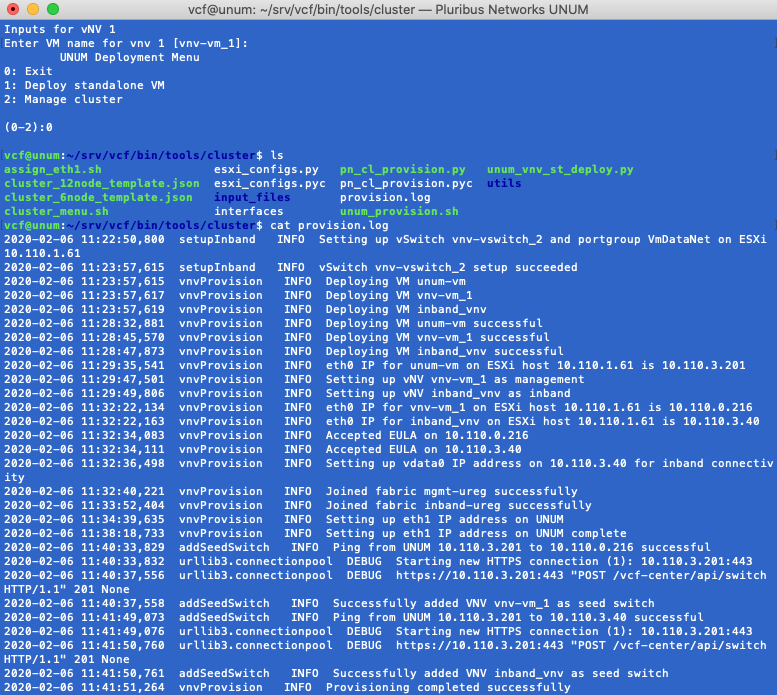
SSH Terminal - UNUM Provisioning Log Output
Note: Once provisioning is complete, we recommend powering down the Provisioning VM.
Autostart Settings for VMs
After deploying the VMs, enable autostart in the event the ESXi host reboots to ensure the UNUM VMs start as well.
From the ESXi Management Interface click Manage and choose Autostart.
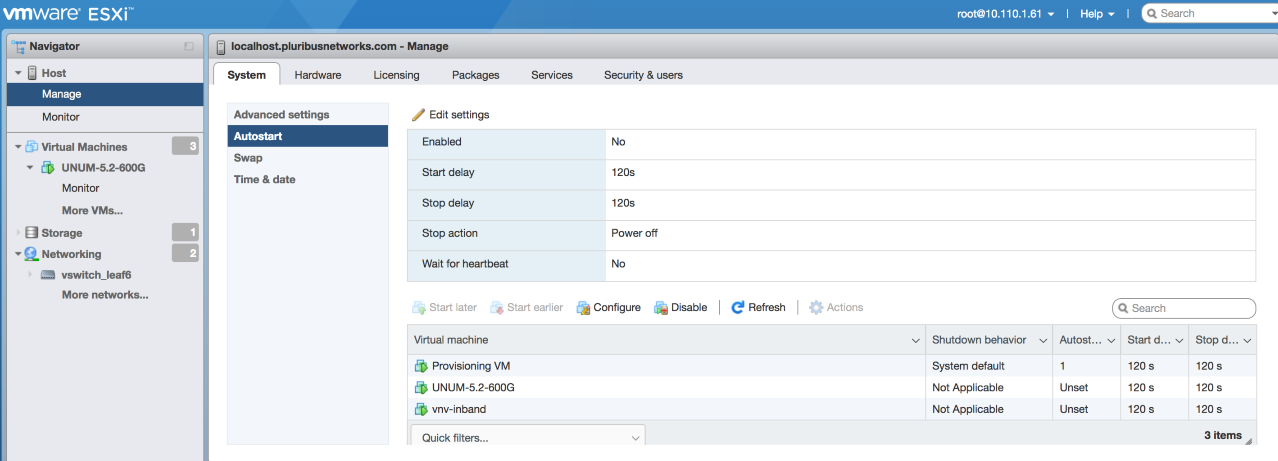
Esxi Management Interface Configure Autostart
Click on Edit Settings and set Enabled to Yes.
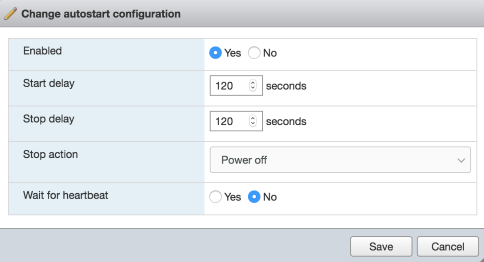
Esxi Management Interface Enable Autostart
Select the UNUM VM, click on Enable. Repeat the process for the vNV VM(s).

Esxi Management Interface Enable Autostart All VMs
vNV Configured Switch
Login to the newly configured seed switch using the mgmt-ip address: 10.110.0.216 (in this example) to review the configuration.
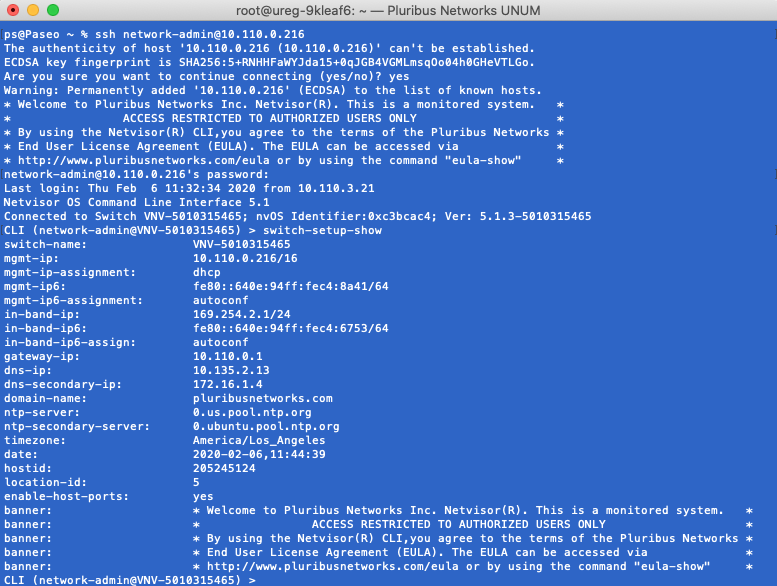
SSH Terminal - UNUM Provisioning Show Switch Setup vNV Seed Switch
Login to the UNUM instance. Refer to the UNUM Installation & User Guide for more information on using UNUM.
The Topology dashboard displays the newly configured switches and vNV instances.
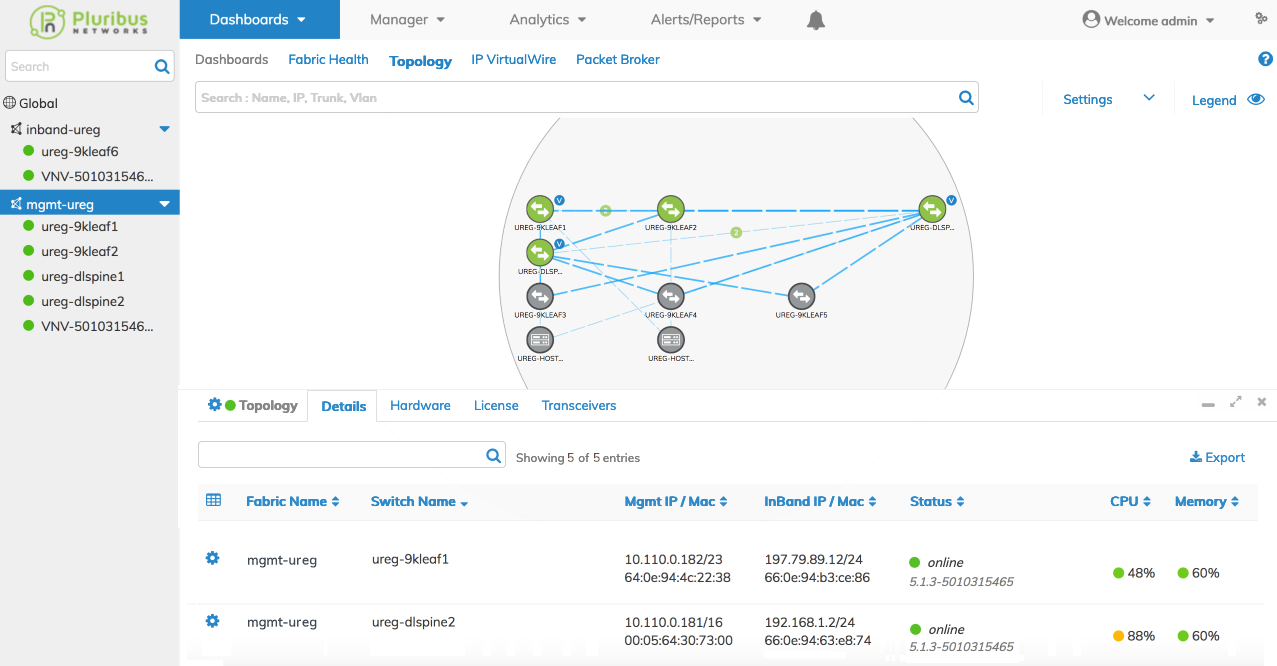
UNUM Topology Dashboard - Post Provisioning
Note: Refer to the Arista NetVisor UNUM Installation & User Guide for more information on using UNUM.