
L3 OVL - Manage Subnet
Layer 3 Configuration - Manage Subnet
There are features and functions used in UNUM Manager and UNUM Analytics that are common throughout the user interface (UI). Please refer to the Common Functions section for more information on the use of these functions and features.
Manage Subnet
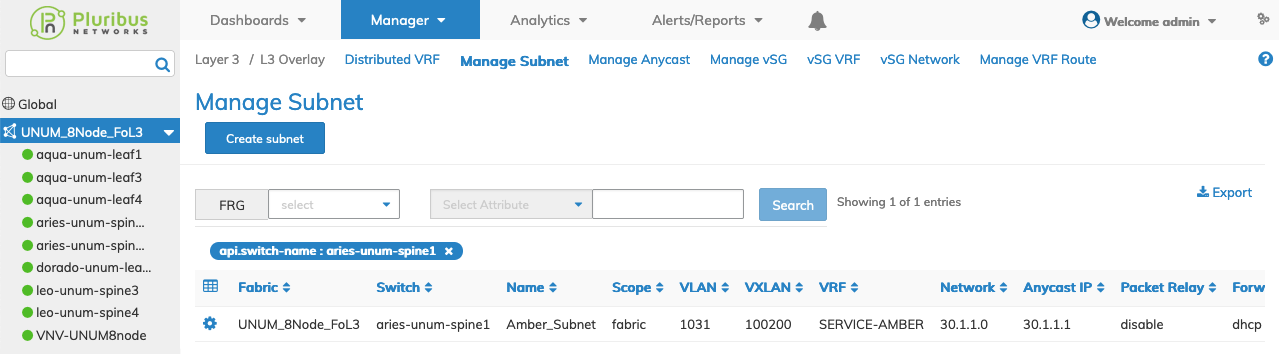
Selecting Manager → Layer 3 → Manage Subnet displays the Manage Subnet dashboard with a list of any existing Subnet settings.
Select the applicable Fabric from the left-hand navigation bar and the dashboard updates showing all Subnet entries from all switches within the Fabric.
Note: If no entries exist a "No Data Exists" message is displayed. You must first configure an entry on a switch. Prerequisite settings and configuration may be required.
This feature table displays data based on the fabric's default Collector Switch. If no data displays in the dashboard, either select a switch from the Left-hand Navigation (LHN) pane or perform a Search by selecting an FRG (Fabric Resource Group) and a specific Attribute from the drop-down lists, as required.
The dashboard displays a list of existing Subnet entries by Switch. Additional parameters include: Name, Scope, VLAN, VXLAN, VRF, Network, Anycast IP (Anycast Gateway), Packet Relay, Forward Proto, State, and Enable. The Subnet information is scope dependent meaning either Fabric, Local or Cluster.
Manage Subnet Fabric Dashboard
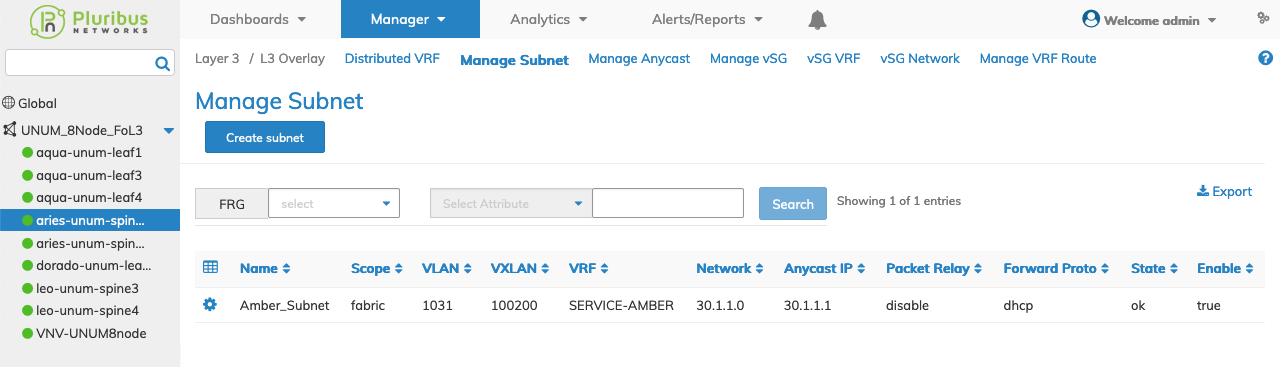
Select the applicable switch from the fabric and the dashboard updates automatically with Subnet settings.
The dashboard displays a list of existing Subnet entries by Name. Additional parameters include: Scope, VLAN, VXLAN, VRF, Network, Anycast IP (Anycast Gateway), Packet Relay, Forward Proto, State, and Enable. The Subnet information is scope dependent meaning either Fabric, Local or Cluster.
Manage Subnet Switch Dashboard
Create a Subnet
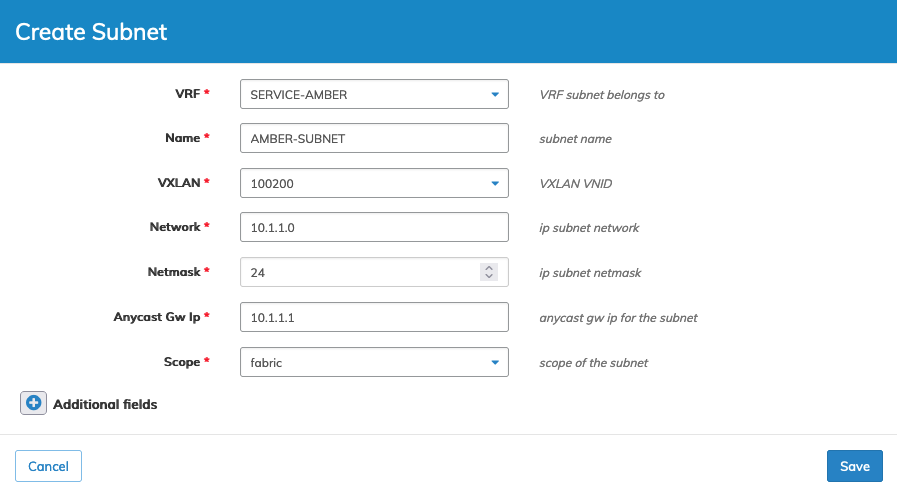
A Subnet is added by selecting Create Subnet.
Manage Subnet Create Entry
To add a Subnet to a switch click Create Subnet and enter the configuration parameters which include:
•VRF – (required) VRF subnet belongs to (select from drop-down).
•Name – (required) applicable name for the subnet.
•VXLAN – (required) VXLAN VNID from drop-down list.
•Network – (required) IP subnet network.
•Netmask – IP subnet mask.
•Anycast Gw Ip – (required) Anycast gateway IP for the subnet.
•Scope – local, fabric or cluster.
Select additional field parameters by clicking on the ![]() icon. Additional fields include:
icon. Additional fields include:
•Network6 – IPv6 subnet network.
•Netmask6 – IPv6 subnet mask.
•Enable – (checkbox) Enable/disable subnet routing.
•vNET Id – vNET for the network.
•Wake on LAN – (checkbox) Enable Wake on LAN.
•Description – Subnet description.
•Forward Proto – Protocol type to forward packets.
•Forward Ip – Forward IP address.
•Anycast Gw Ip6 – Anycast gateway IP for the subnet.
•Packet Relay – Packet relay enable, disable or none.
•Forward Ip2 – second forward IP address.
•Forward Ip6 – forward IPv6 address.
•Forward Ip6 2 – second forward IPv6 address.
•Flood – Enable, disable or none for flooding state of BUM traffic.
•EVPN Export Leaked Networks – Permit or deny exporting leaked subnets to EVPN overlay.
Click Save to continue or Cancel to return to the previous screen without saving any changes.
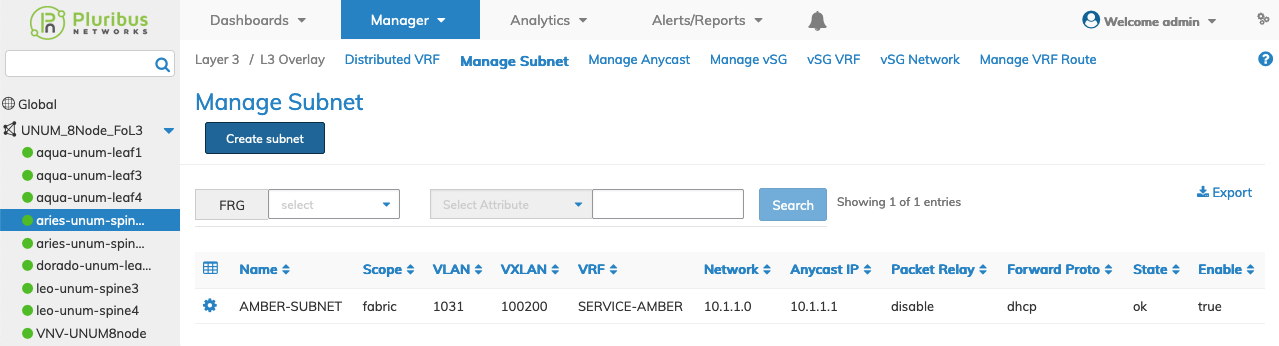
The new Subnet is added to the Dashboard.
Manage Subnet Added to Dashboard
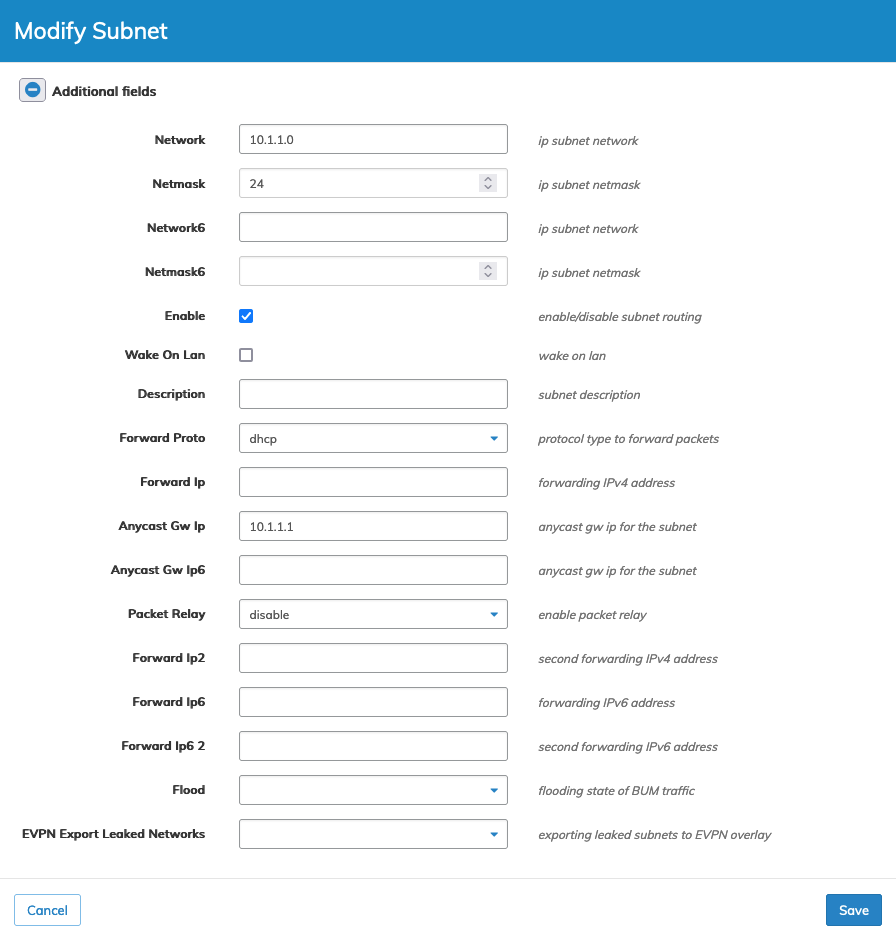
Modify a Subnet
To modify a Subnet entry use Edit by selecting the Cog ![]() icon to make changes to the Subnet configuration.
icon to make changes to the Subnet configuration.
Click the ![]() icon for Additional Fields which include:
icon for Additional Fields which include:
•Network – (required) IP subnet network.
•Netmask – IP subnet mask.
•Network6 – IPv6 subnet network.
•Netmask6 – IPv6 subnet mask.
•Enable – (checkbox) enable/disable subnet routing.
•Wake on LAN – (checkbox) Enable Wake on LAN.
•Description – Subnet description.
•Forward Proto – Protocol type to forward packets.
•Forward Ip – Forward IP address.
•Anycast Gw Ip6 – Anycast gateway IP for the subnet.
•Packet Relay – Packet relay enable, disable or none.
•Forward Ip2 – second forward IP address.
•Forward Ip6 – forward IPv6 address.
•Forward Ip6 2 – second forward IPv6 address.
•Flood – Enable, disable or none for flooding state of BUM traffic.
•EVPN Export Leaked Networks – Permit or deny exporting leaked subnets to EVPN overlay.
Manage Subnet Modify Entry
Click Save to continue or Cancel to return to the previous screen without saving any changes.
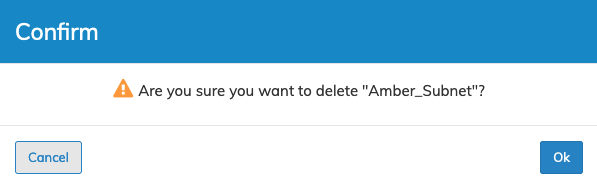
Delete a Subnet
To delete a Subnet entry use Delete by selecting the Cog ![]() icon.
icon.
A confirmation message requires an acknowledgment to continue deletion.
Click OK to continue or Cancel to return to the previous screen without making any changes.
Manage Subnet Delete Entry
Manage Subnet Example
In the following example, UNUM created a Subnet named AMBER-SUBNET as a prerequisite for configuring avSG Network.
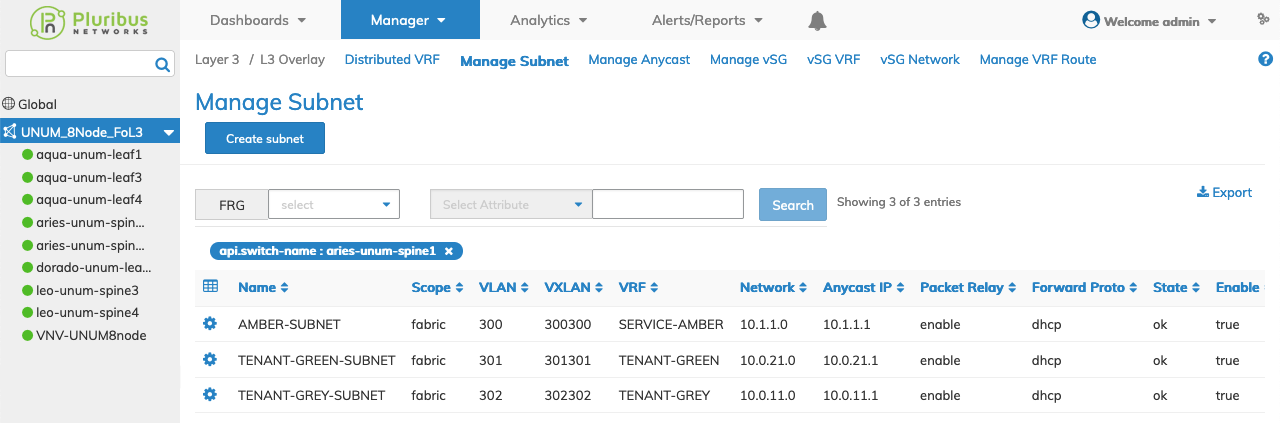
Manage Subnet Example
To configure a vSG for theVRFs proceed to Manage vSG.